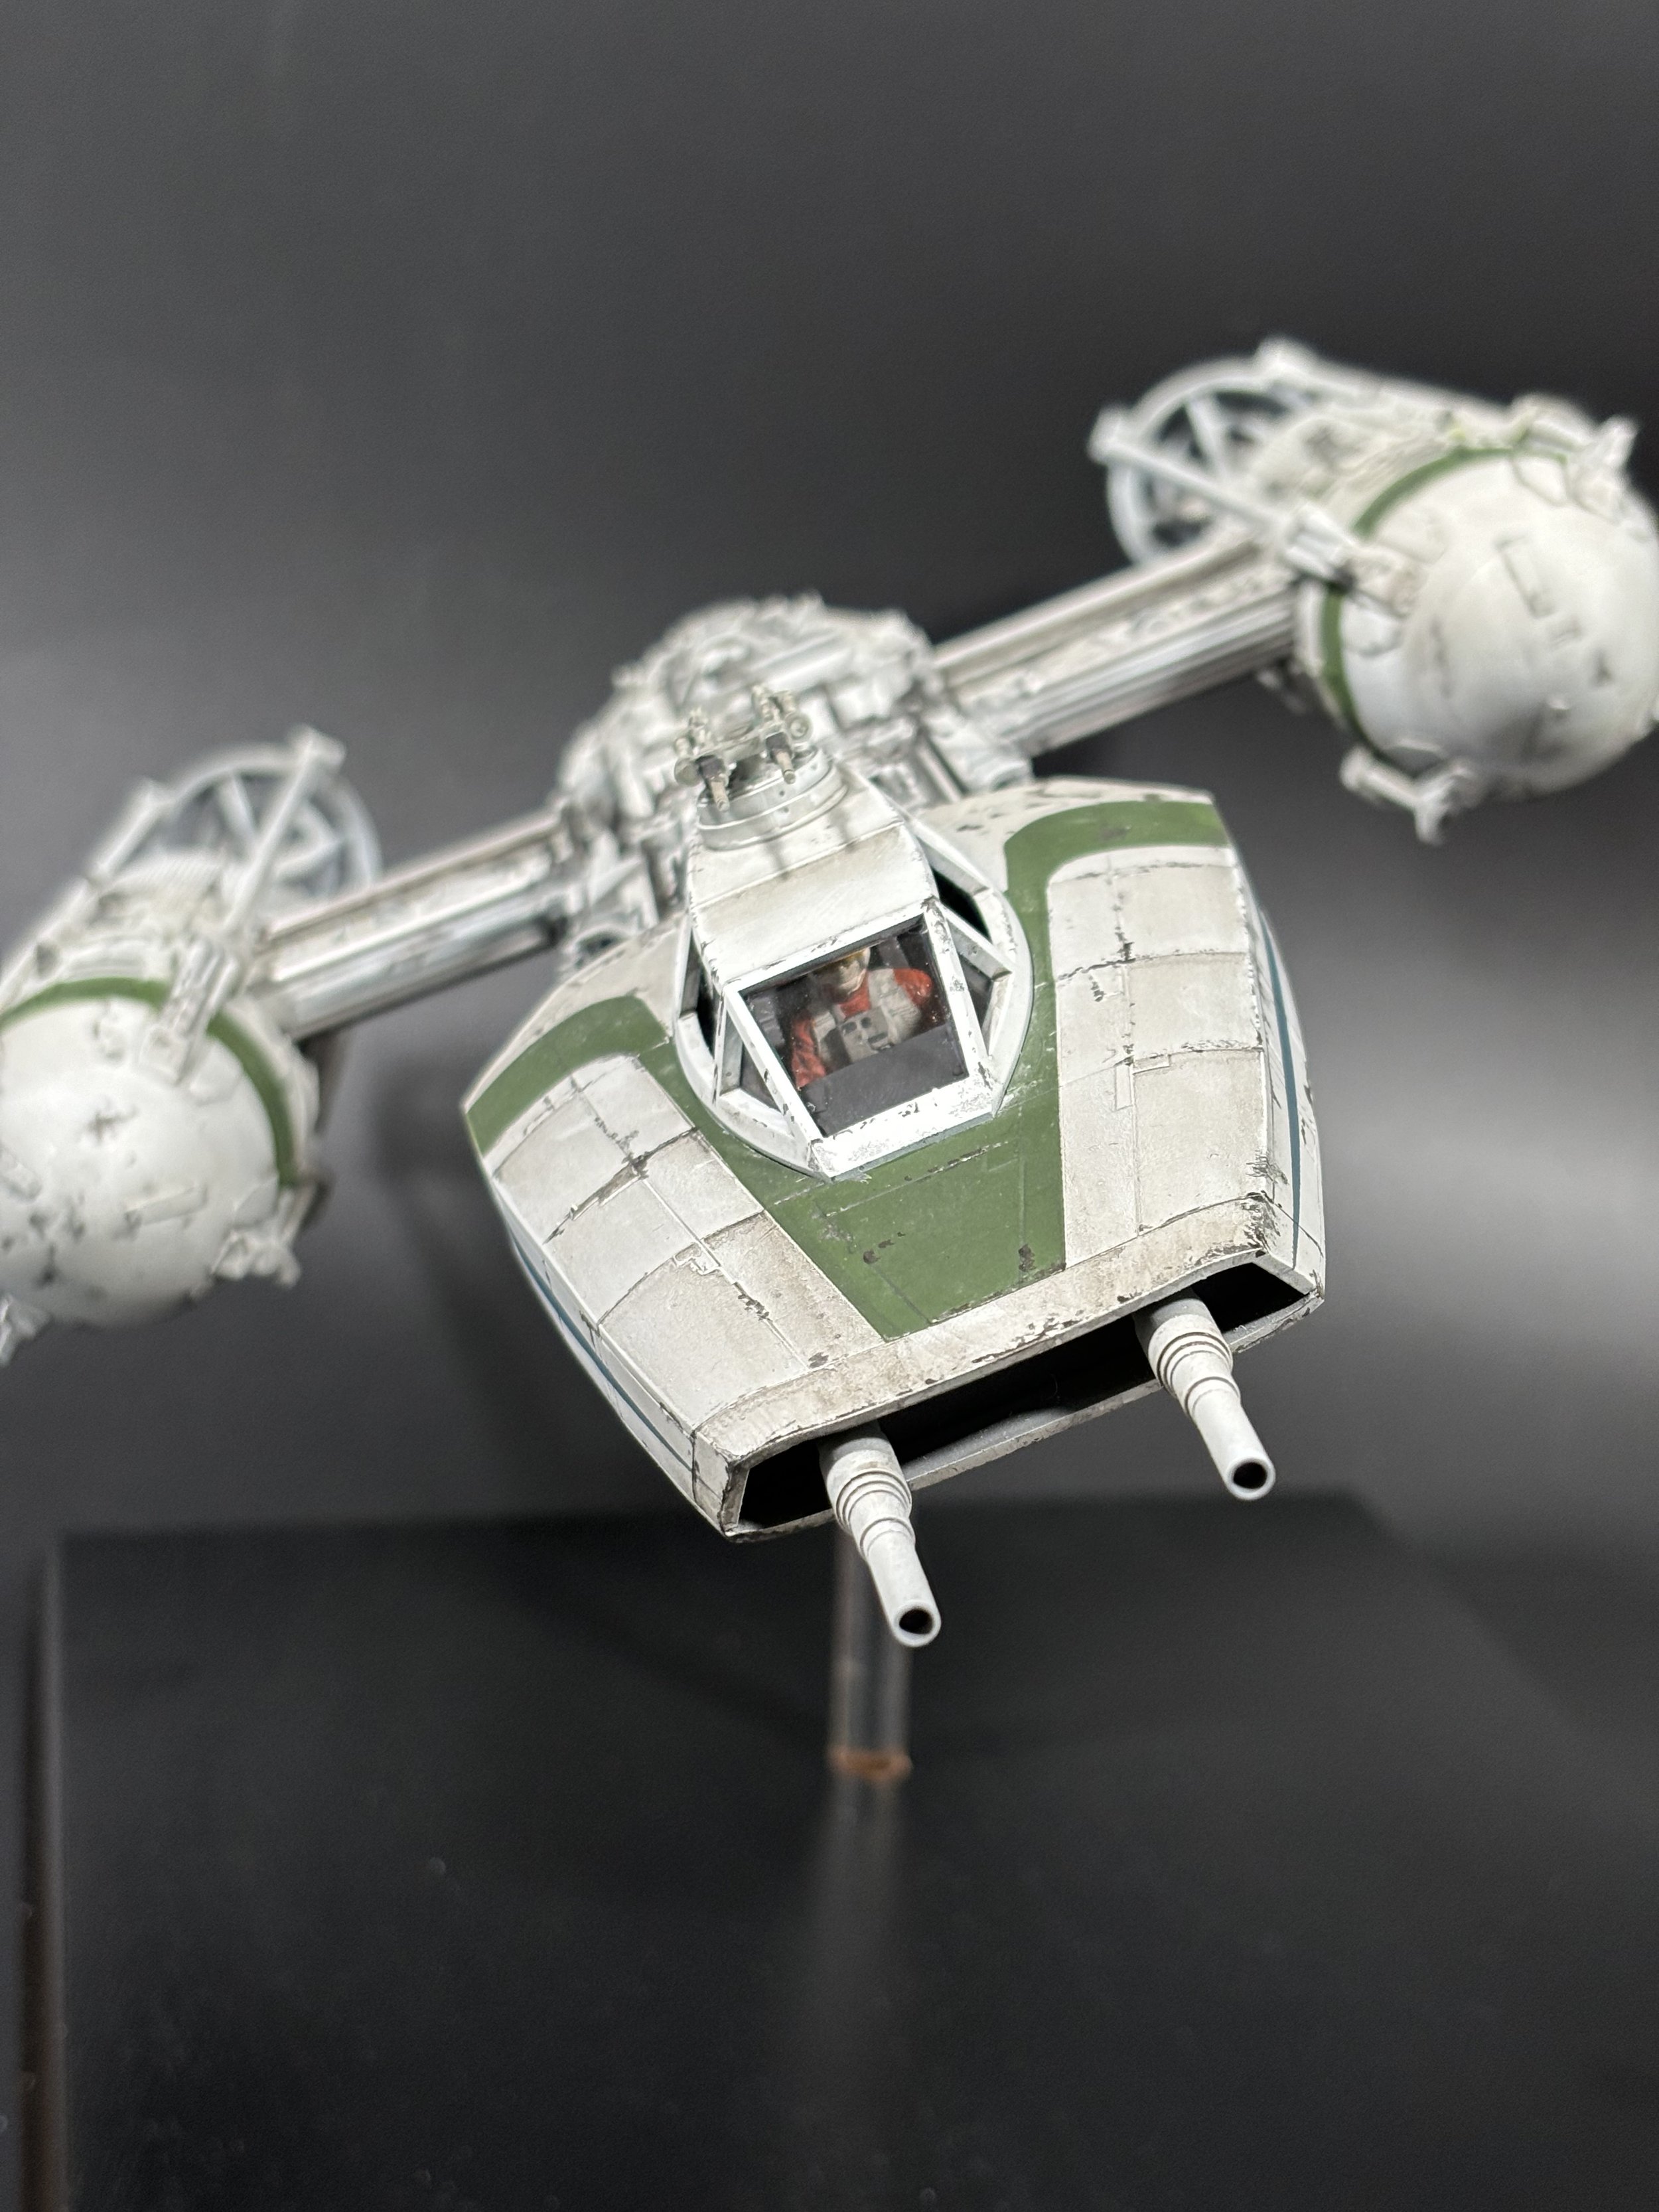
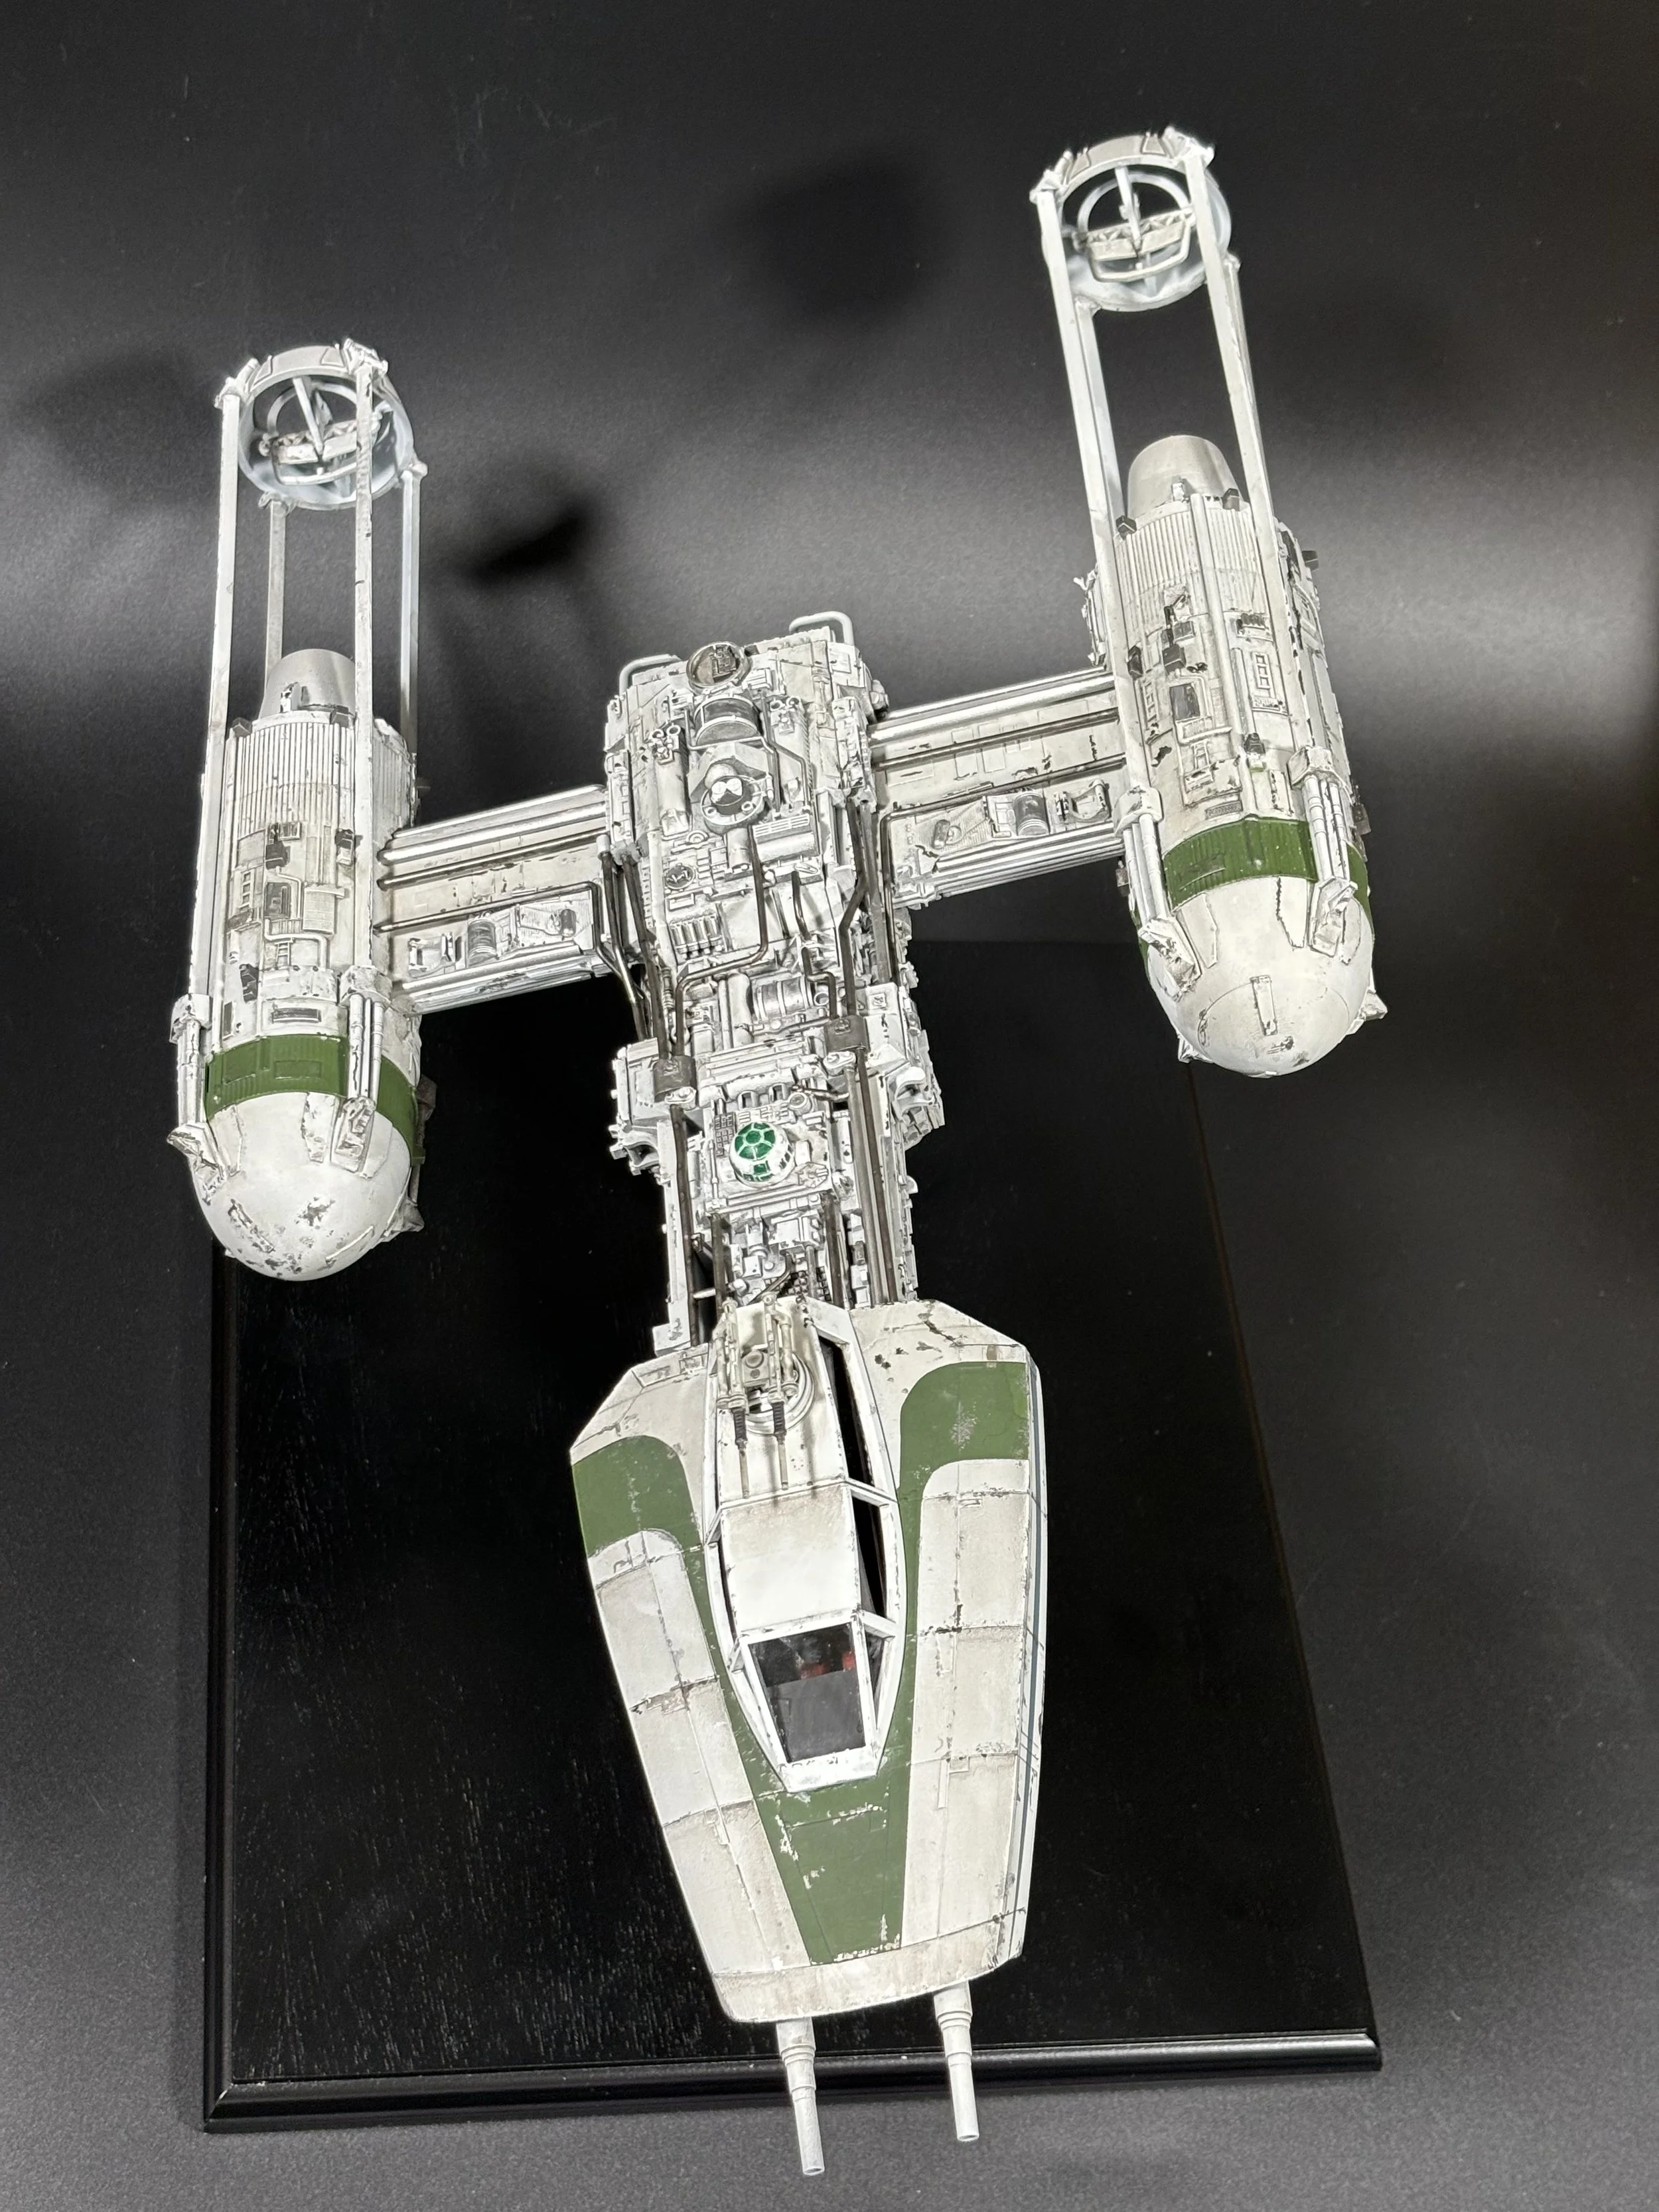
BTL-S3 Y-Wing
Scale: 1/32 (Approx)
Manufacturer: Chris Bibby
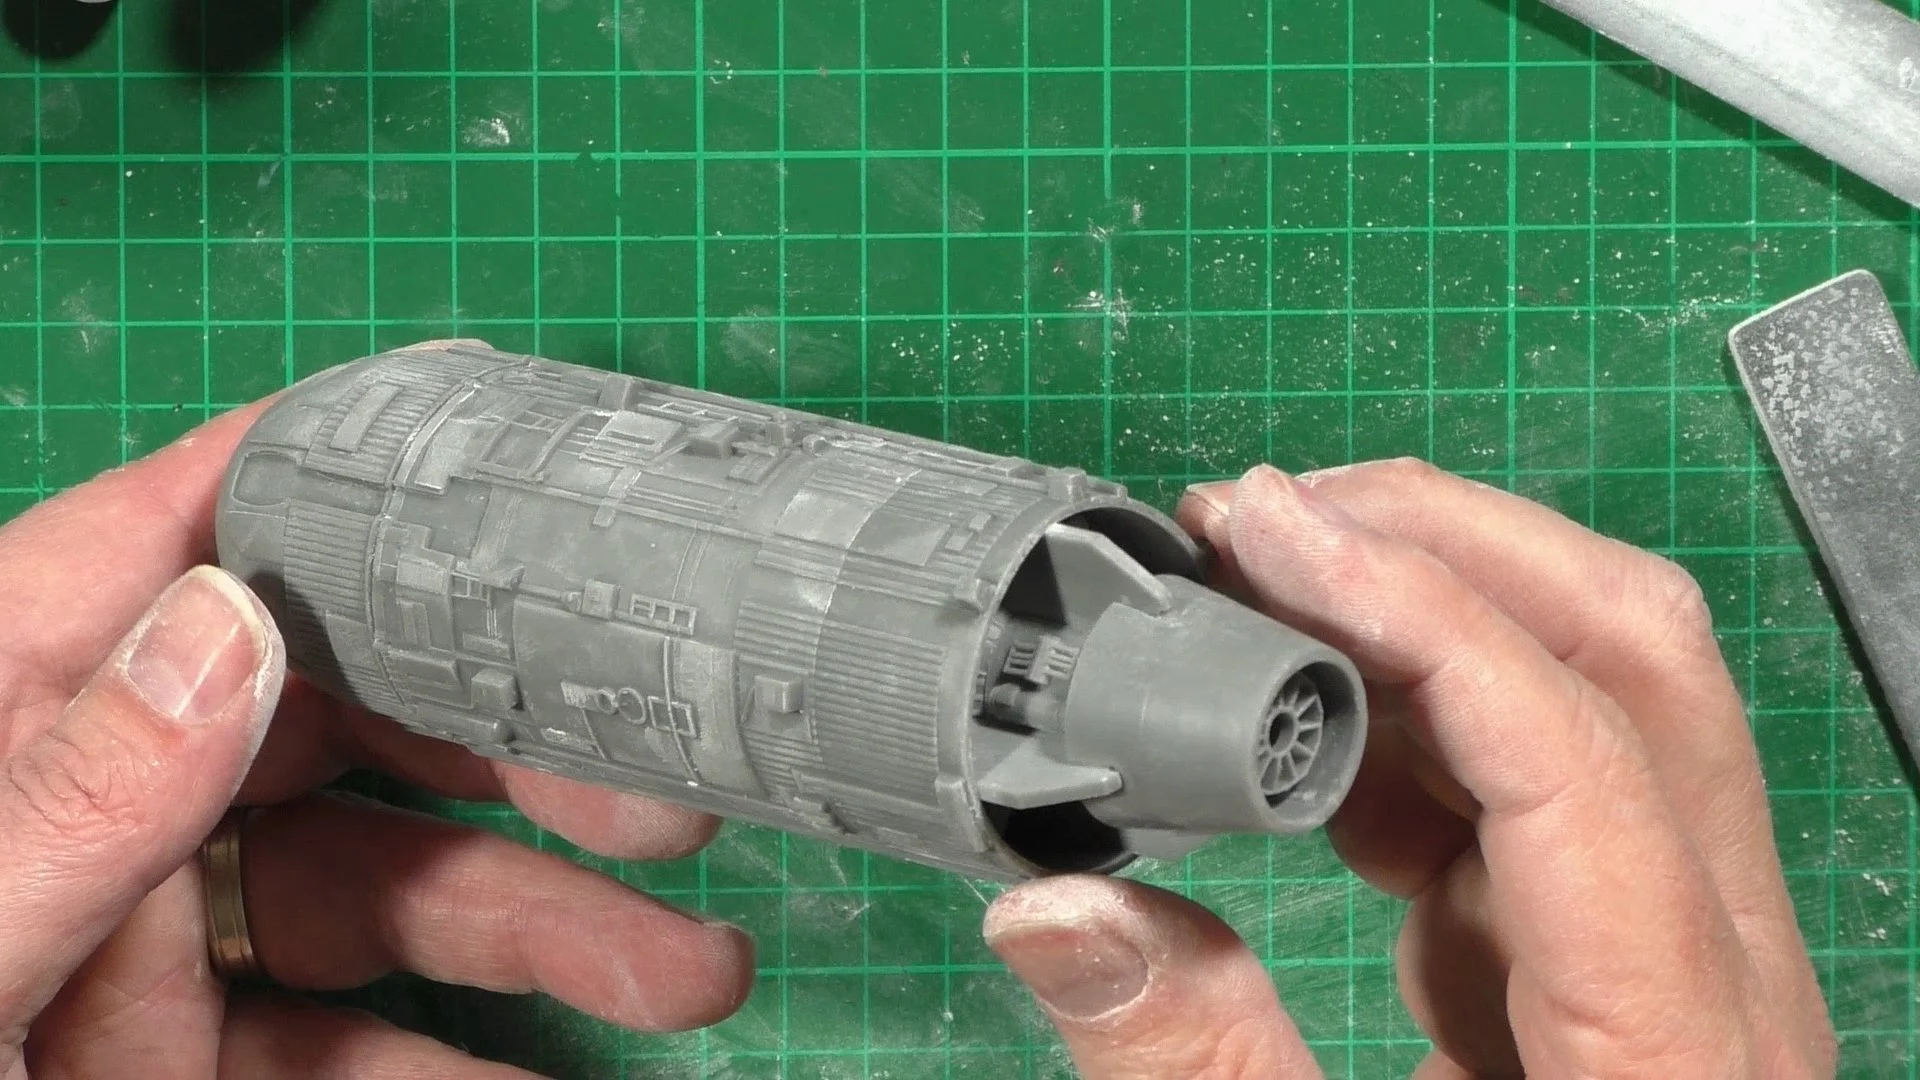
Parts used: 3D Printed Resin
Main paints used: Tamiya and Xtream Metals
0:00 Here we look at the build ahead and how the 3D print files look and how we will rezes it by 200% to give up the size model we want. 2:58 Looking at the files we move them to the software (Chitubox) so they can be sliced and scaled for printing. 4:41 Next it's time to clean up the prints and remove the support struts. 13:18 We start the build with the cockpit and install it into the forward area. 19:27 We close up the top and bottom halves completing the forward section.

0:00 Here we put the engine together but need to thin some of the parts to get a better fit. 6:13 Next we put together the rudder system for the Y-WING and think about changing out some of the resin parts for something a little stronger. 14:19 With the engines together we can start to bring things together, The wings need thinning to get the correct fit, so plenty of sanding and dry fitting to get these to fit. 24:07 With the wings on we can plate up all the sides with detailed plates and fine greebily parts.

0:00 First up we went outside and gave the model a primer coat of automotive Hycote plastic grey primer. 6:01 We paint the cockpit Black with Tamiya XF-85 and add a piece of plasticard for the front panel and pre-paint. Next, we drybrush Mr. Metal color 214 over the cockpit area to give a metal warn look. 13:23 By using Posca pens and Tamiya colors we pick out the cockpit details. 20:12 Next we do a simple rough paint job of the pilot figure, not my best work but will work for what we need. The figure was a free file from CG trader. 28:13 we a simple dry brush and thinned oils and weather the pilot.

0:00 We start by replacing the 3D printed part for styrene triangle rods 4mm and glue the rudders in place. 6:10 Next we prime the whole model and then look a the colors we'll be using, starting with a mix of Tamiya white, gray and deck tan. 13:14 We move over to the spray booth and put on the off-white mix. 16:00 We have a look at the model and are happy with the finish and color. 16:56 Next we mask up read for our green squadron color scheme to be added. 24:34 We use Tamiya flat green for our colors and then Tamiya XF-18 Blue with a drop of white added for the side stripes.

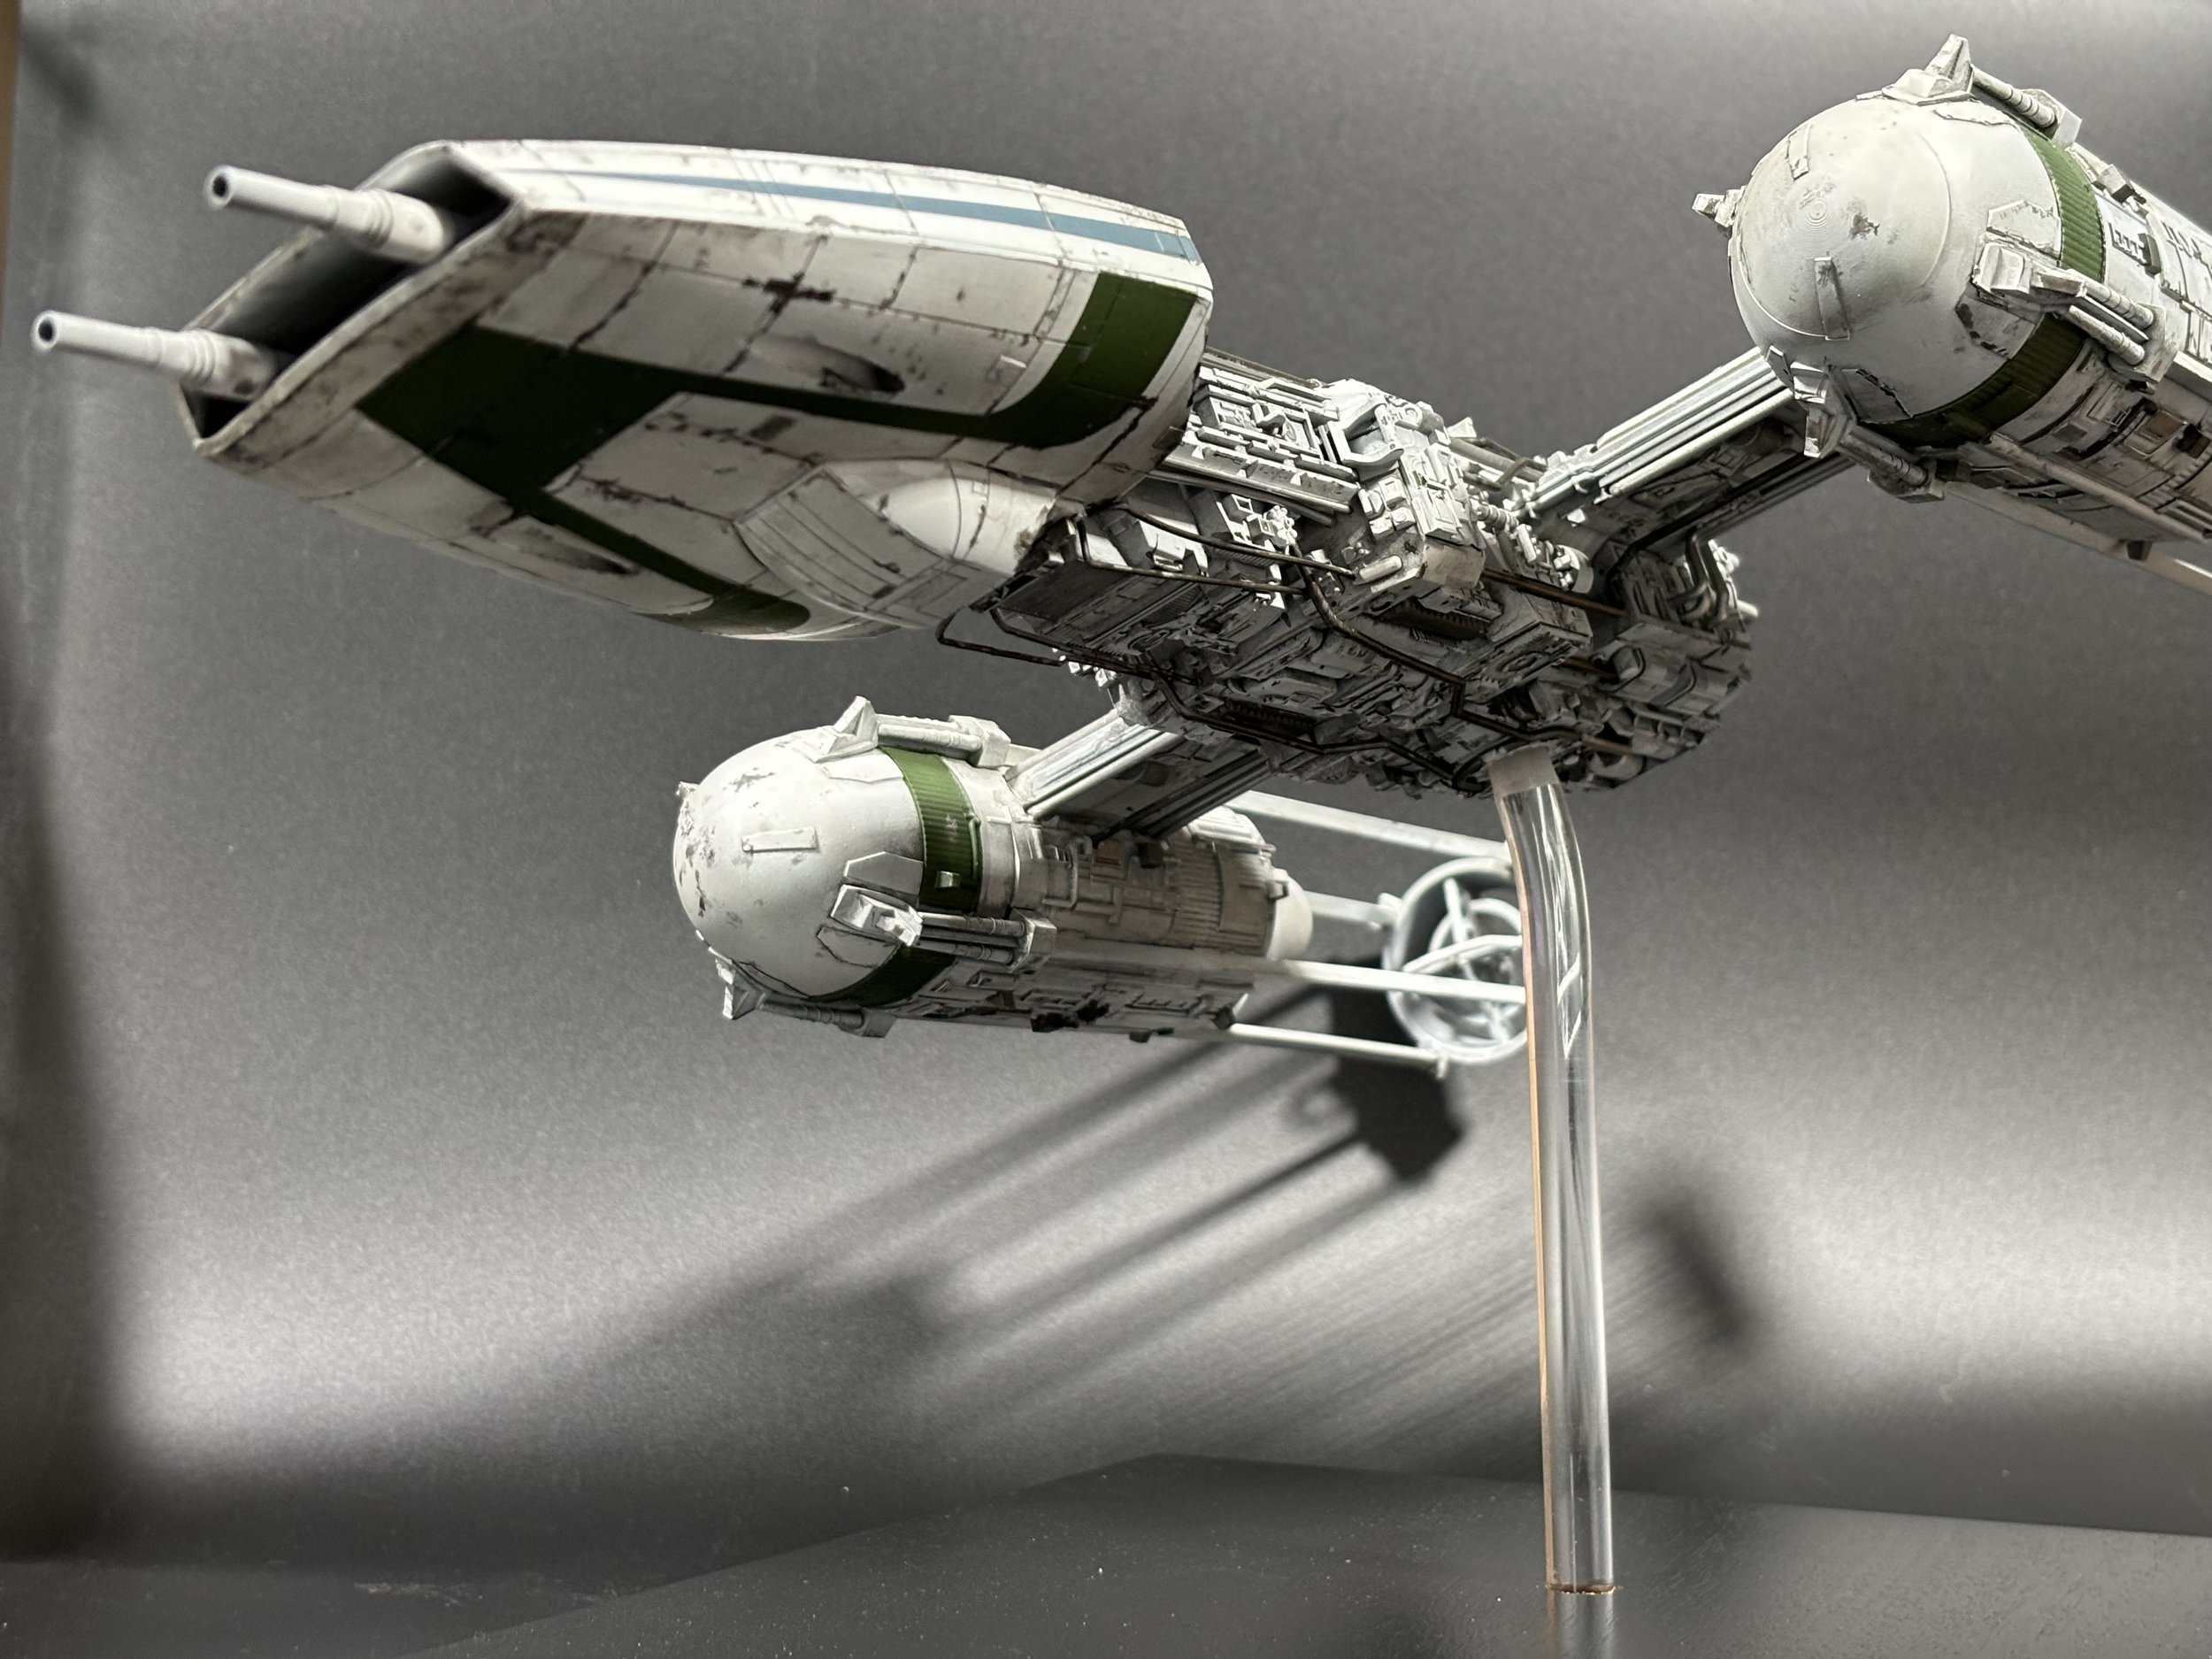
0:00 Next we detail paint shades of metals starting with Tamiya LP-61 Metallic grey, then SM203 Super Iron 2, SM205 Titanium, and then a bright Stainless steel SM204 4:39 Then it's time for a filter with Abteilung 502 ABT510 Starship Filth. This is thinned with Enamel thinners. 15:37 With these dry we can now blend those in as needed. 17:44 With the oil work done, we can make and add all the pipework using coated wire, bending it into shape

0:00 We continue to add all the piping work and print off some of the more difficult bends in 3D resin. 6:21 With the piping all done we look at the canopy and add glass or in our case clear acetate. Here we show how to make a quick template. 15:53 Next we use PVA glue to fix it in place and allow it to fully dry. 23:31 Once the canopy is dry we can install and attach the cockpit section to the fuselage.

0:00 We start on the chipping with Tamiya LP-61 and Mr. Color SM203 and manage to tip a bottle over myself!!! 12:02After a clean-up we carry on and use Vallejo Metal color 723 Exhaust Manifold. 18:24 With the chipping done, we now look at the base for mounting the acrylic rod. We use 10mm solid, clear rod. 23:42 With a hot air gun we bend the rod into the angle we want to display the Y-Wing. 33:00 The final reveal and thoughts about the build. 42:40 Reveal video and photos.