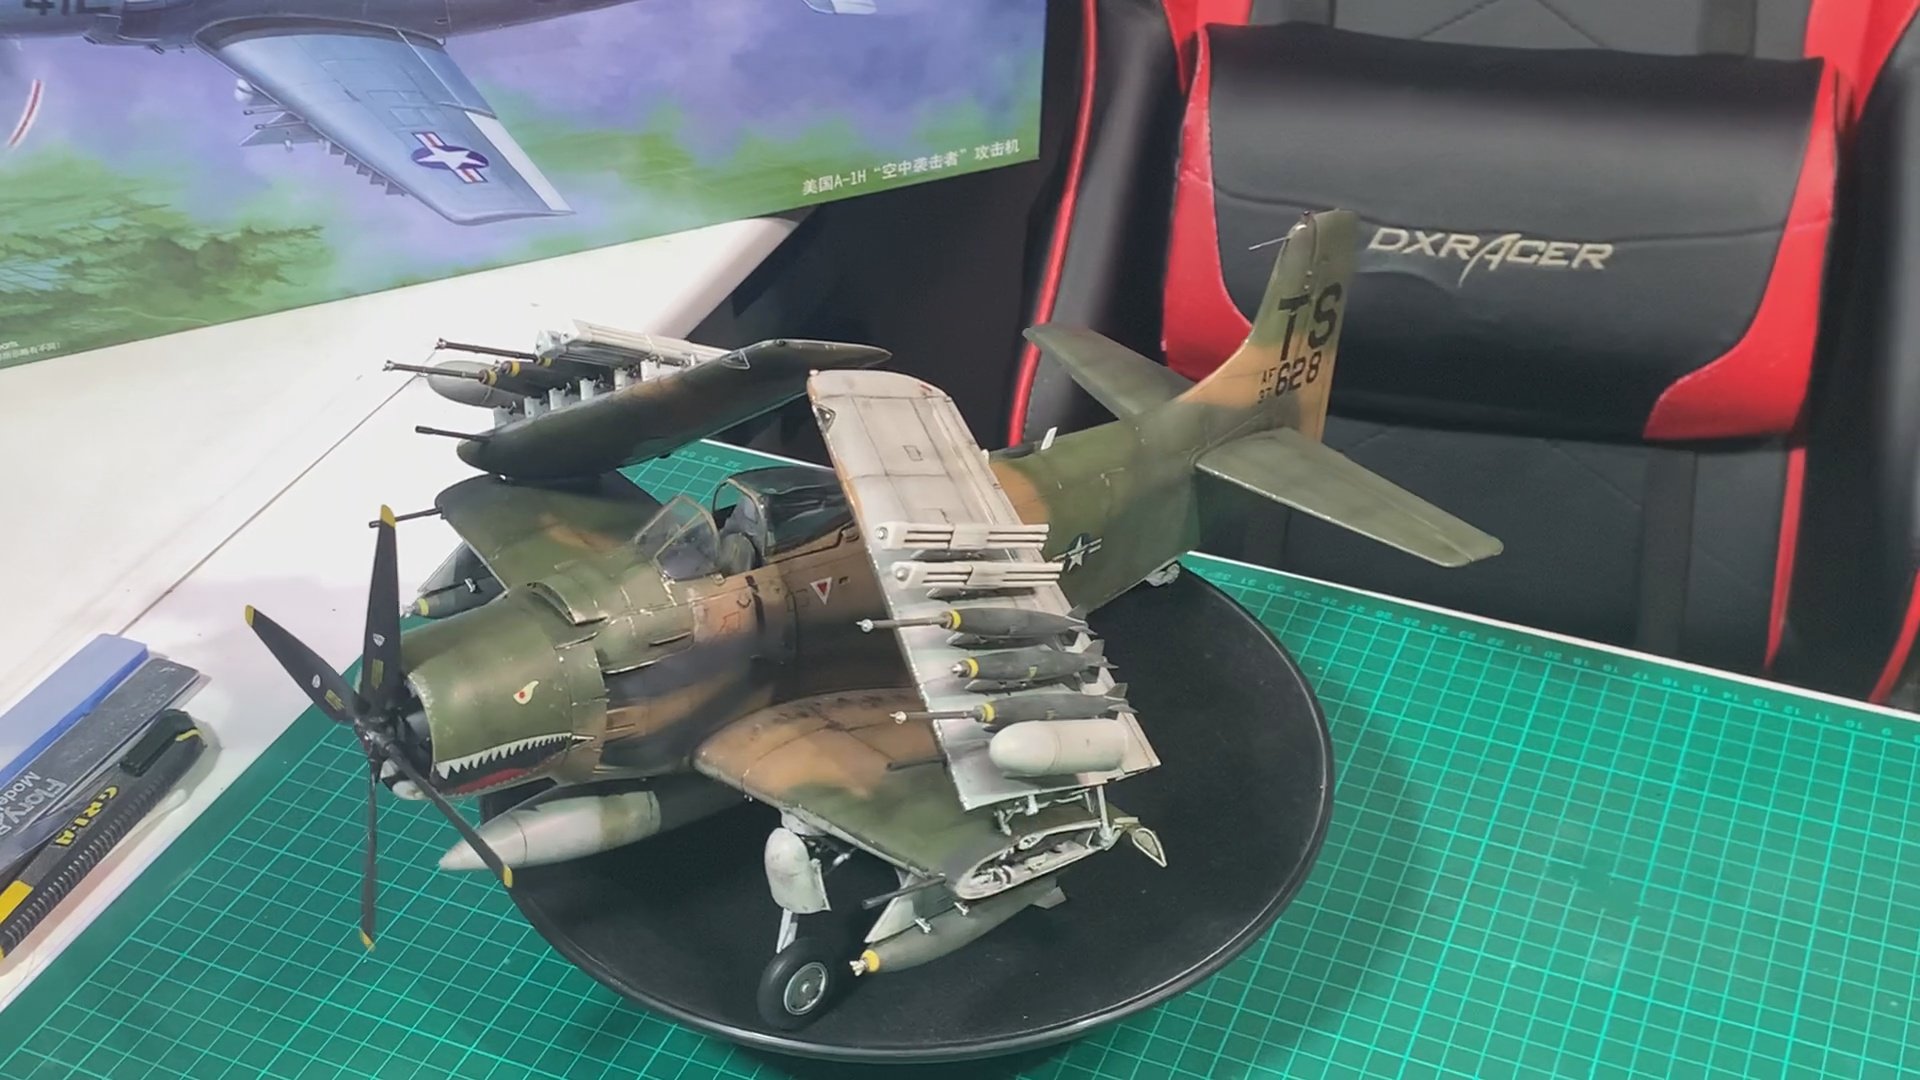
Skyraider
Scale: 1/32
Manufacturer: Trumpeter
Parts used: Quinta Studio 3D cockpit set
Main paints used: Tamiya and AK Real Colors
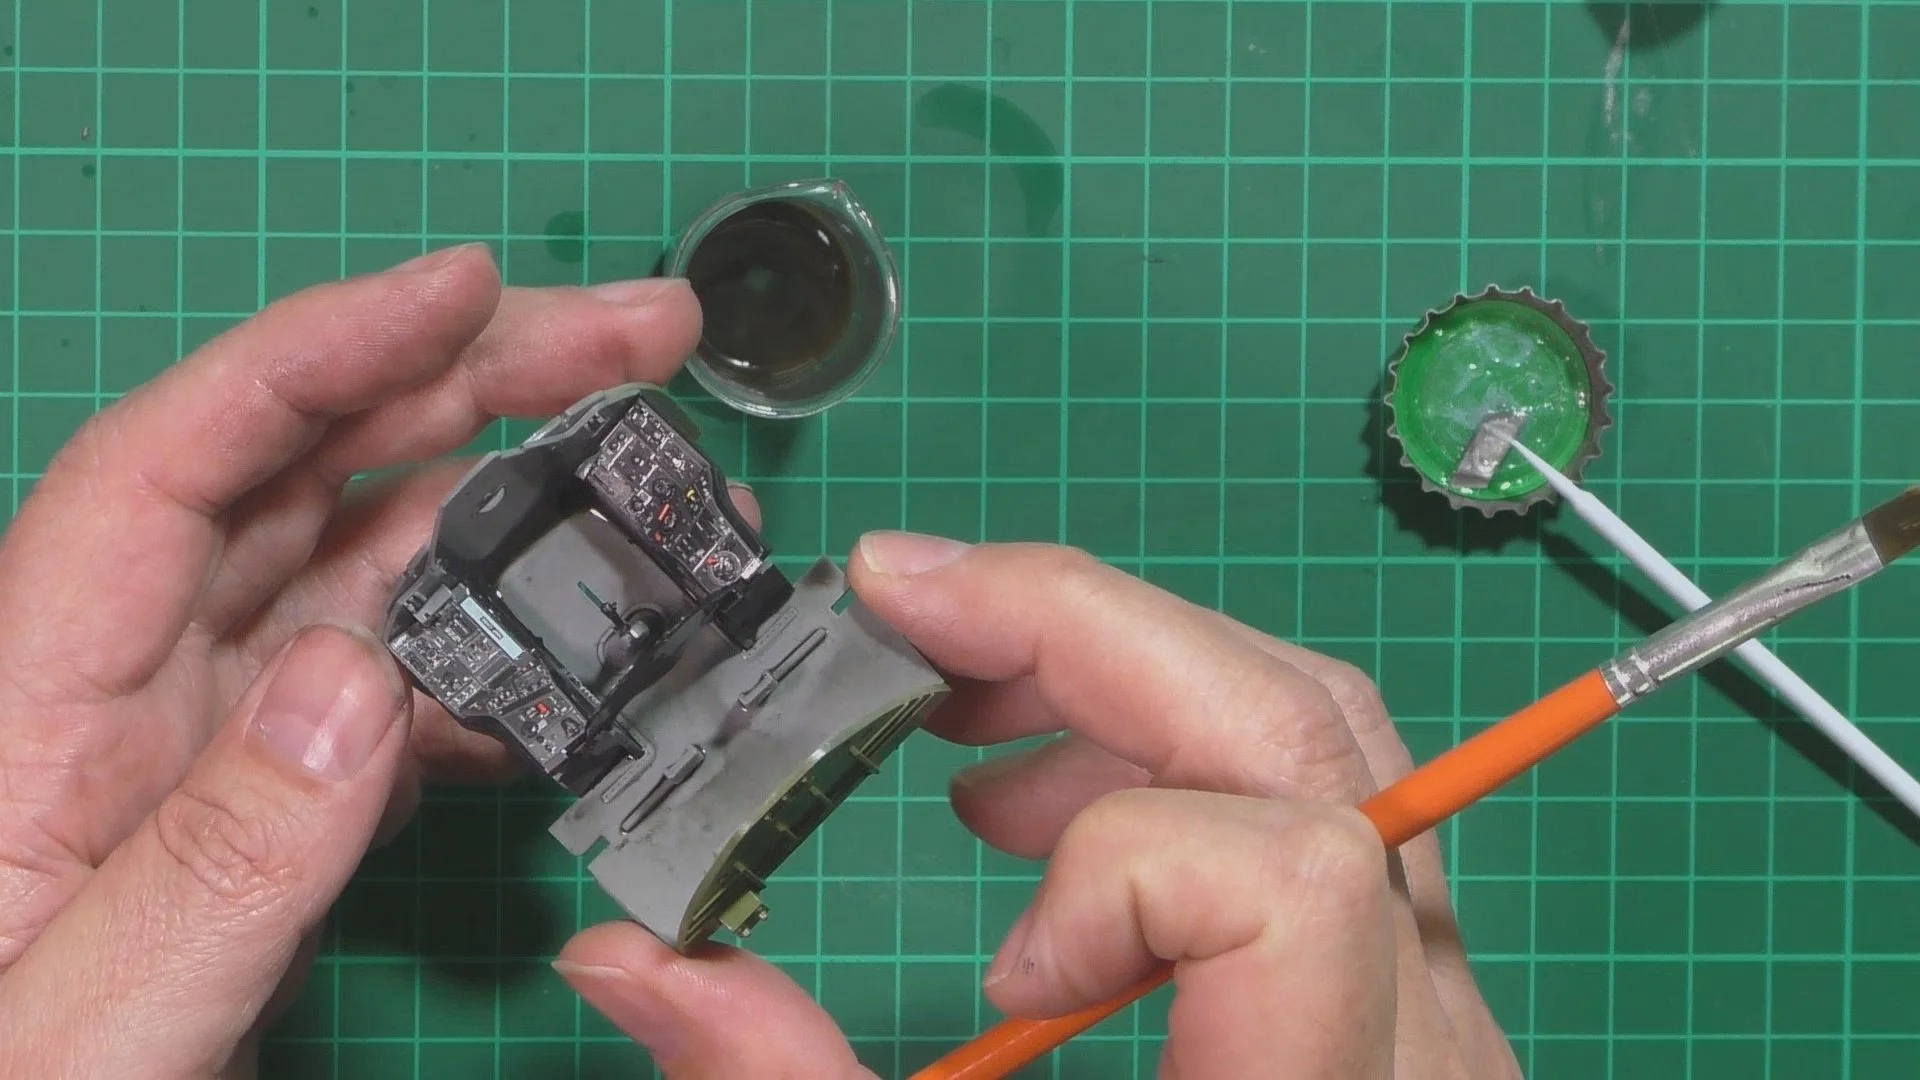
In part one, we work on the engine and the cockpit.

In part two, we add detail to the engine with lead wire and pick out the detail with blacks and then use a oil wash to bring out all the detail. Next we add the 3D printed cockpit set and the dry brush and give a further oil wash to the cockpit assembly.

In part three, we install the cockpit and engine and add the formers to the fuselage before gluing the two halves together. Next we use a CA and Talc (French Chalk) mix to fill the gaps and seams. Then it’s time to get the wheel wells built and installed in the Wing section.

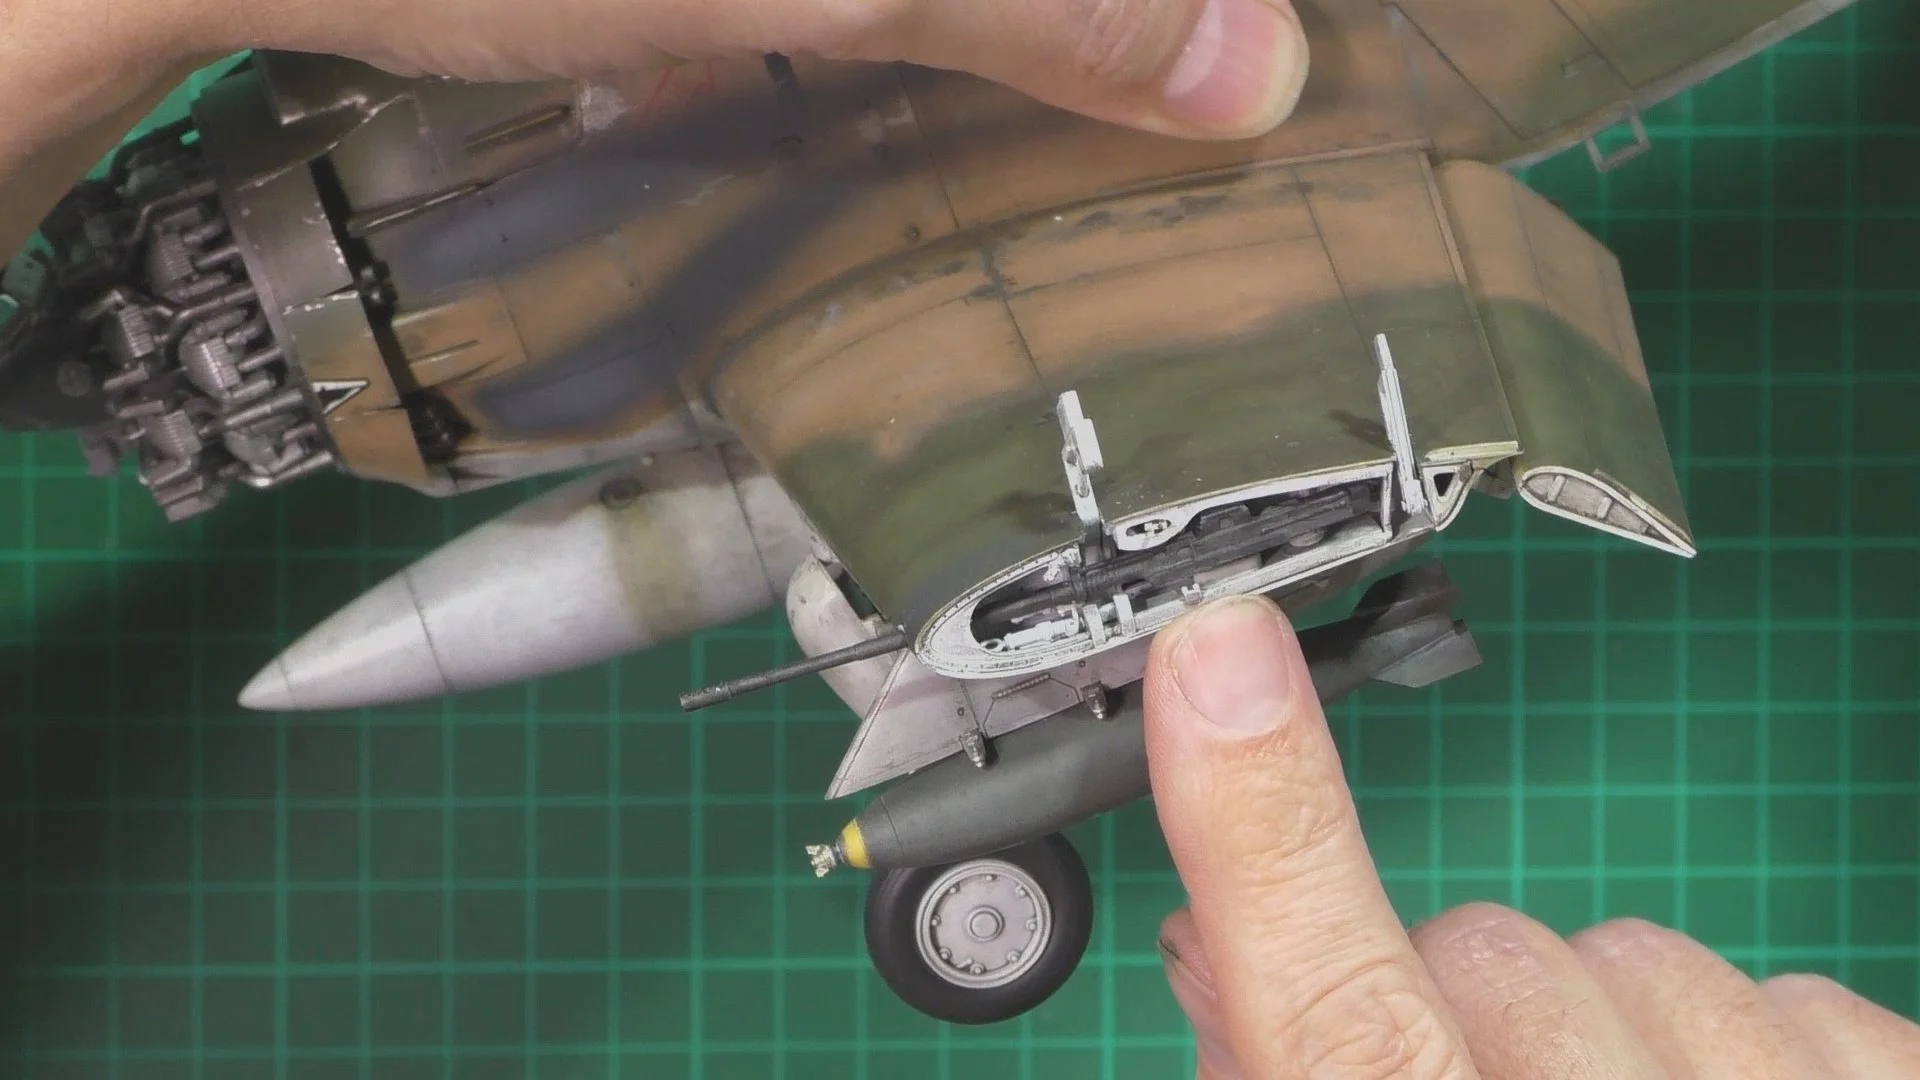
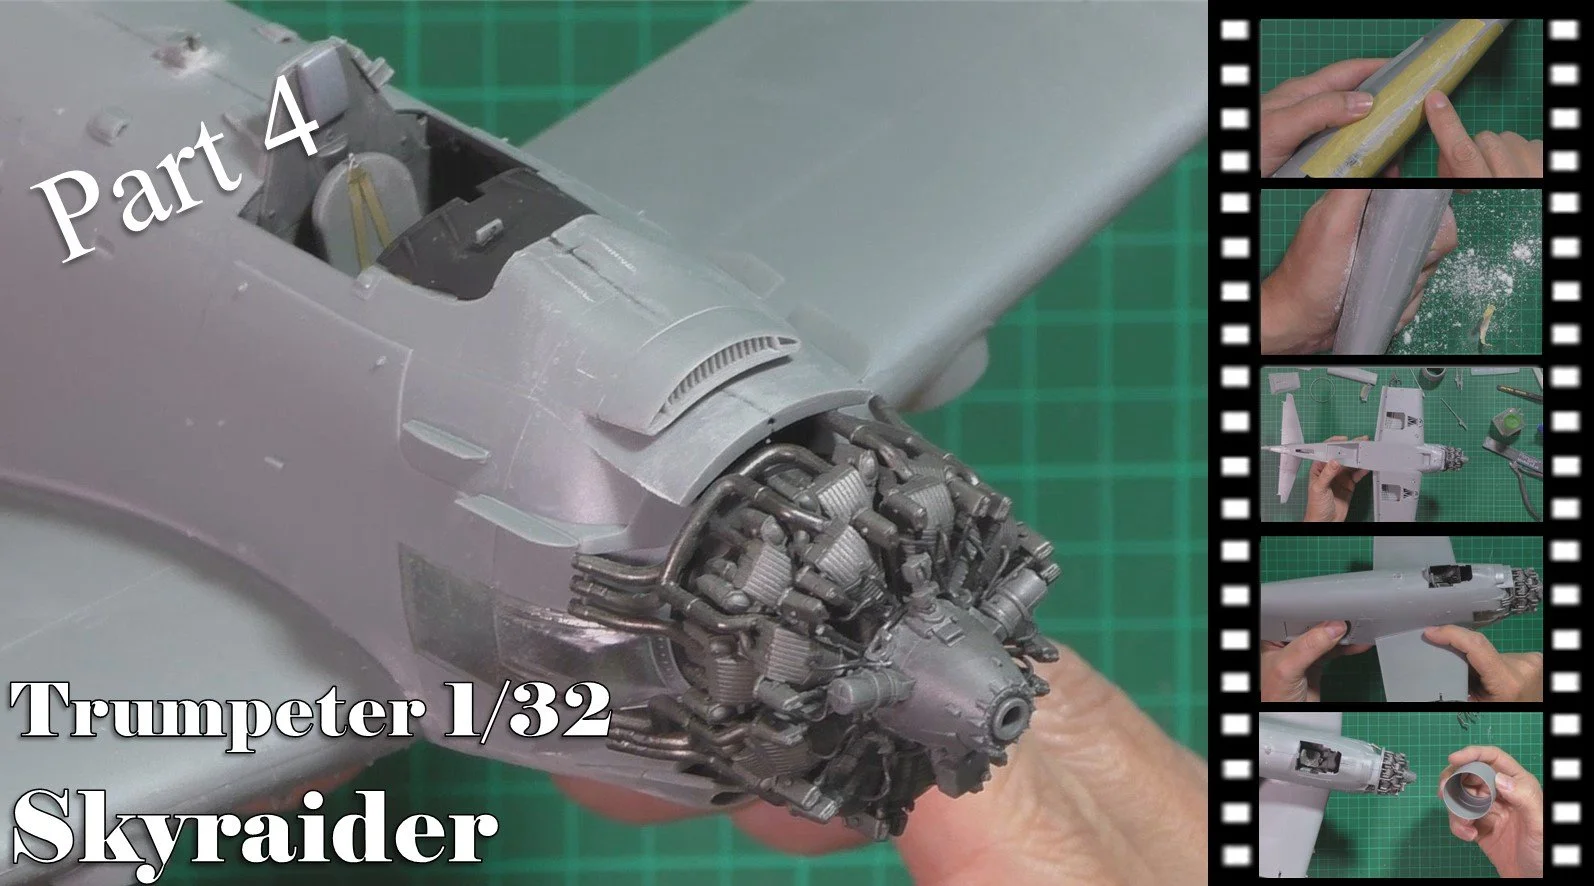
In part four, we finish off the seams by sanding and then later re-scribing and re-riveting. Next, we add the wing section and intake scoops. Then it’s time to build the outer wings and the gun bays in them.
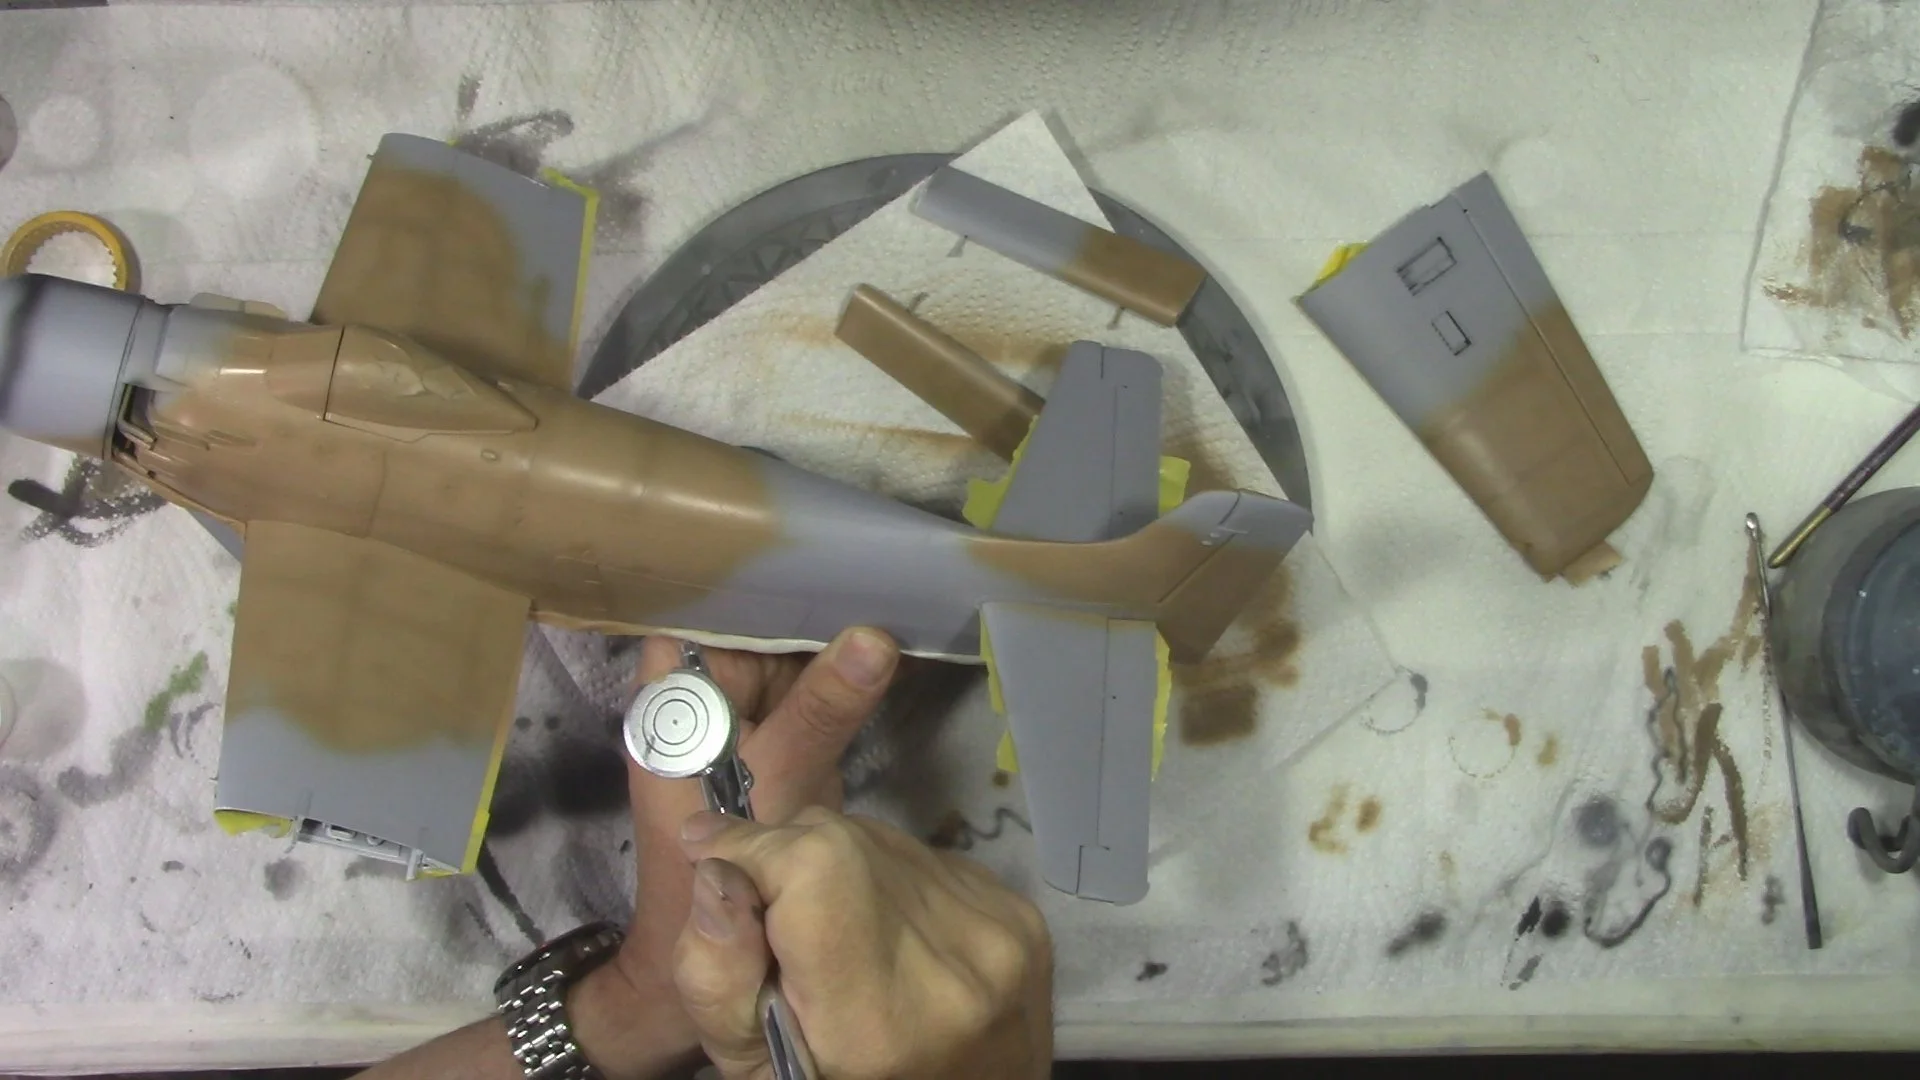
In part five, we re-scribe and re-rivet the details lost during filling and sanding. Next the gunsight is molded in one piece of grey plastic so we cut the site and add a piece of clear for the glass part and install. The center seam in the clear part bugged me so I have a go at removing and glad I did as it turned out great. Then it’s time to Prime up and pre-shade the underside.

In part six, we put down three thin coats of Tamiya LP-4 White mixed with a dash of Tamiya XF-54. This is thinned around 70% thinners to 30% paint. Light gentle layers are put down 10 mins apart. Next the underside is masked up ready for the Tan coat, We use AK Real colors RC225, next we make the lighter Tan by adding a dash of white to give a faded look. Last we make a new mix of tan but add a dash of black and the with this post shade the panel lines and details.

In part seven, we carry on with the medium green and the dark green camo work again lightening and then darkening the colors to contrast and weather the paintwork. Then sharpen the camo and fix any errors.

In part eight, we move into the decaling and bed those down nicely. We next make the missing kit tail light and then time for a flat coat ready for weathering. Last up we paint and decal the weapons.

In part nine, we start the weathering by chipping using both the sponge and free hand brush technique. Then it’s time to give the whole model a wash of Flory models dark dirt and then the way’s to remove it from the surface to give a deep warn grimy look to the paintwork.

In part ten, we add a dirt filter with oils over the body of the aircraft and texture that in, Next we let that dry and then add neat oils to add grime and build up of dirt to panel lines and other areas.

In the final one hour part, we cover the staining and leaks along with water marks and grime with neat oils, We also weather the weapons and tanks. Last up the exhaust stains and gun smoke weathering done by airbrush. Last we install all the weapons and lights, aerials etc. ready for the final reveal.