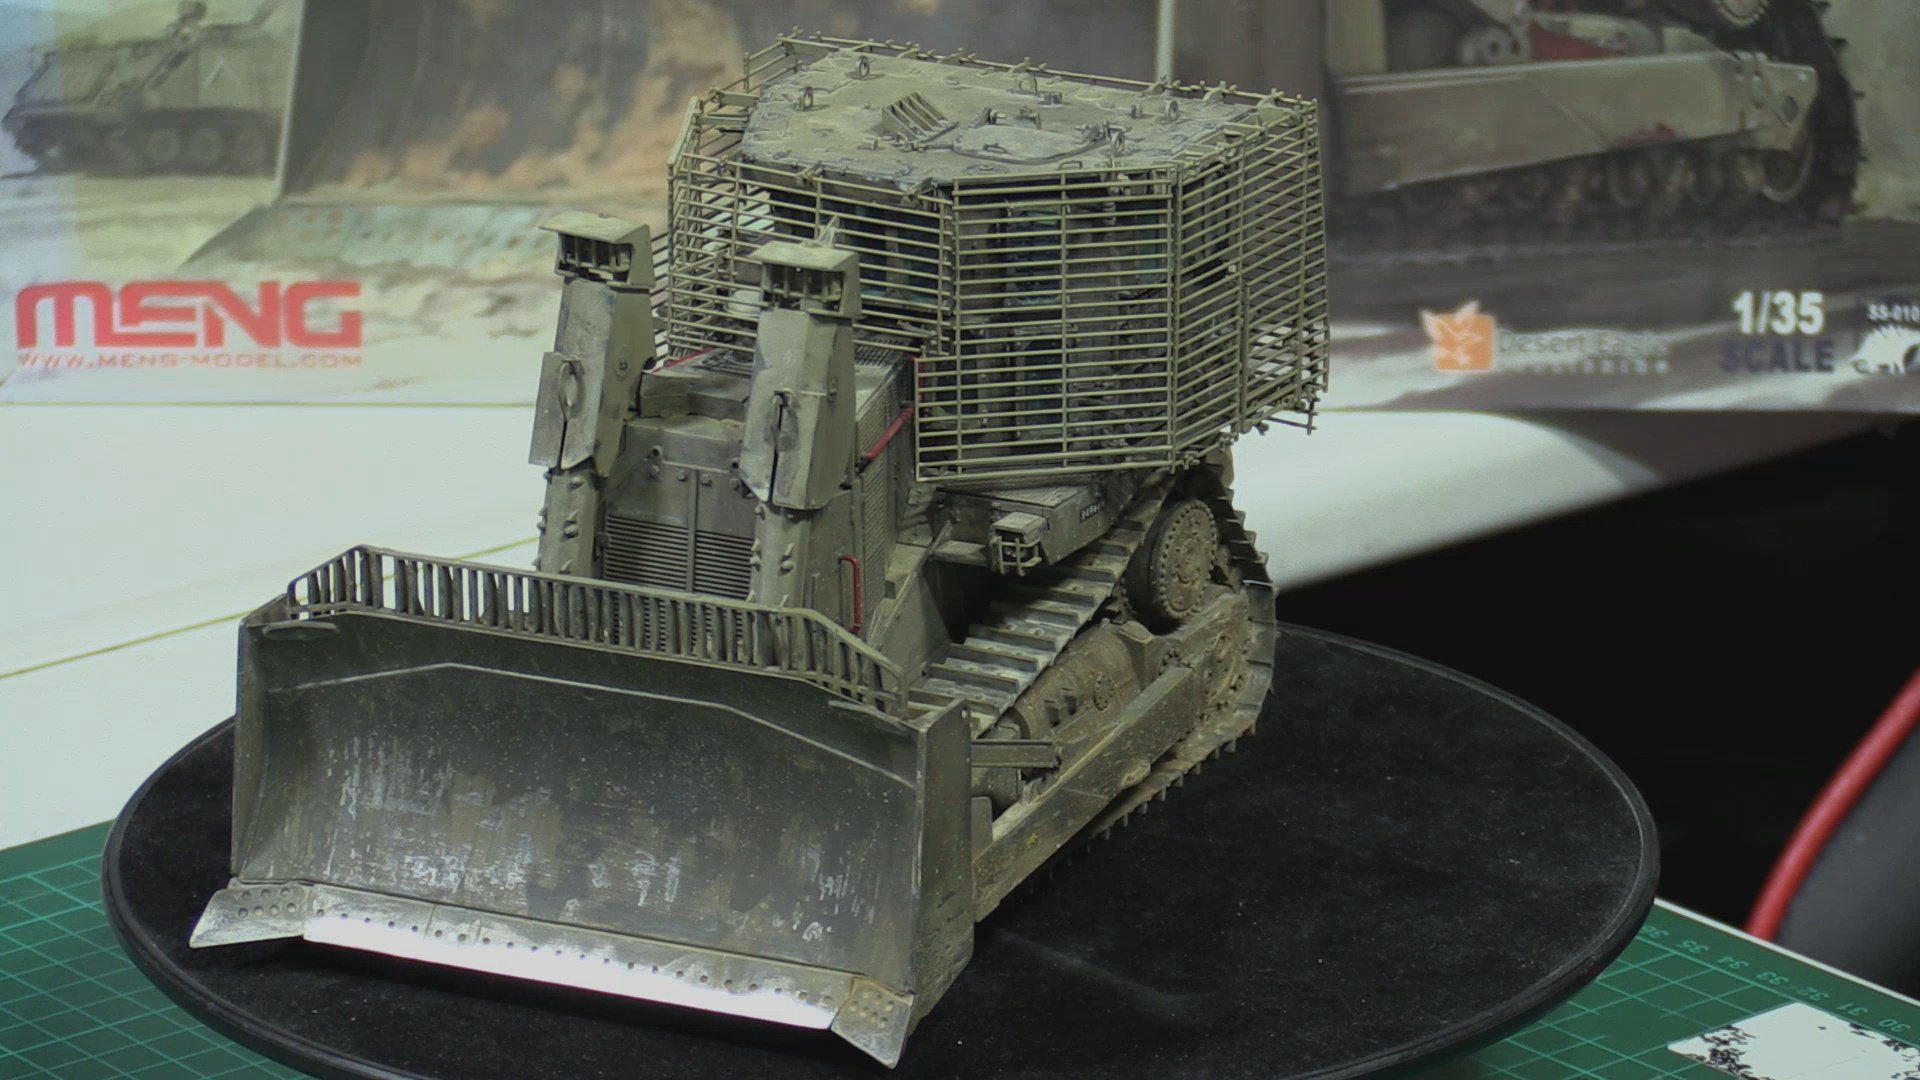
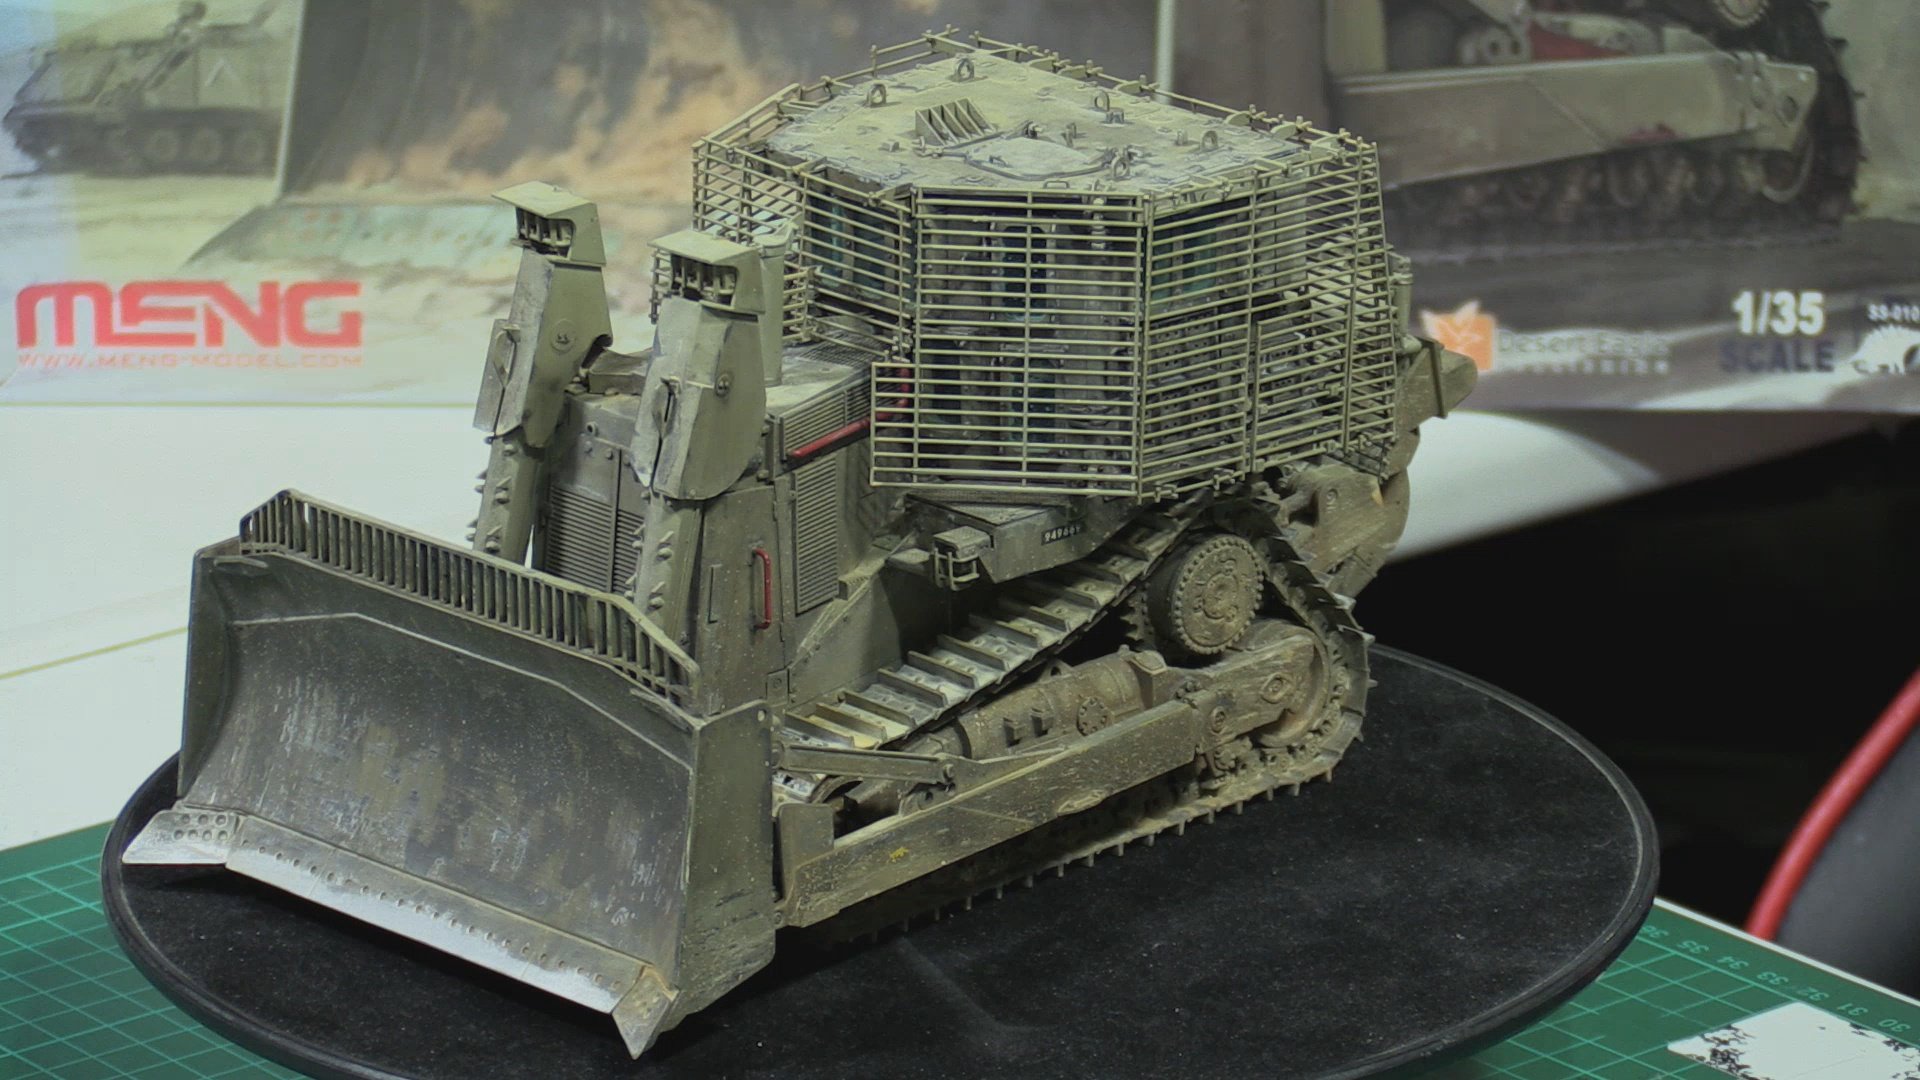
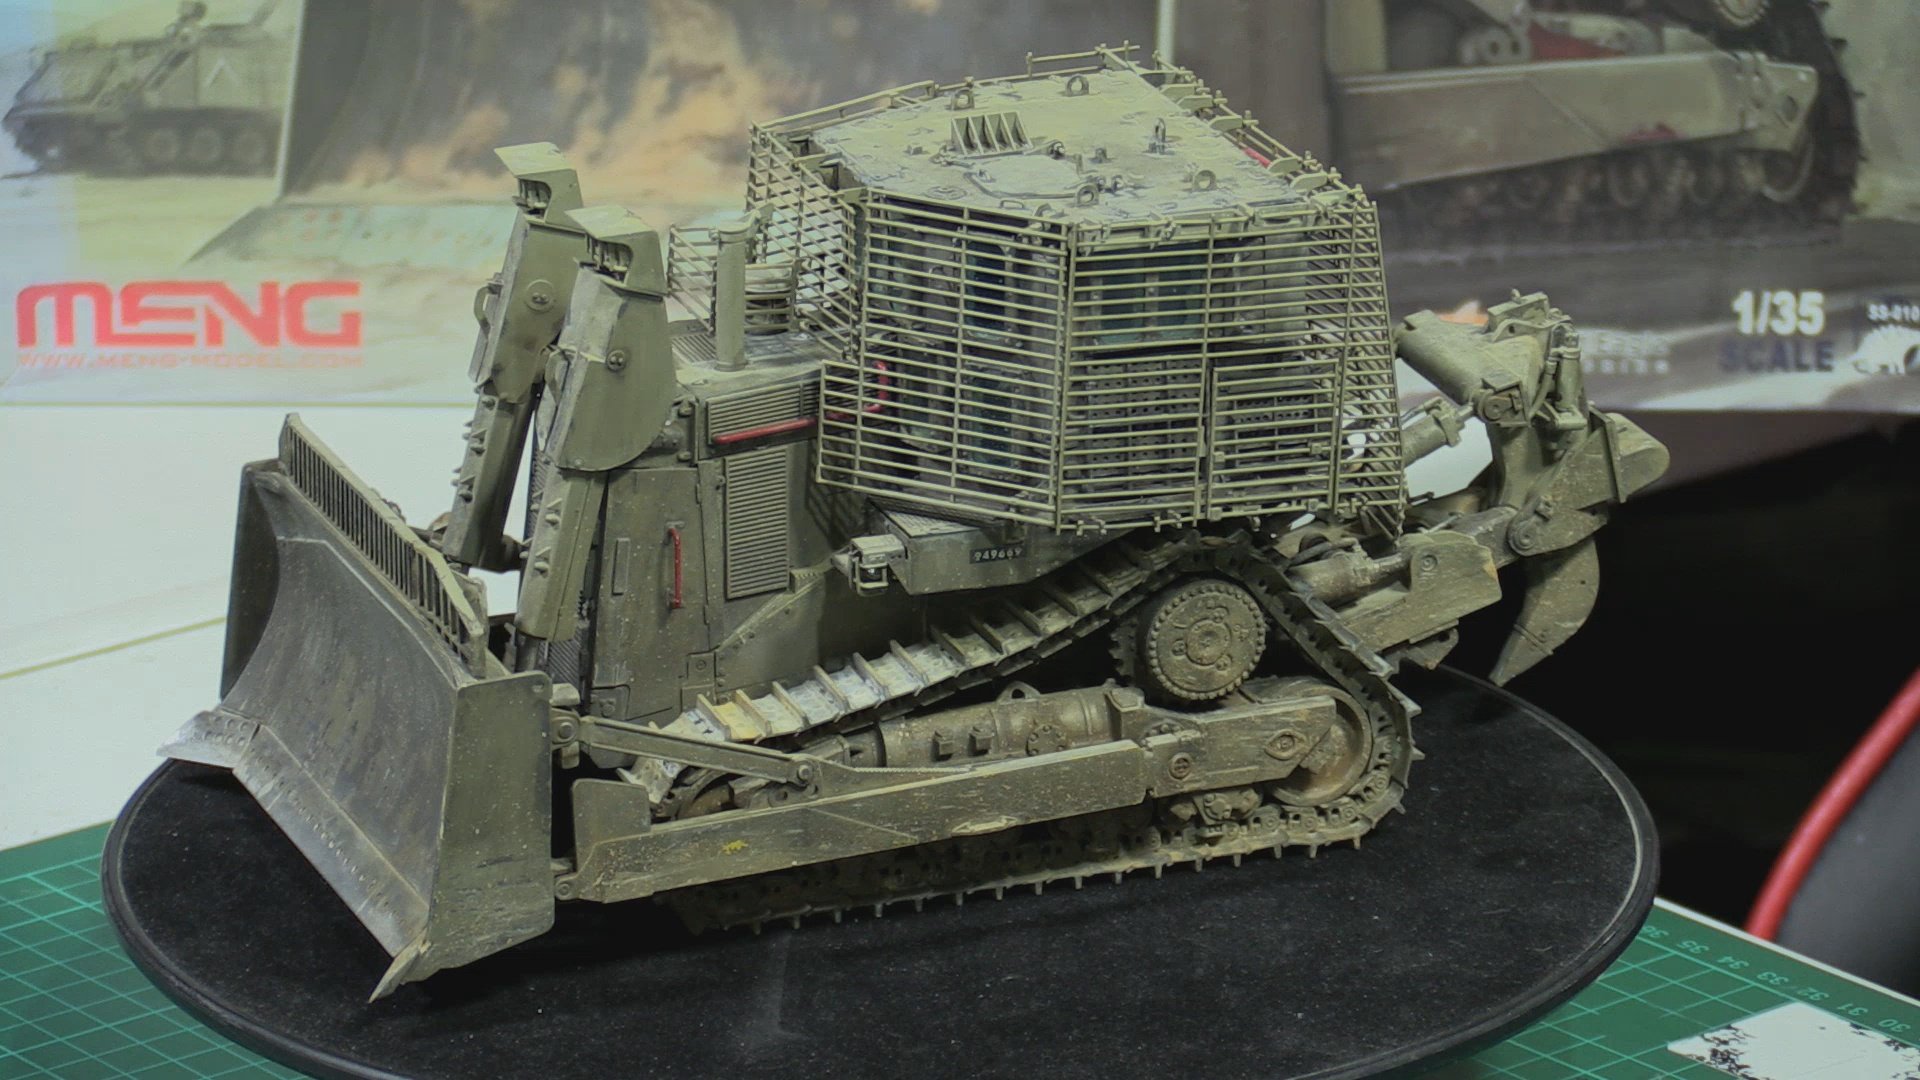
D9R Dozer
Scale: 1/35
Manufacturer: MENG
Parts used: Out Of The Box
Main paints used: Tamiya and Xtream Metals
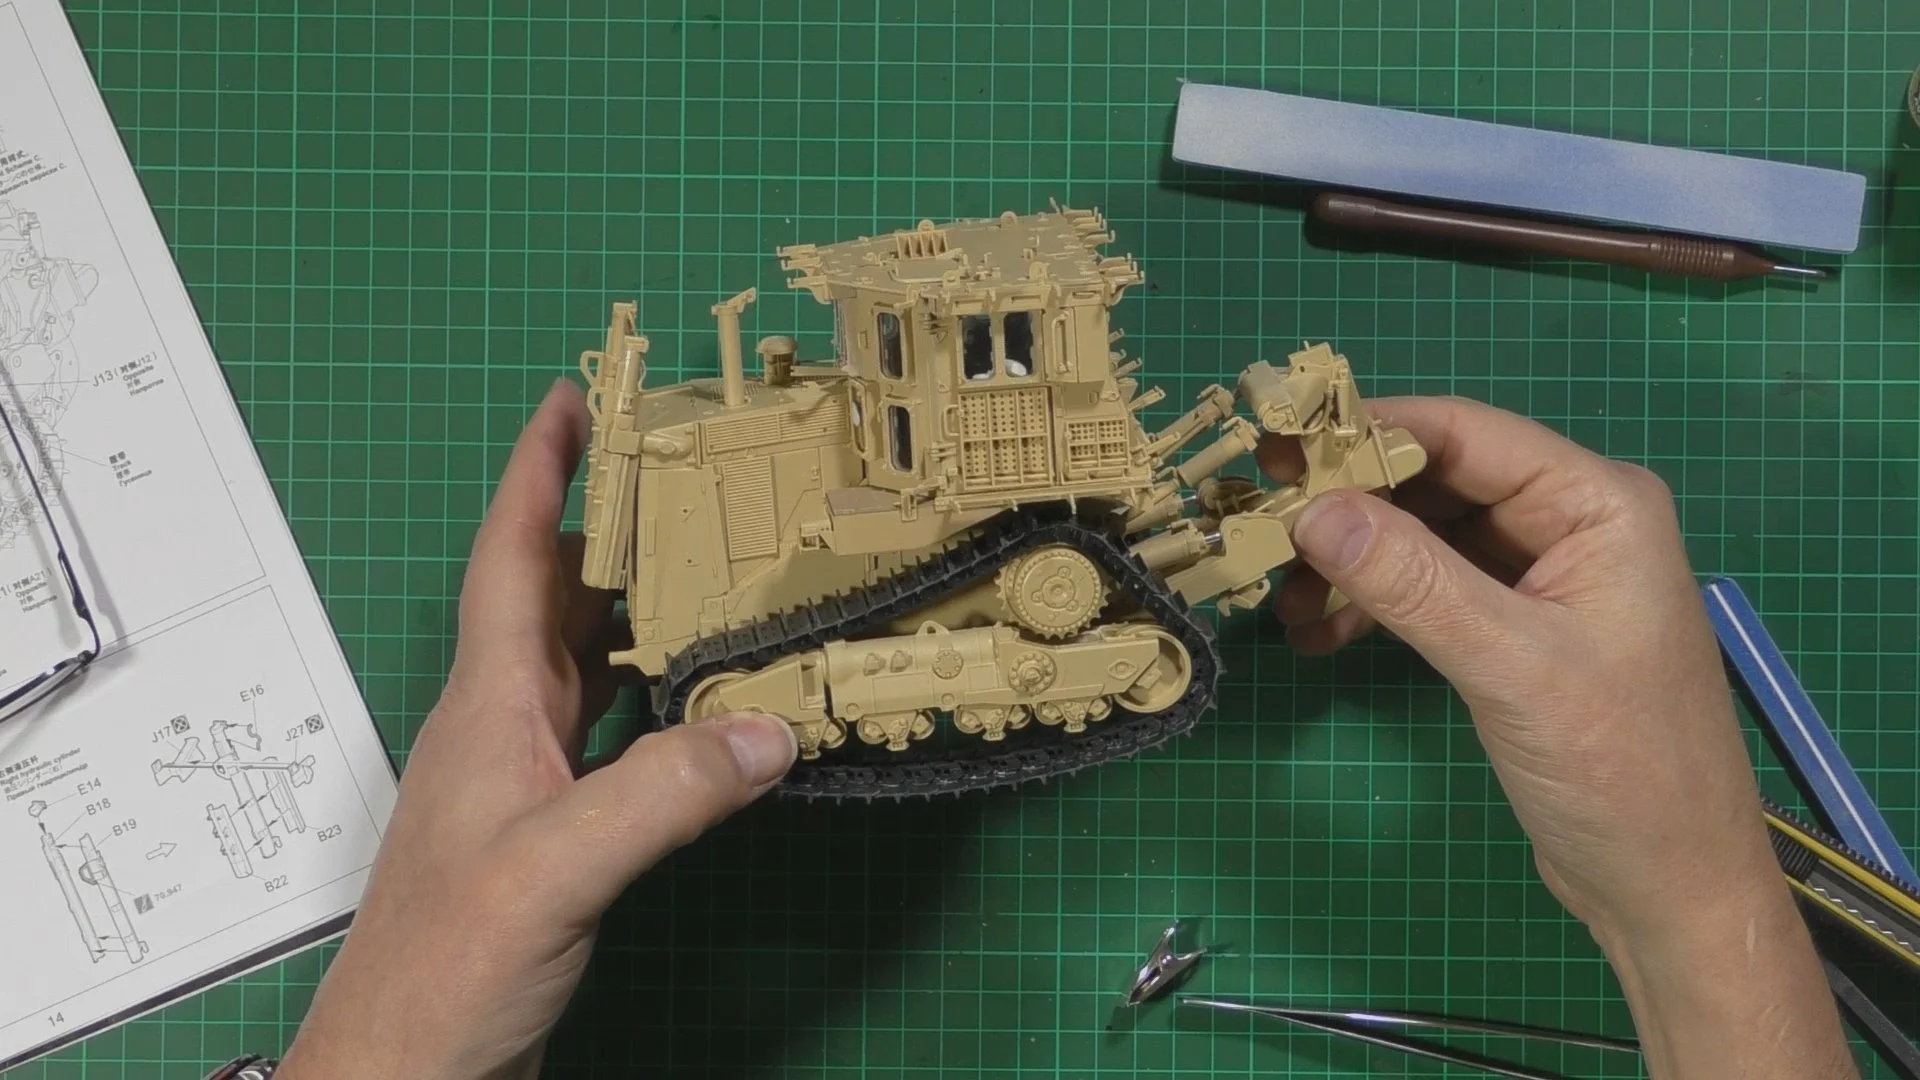
In part one, we look abt the build ahead and then start work on the main body and then put the ripper assembly together

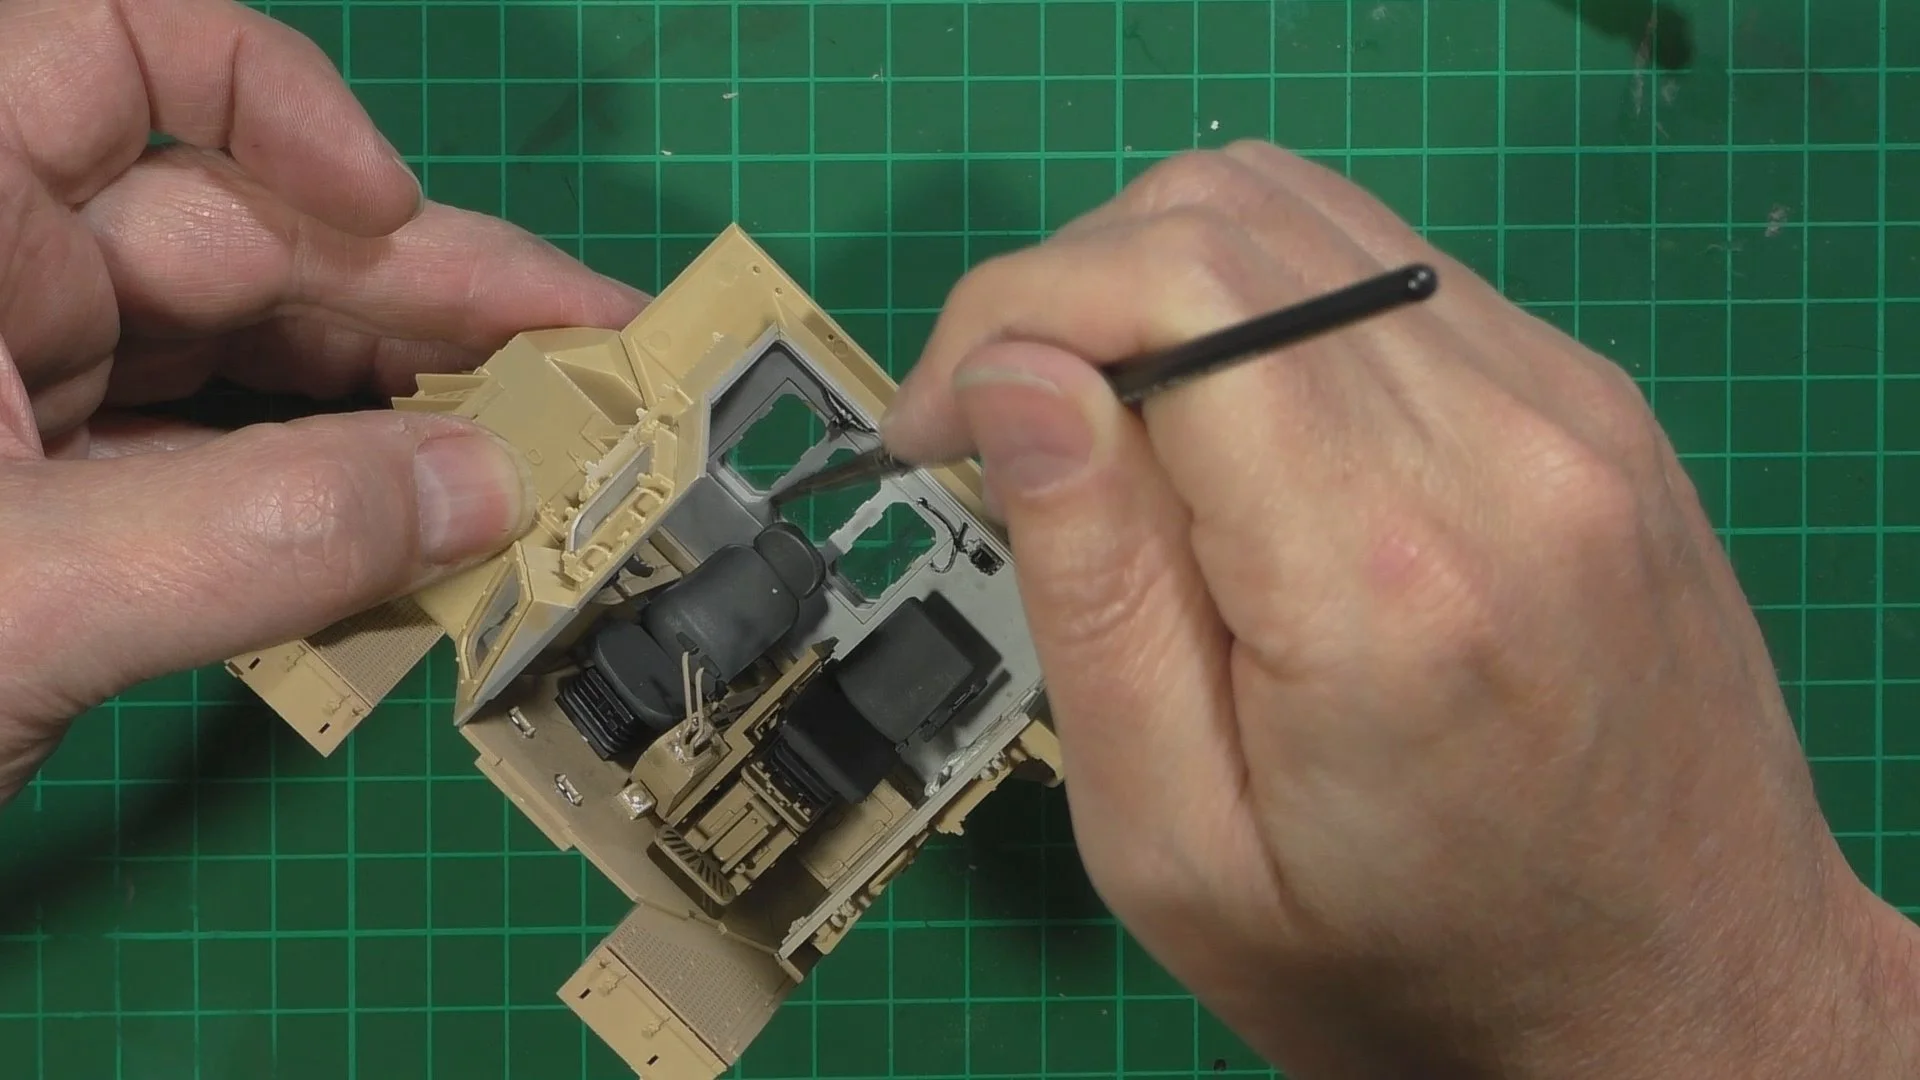
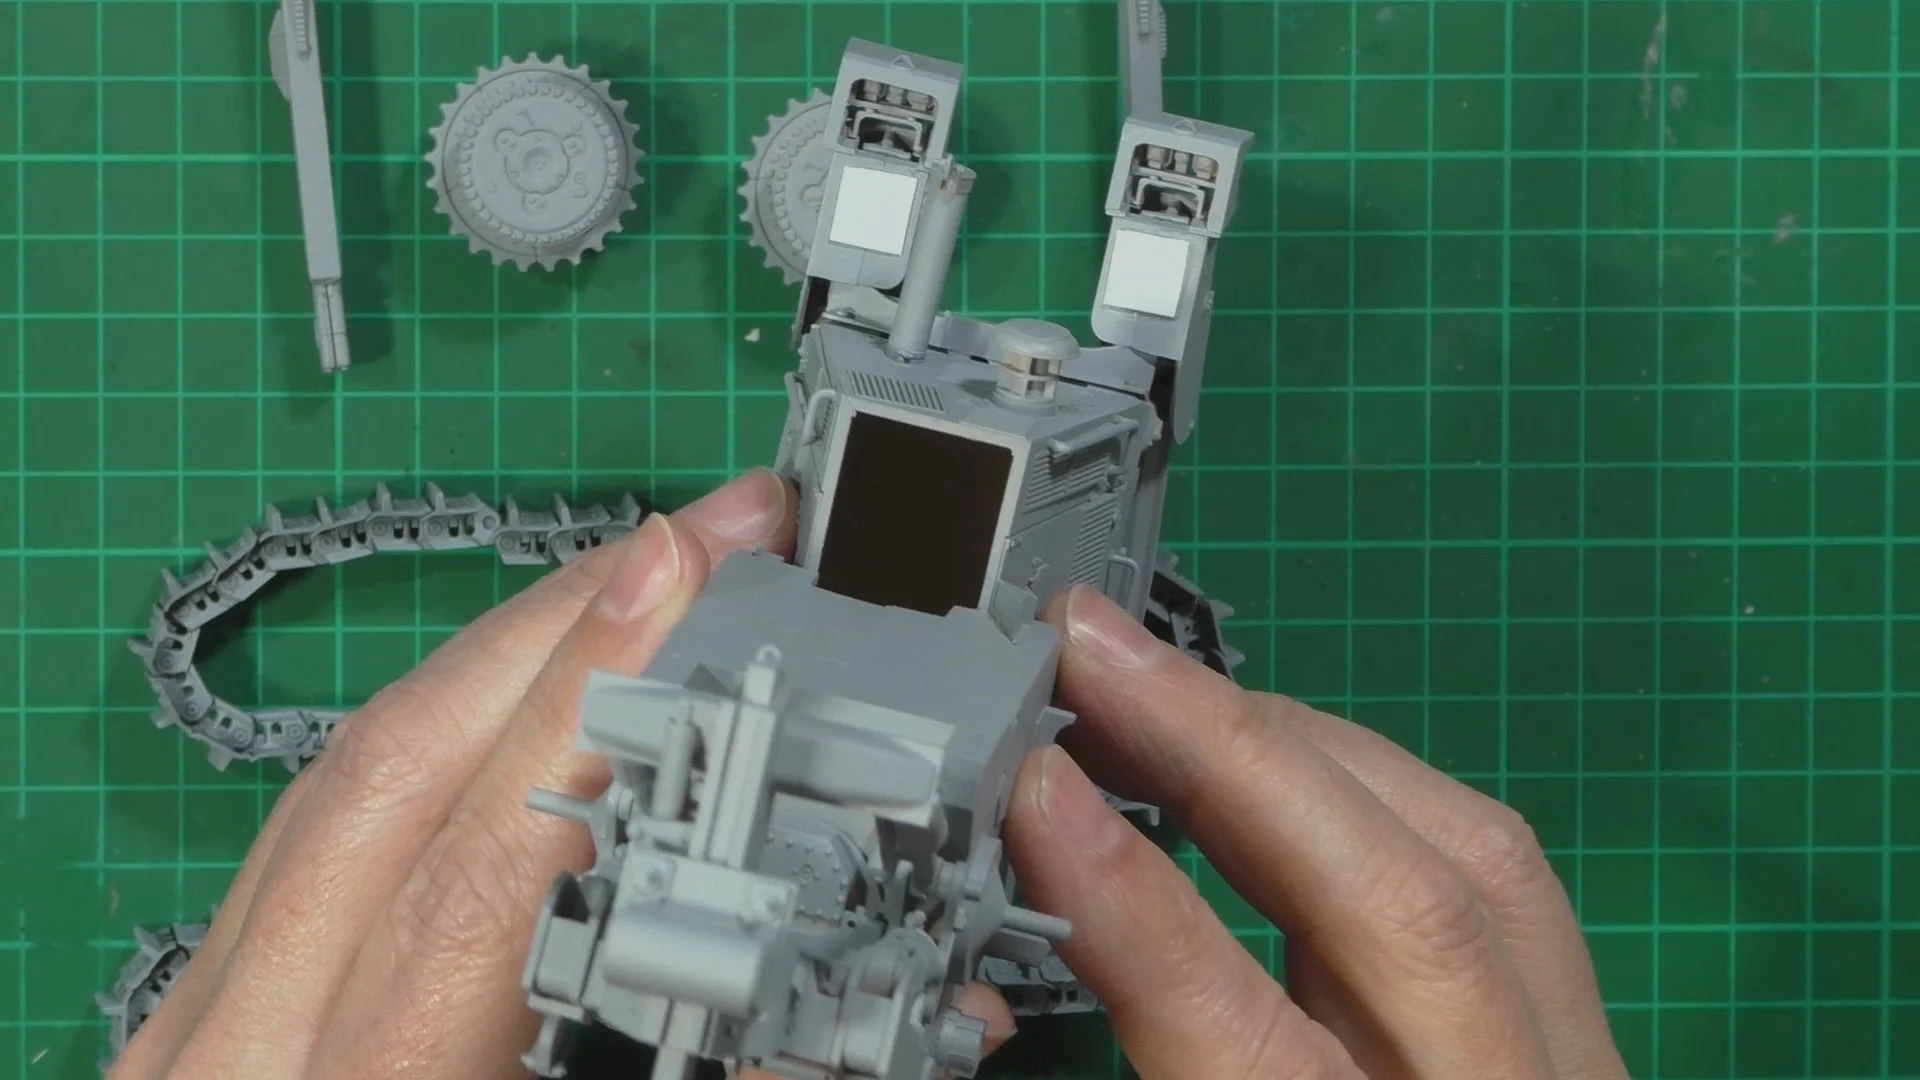
In part two, We move on to the cab area installing the seats and equipment. Next we remove the ejection pin mark and look at the best way to paint the internal framework. We then paint the interior seats etc. and dry brush to add detail.

In Part Three, we continue to work on the cab and add temporarily the clear glass and install the sides and doors. Next we add a thin oil wash to weathering and bring out the details. There is a PE jerry can frame to put together so we use a mouse mat to get a nice curve.

In Part Four, we add all the Bar amour hangers to the dozer. Next we put together the drive sprocket and wheels for the tracks and then test fit.

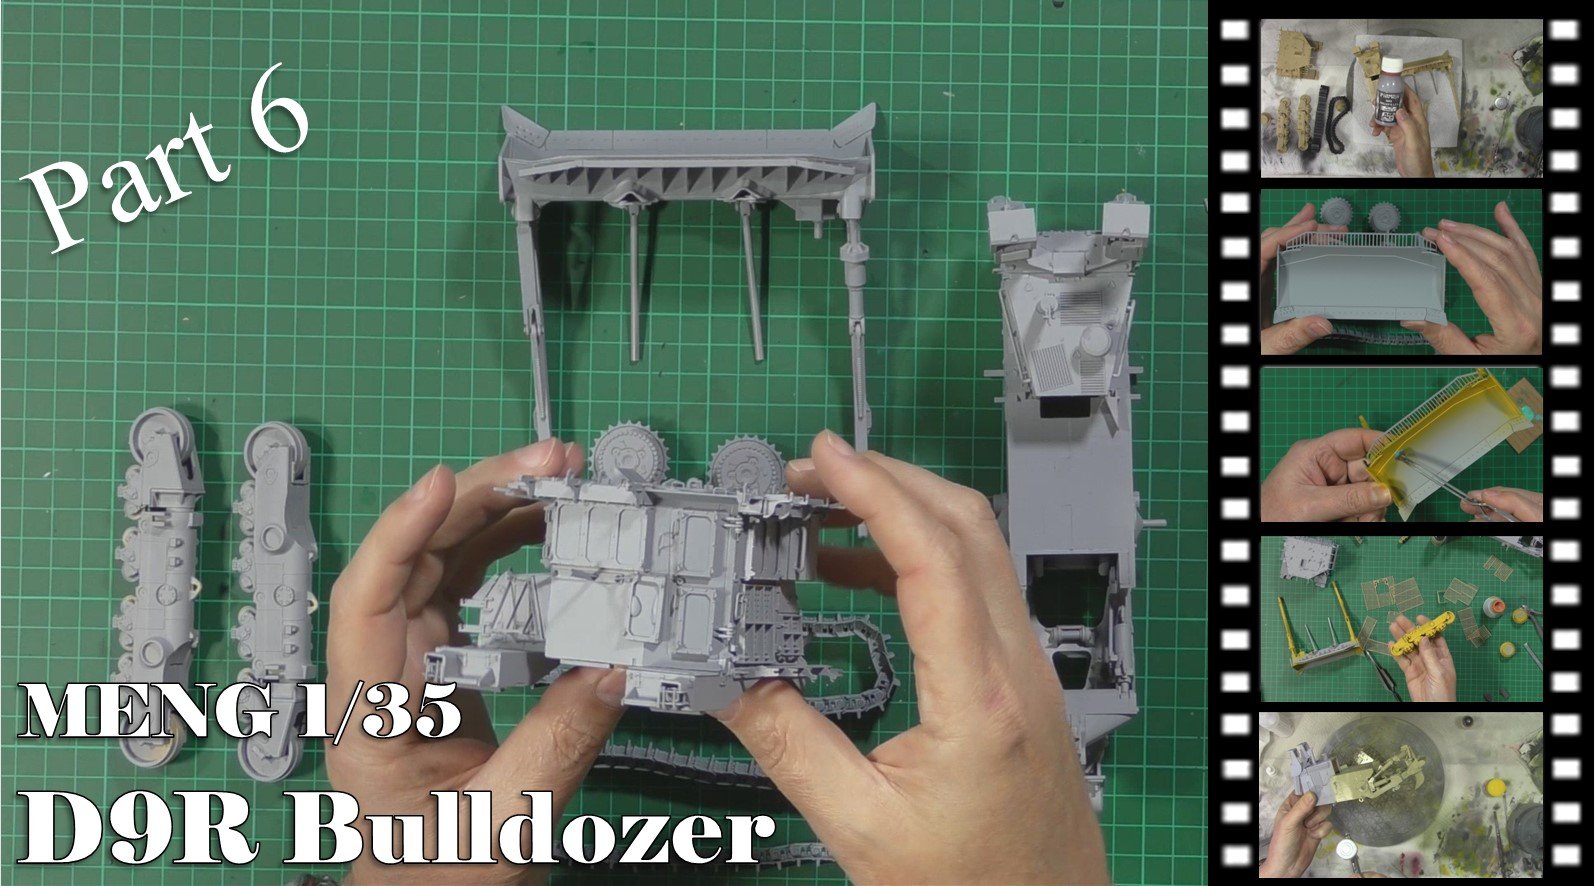
In Part Five, we finish of the construction with the front blade and then add some of the grab handles etc, all read for the primer.

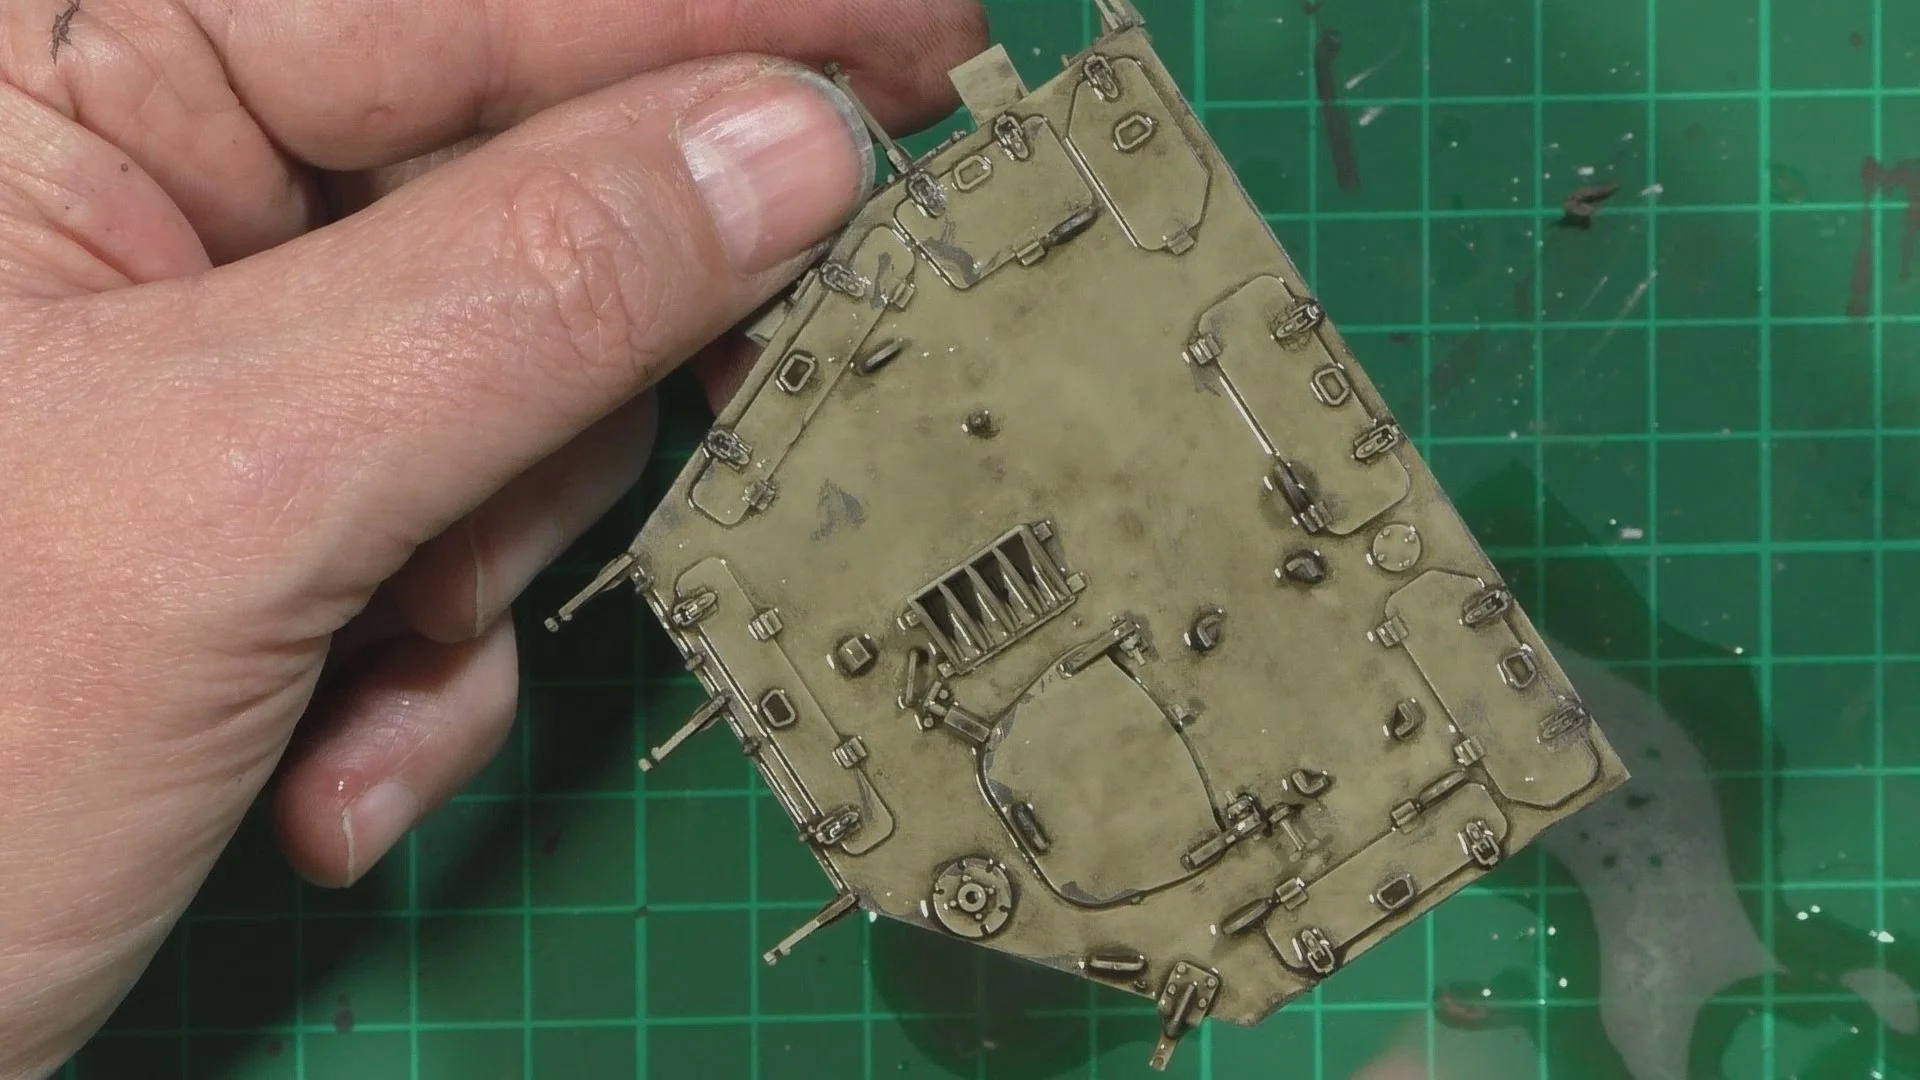
In part Six, it’s time to get the primer coat on so first a light dusting and next a thicker cote followed by the last heavy wet coat and allow to dry. Next we put a coat of Tamiya Yellow down to act as the CAT yellow showing through for chipping and weathering. Last up the top camo color and after a lot of testing, went along with Vallejo’s Hemp.
In part Seven, we start on the weathering with and metal scrub, this is just dry brushing the whole model with dark iron metallizer, We then do the same with buffable metallizers to the dozer blade before picking through the mask oil to reveal the chipping.

In Part Eight, we add a coat of Dark Dirt Wash all over the dozer to add the shadows. Once dry we remove the wash using a wet wash and rinse rather than rubbing off with a cloth. With that all dry we put an acrylic matt coat with AK 3rd gen Matt. Last up we replace the Clear parts with the Armored tinted glass.

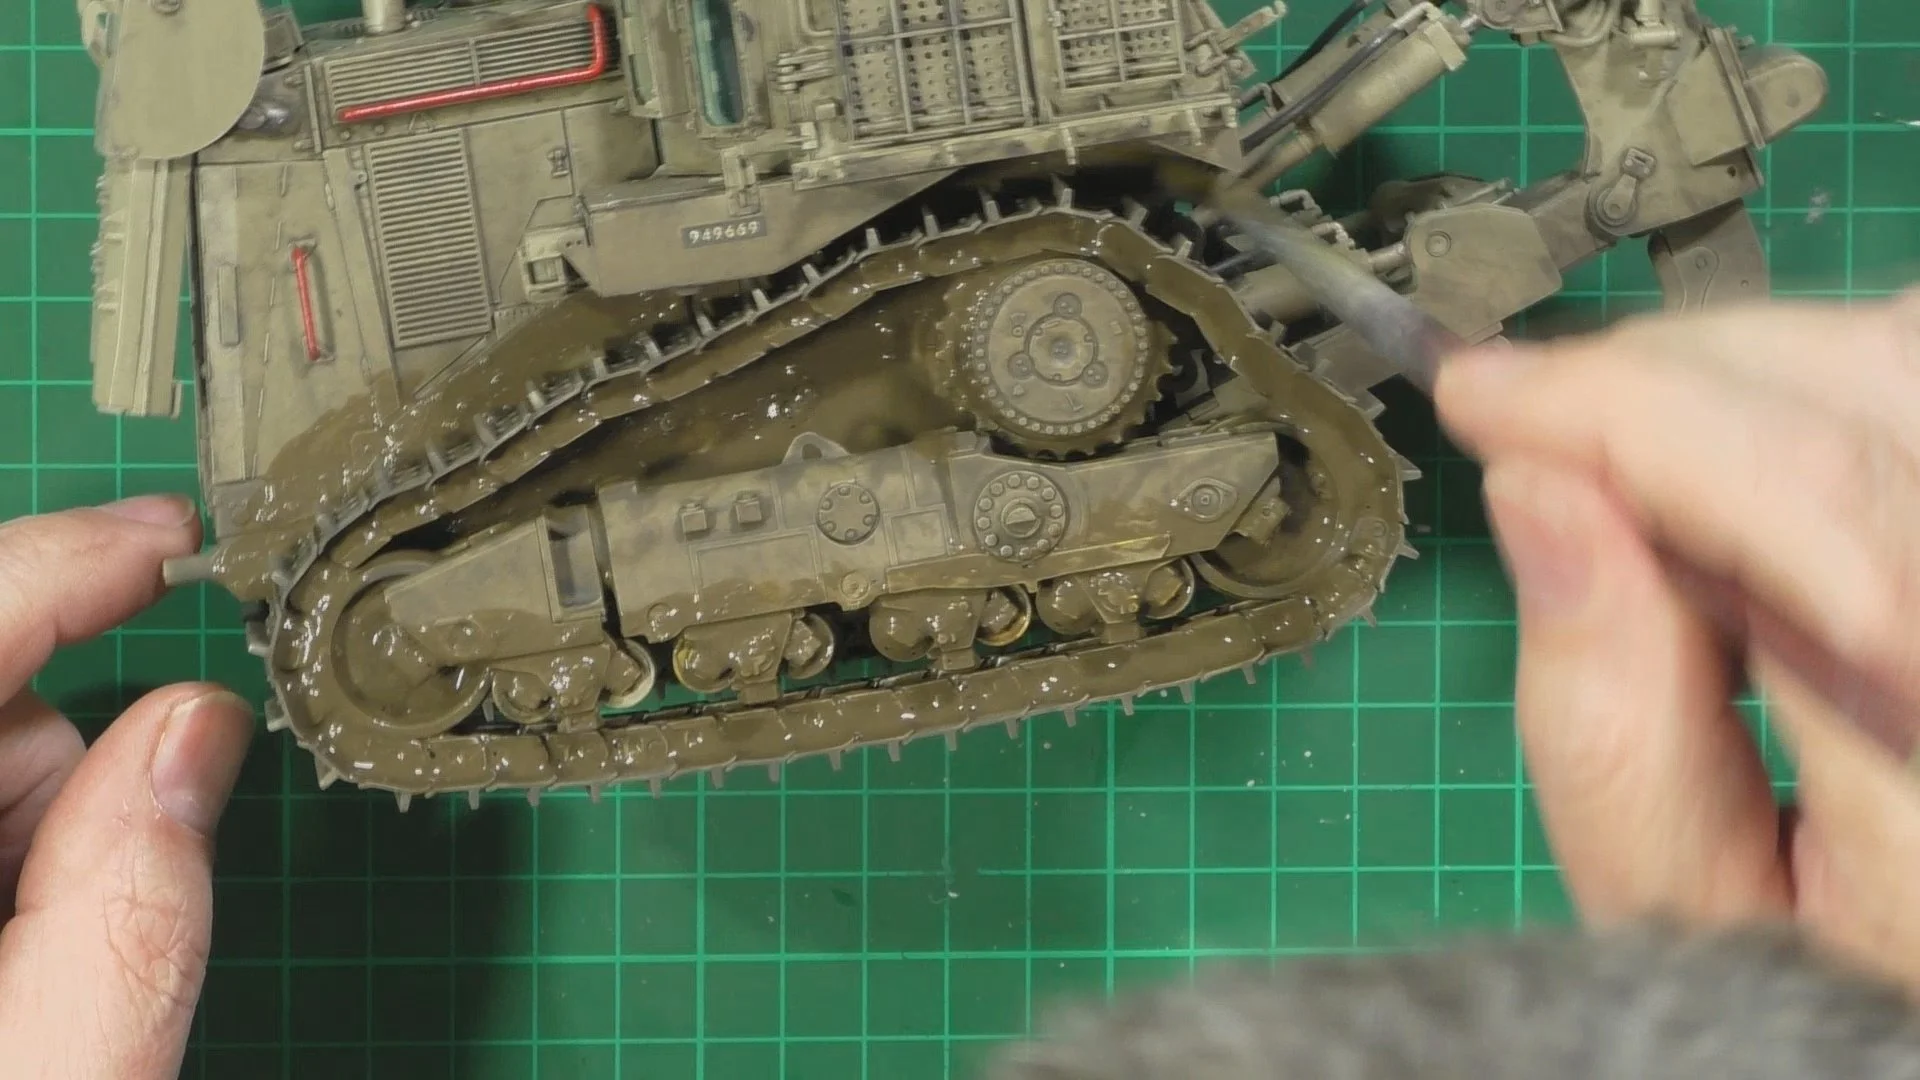
In Part Nine, we get the tracks ready for fitting and add the hand full of decals. Next we move on with heavy weathering using the Thick weathering wash Grime. Once dry the wash is tougher than the original wash and can be sanded or scrapped off as well as re hydrotreated with water and wiped away.

In part Ten, we rub back the thick wash and chip and wear the grime off. Next the final wash coat with the Dust wash, which is great for dust and rain marks. We start with the oils by dry brushing the model to highlight the edges and then use oils for streaking. Lastly, we make a thin oil wash for leaks and stains.

In The final Part of the build, we finish off the weathering with pigments and then thick wash and pigment mix to make a thick wash for flicking around with an old toothbrush. Last up we fix all the loose parts in place ready for the final reveal.