VC-10 C.1
Scale: 1/72
Manufacturer: Mach 2
Parts used: out of the box with plenty of changes and scratch building.
Main paints used: Tamiya and Xtreme Metal
In part one, we look at the build ahead and the changes we need to make to turn this kit into the correct version of the VC-10. we then look at the areas that need to be fixed and as we are making this an in flight display then close up the gear doors.
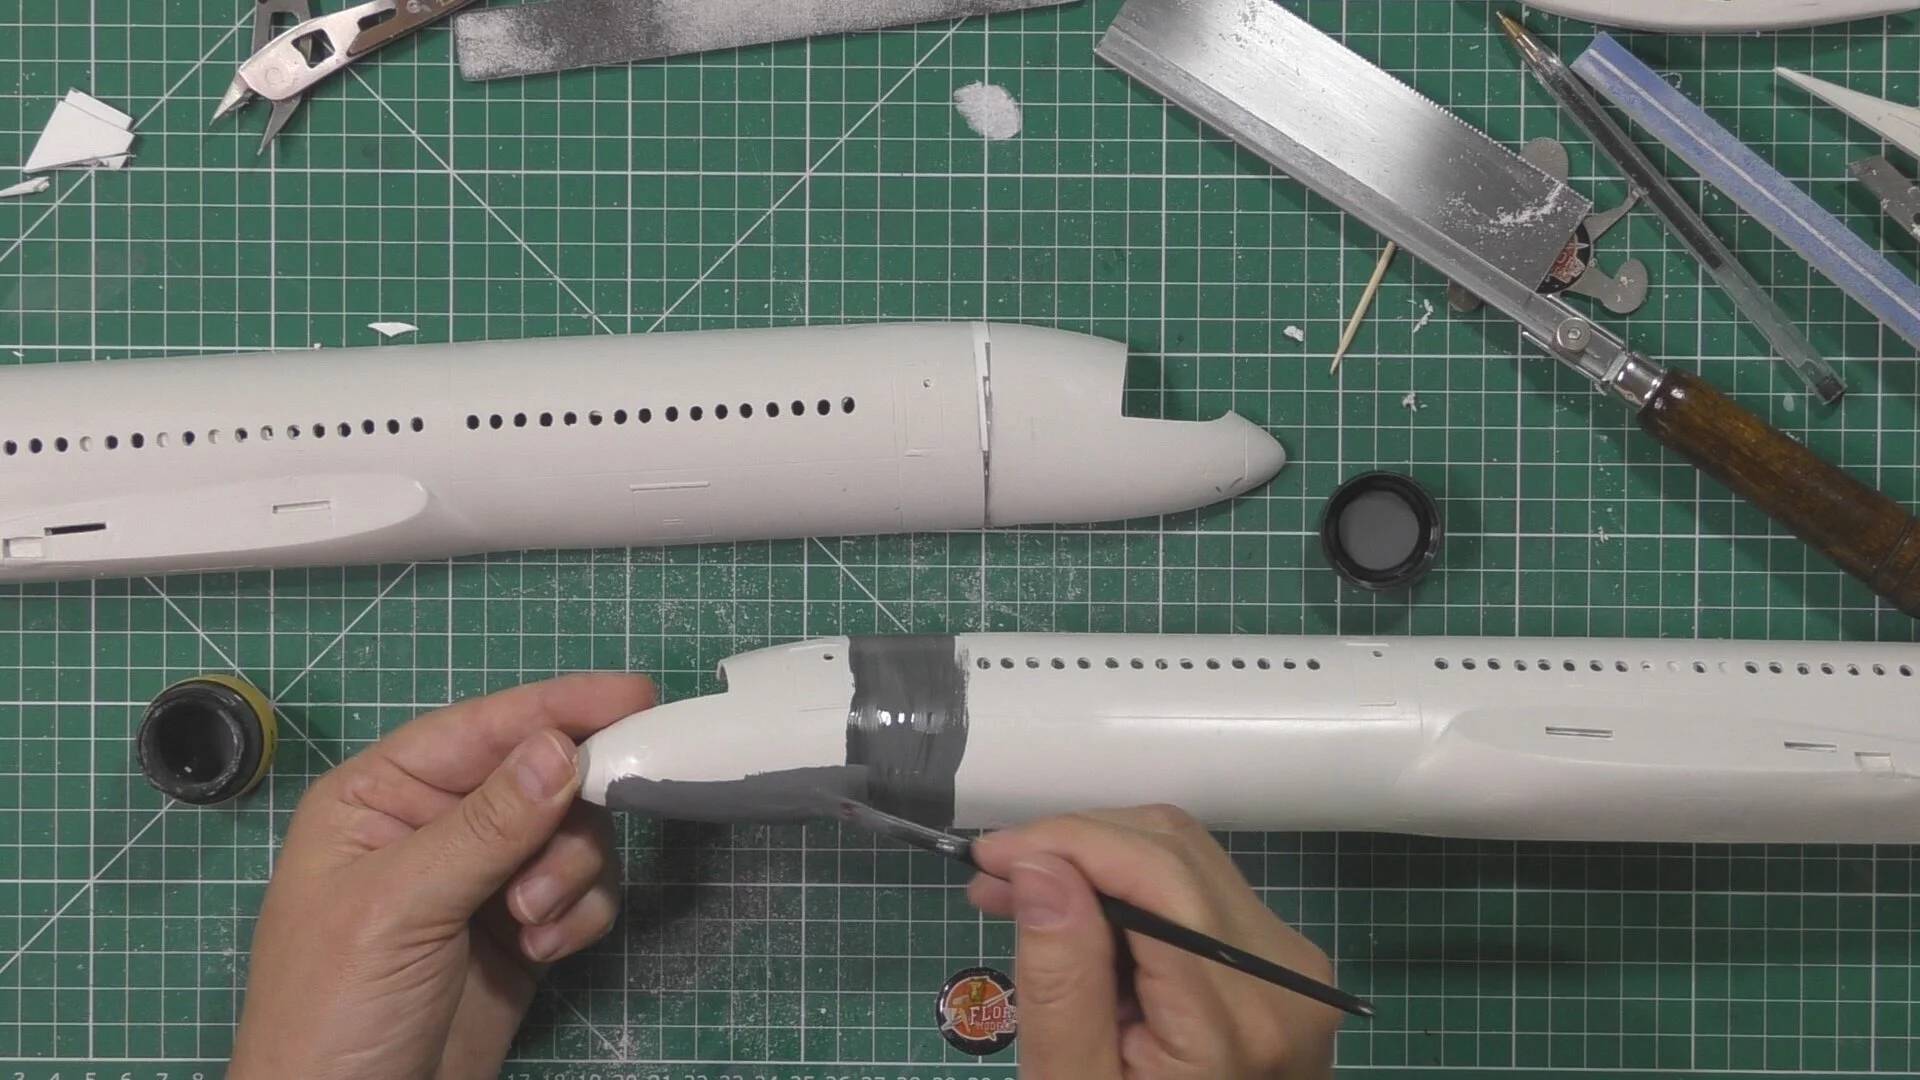
In part two, we start the conversion and cut off the front of the fuselage and work out the packing required to drop the nose by 9mm to give the nose the correct profile. We the sand and fill before looking at reshaping the tail to again give it the correct profiles.
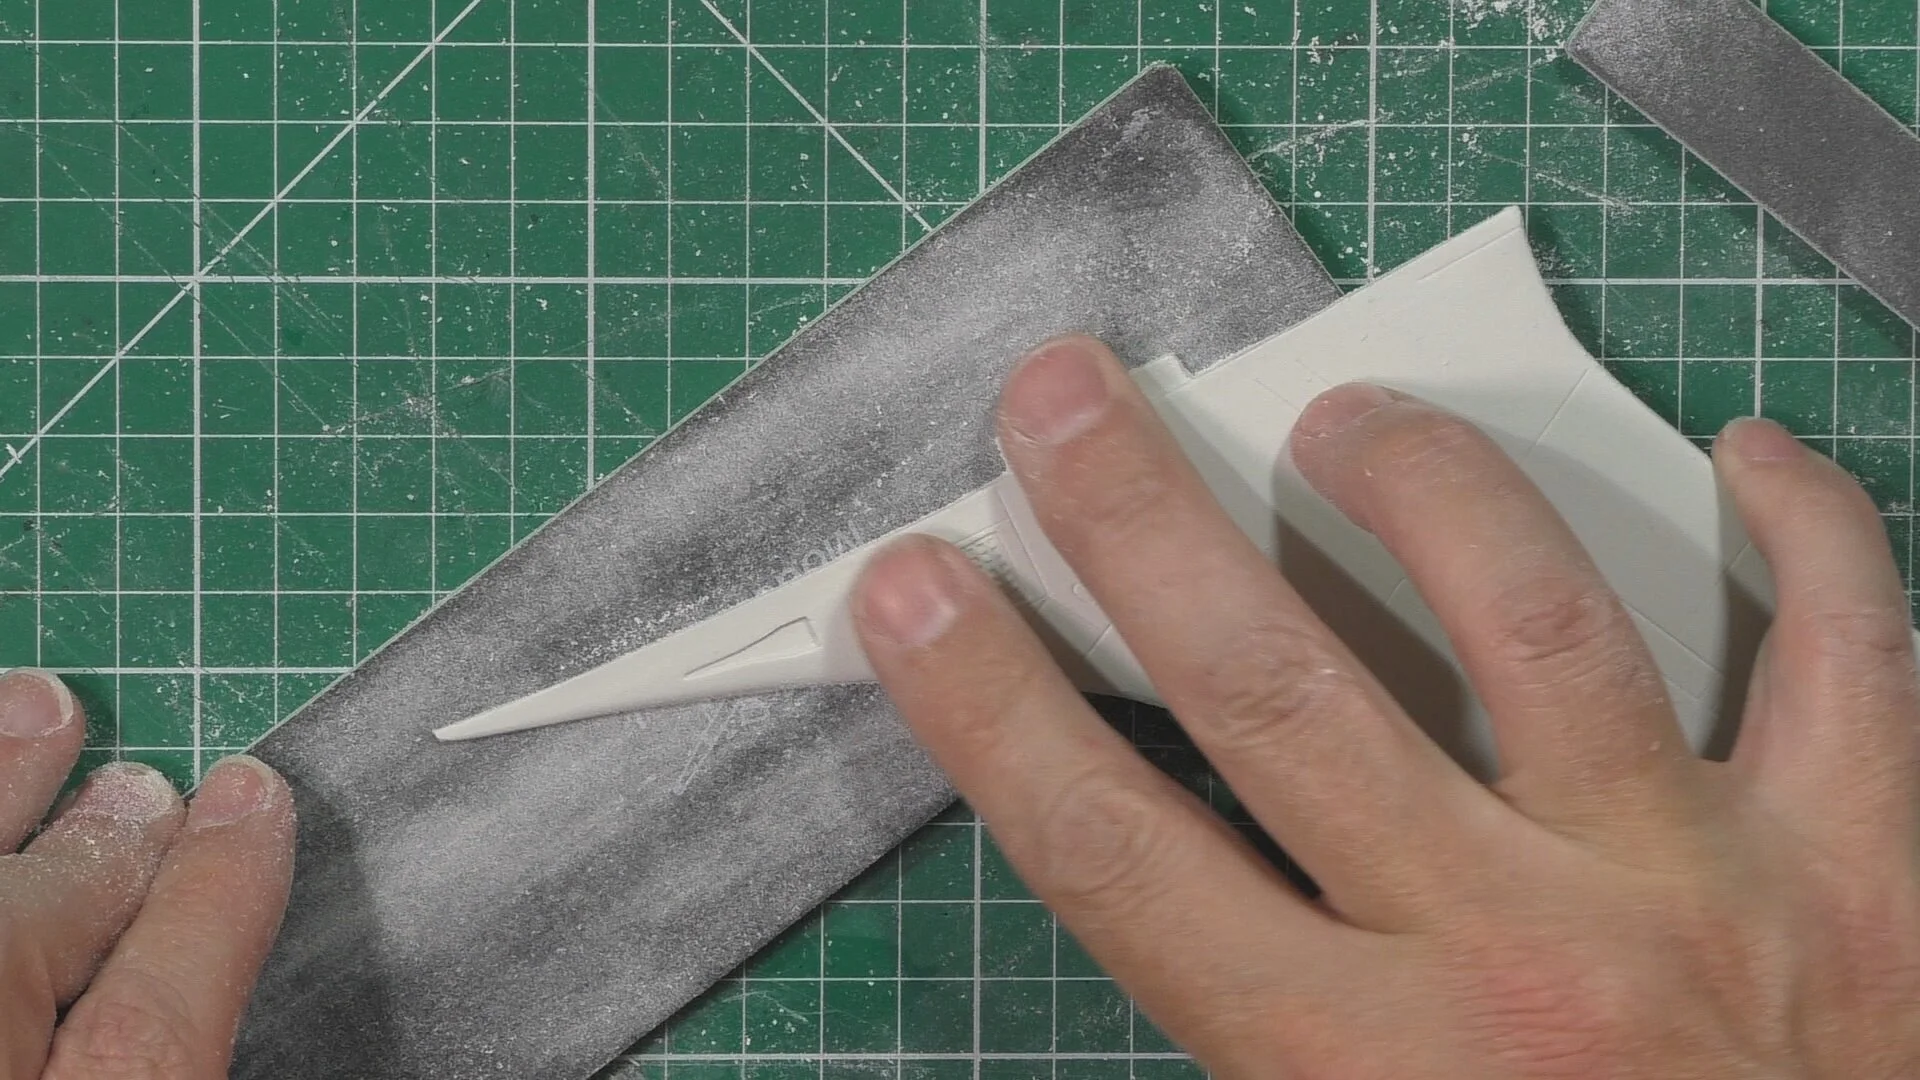
In part three, we move into the filling and sanding and look in-depth at the when and where to use filler. Then we start the sanding and showing the techniques to get that perfect finish.
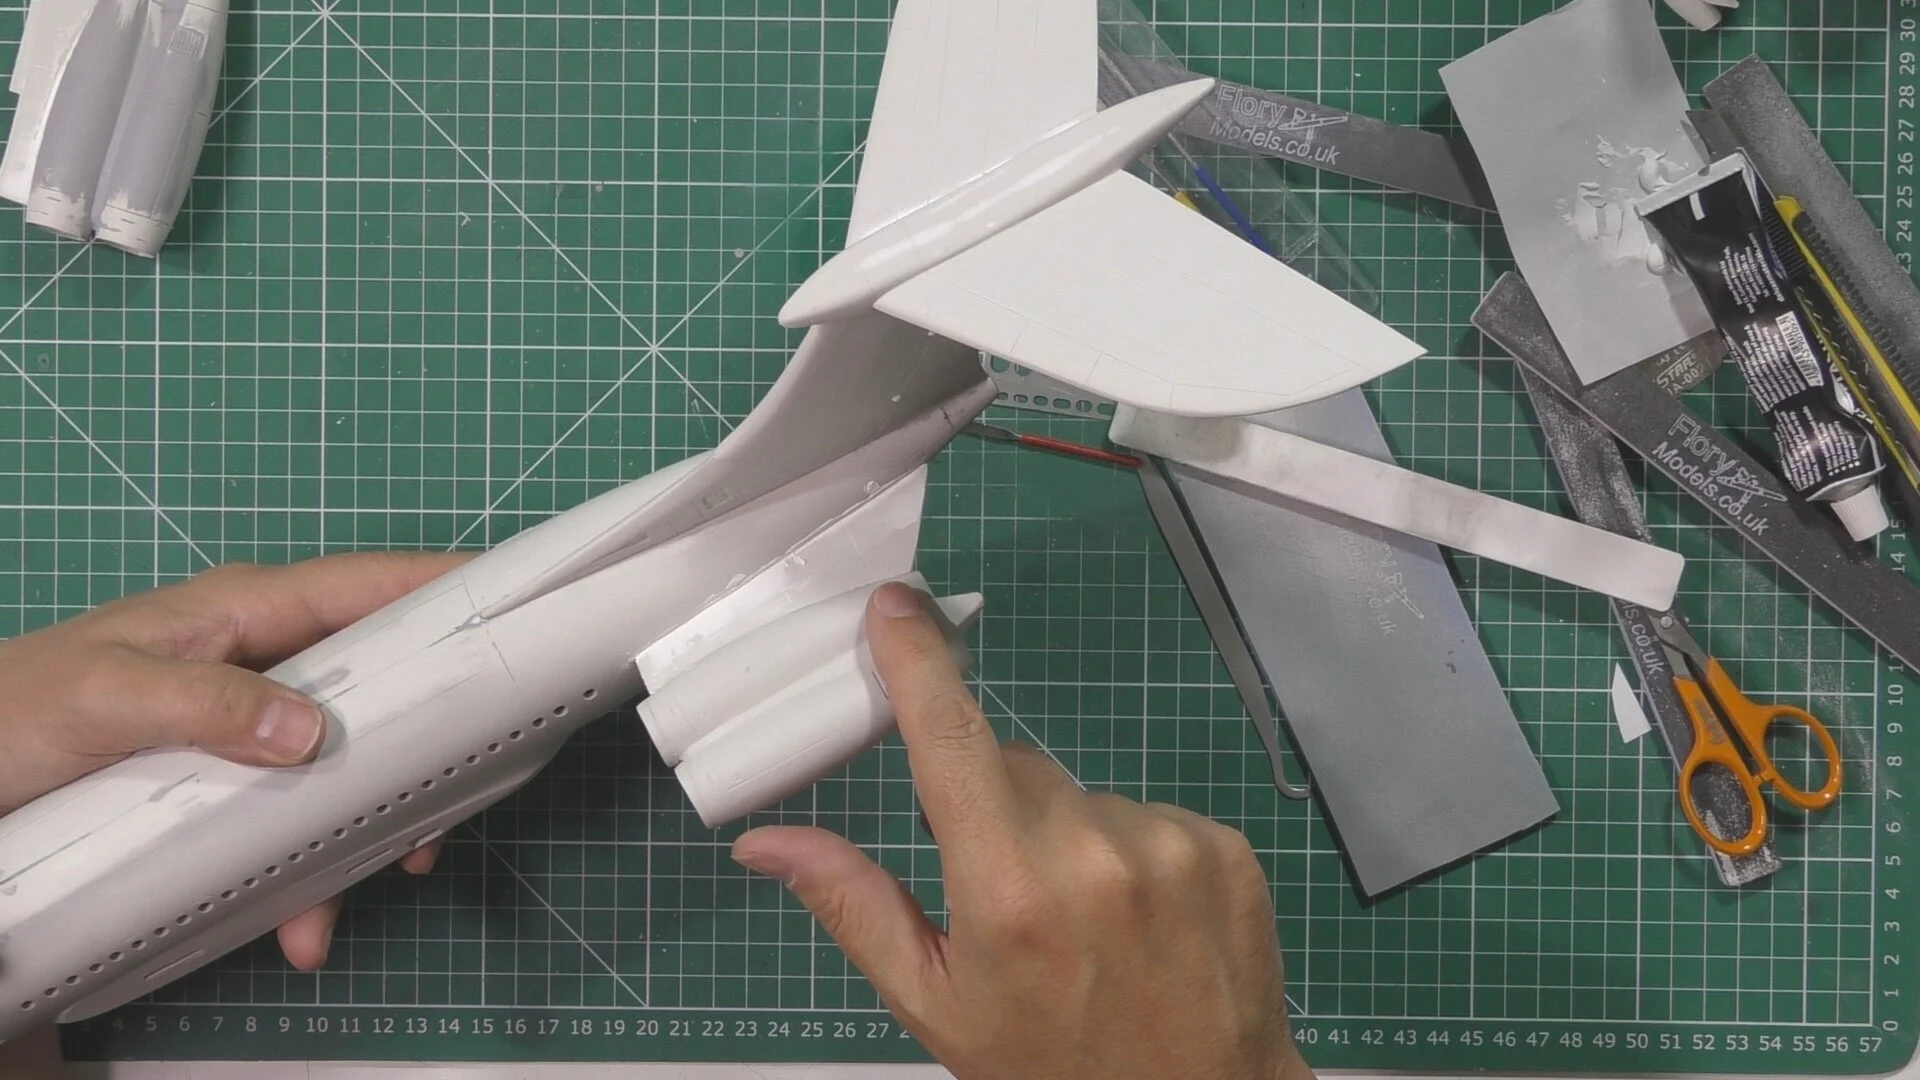
In part four, we look at the wings and then use different types of scrape cleaning to reshape and clean up the edges simply and cleanly. Next it's over to the tail and fill some nasty gaps with plasticard. Then the big moment where we attach the cockpit glass and fill for re-profiling.
In part five, we add access ports to the tail and re-scribe the details back in before installing the tail to the fuselage. Then it’s back filling and sanding to get the profile of the front of the VC-10 better. Next it’s into the spray booth where the whole model gets a coat of primer.
In part Six, we polish the cockpit glass and the options in ding that and then make some masks up by tracing some cockpit glass from a smaller kit. Next it’s re-scribing and adding detail that we lost before adding our own scratch build raised detail to the surface of the model.
In part seven, we blend in the details we added with plasicard and then attach the wing and check alignment. Next we cut out the slot for the in flightstand into the bottom of the fuselage.
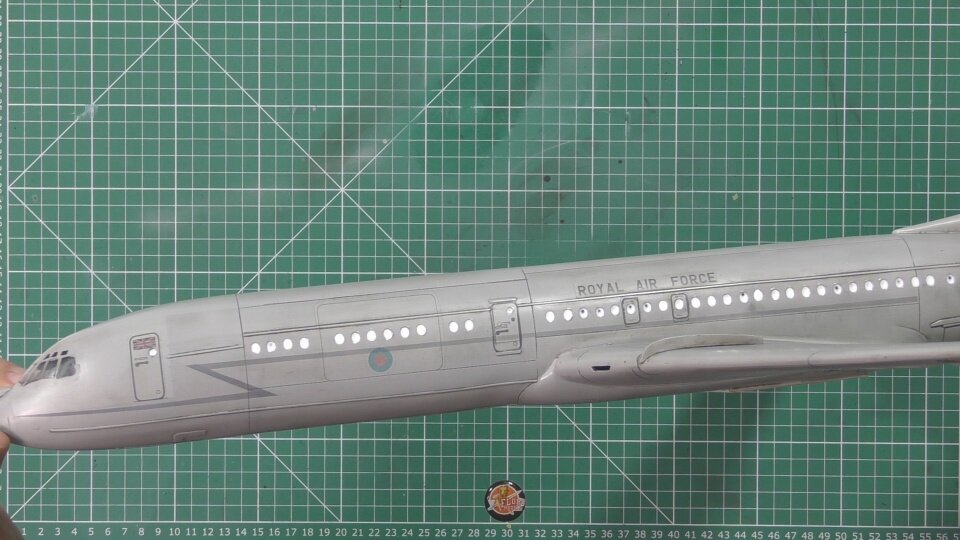
In part eight, we start on the paint stage with pre-shading with black and talk about the pros and cons to pre-shading and then get the main barley gray color on. We use Mr Hobby H334 for this. Once dry with lighten the gray with a mix of barley gray with flat white to fade out the panels and to give depth the paint work.
In part nine, we paint on the gray flash to the fuselage and decal adding the doors to the models before replacing the intake fan blades with a simple bold and two-part resin.
In part ten, we add a 1mm plasticard plate to strengthen the stand area. We then fit the fan blades we made to the engines and then used Aluminum foil for the intakes. Next a Wash of Dark dirt 75% and 25% Black wash was put over the whole VC-10.
In part eleven, we add the eyebrow windows to the cockpit and then start work on the oil weathering with 502 and AK oils with Tamiya X-20 enamel thinners.
In part twelve, we make the windows with PVA glue and then work in the refueling baskets and hoses. Next we add all the small parts ready for the final reveal.