Viking S-3
Scale: 1/48
Manufacturer: Italeri
Parts used: Black Dog resin sets
Main paints used: AK Real Colors
In part one, we look at the build ahead and then start cutting the kit parts to replace with the resin aftermarket sets and the different ways this can be done.

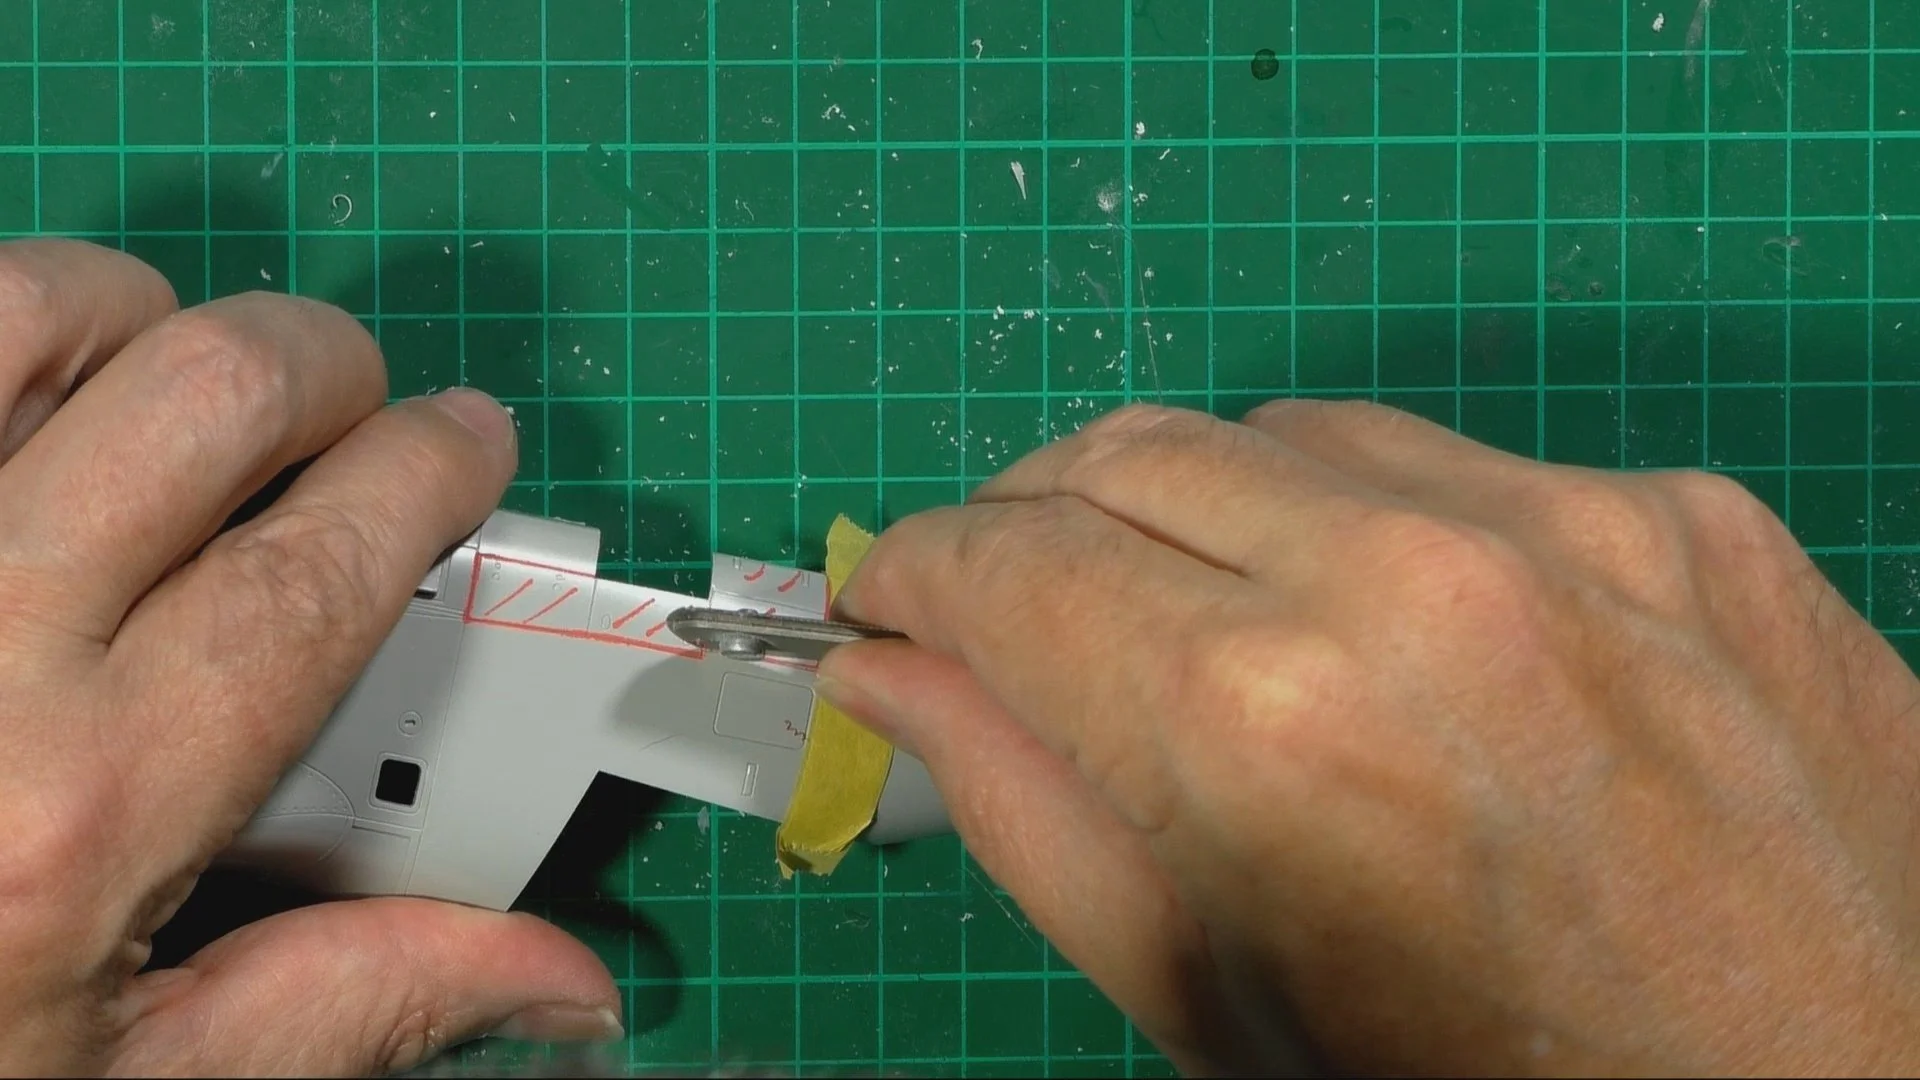
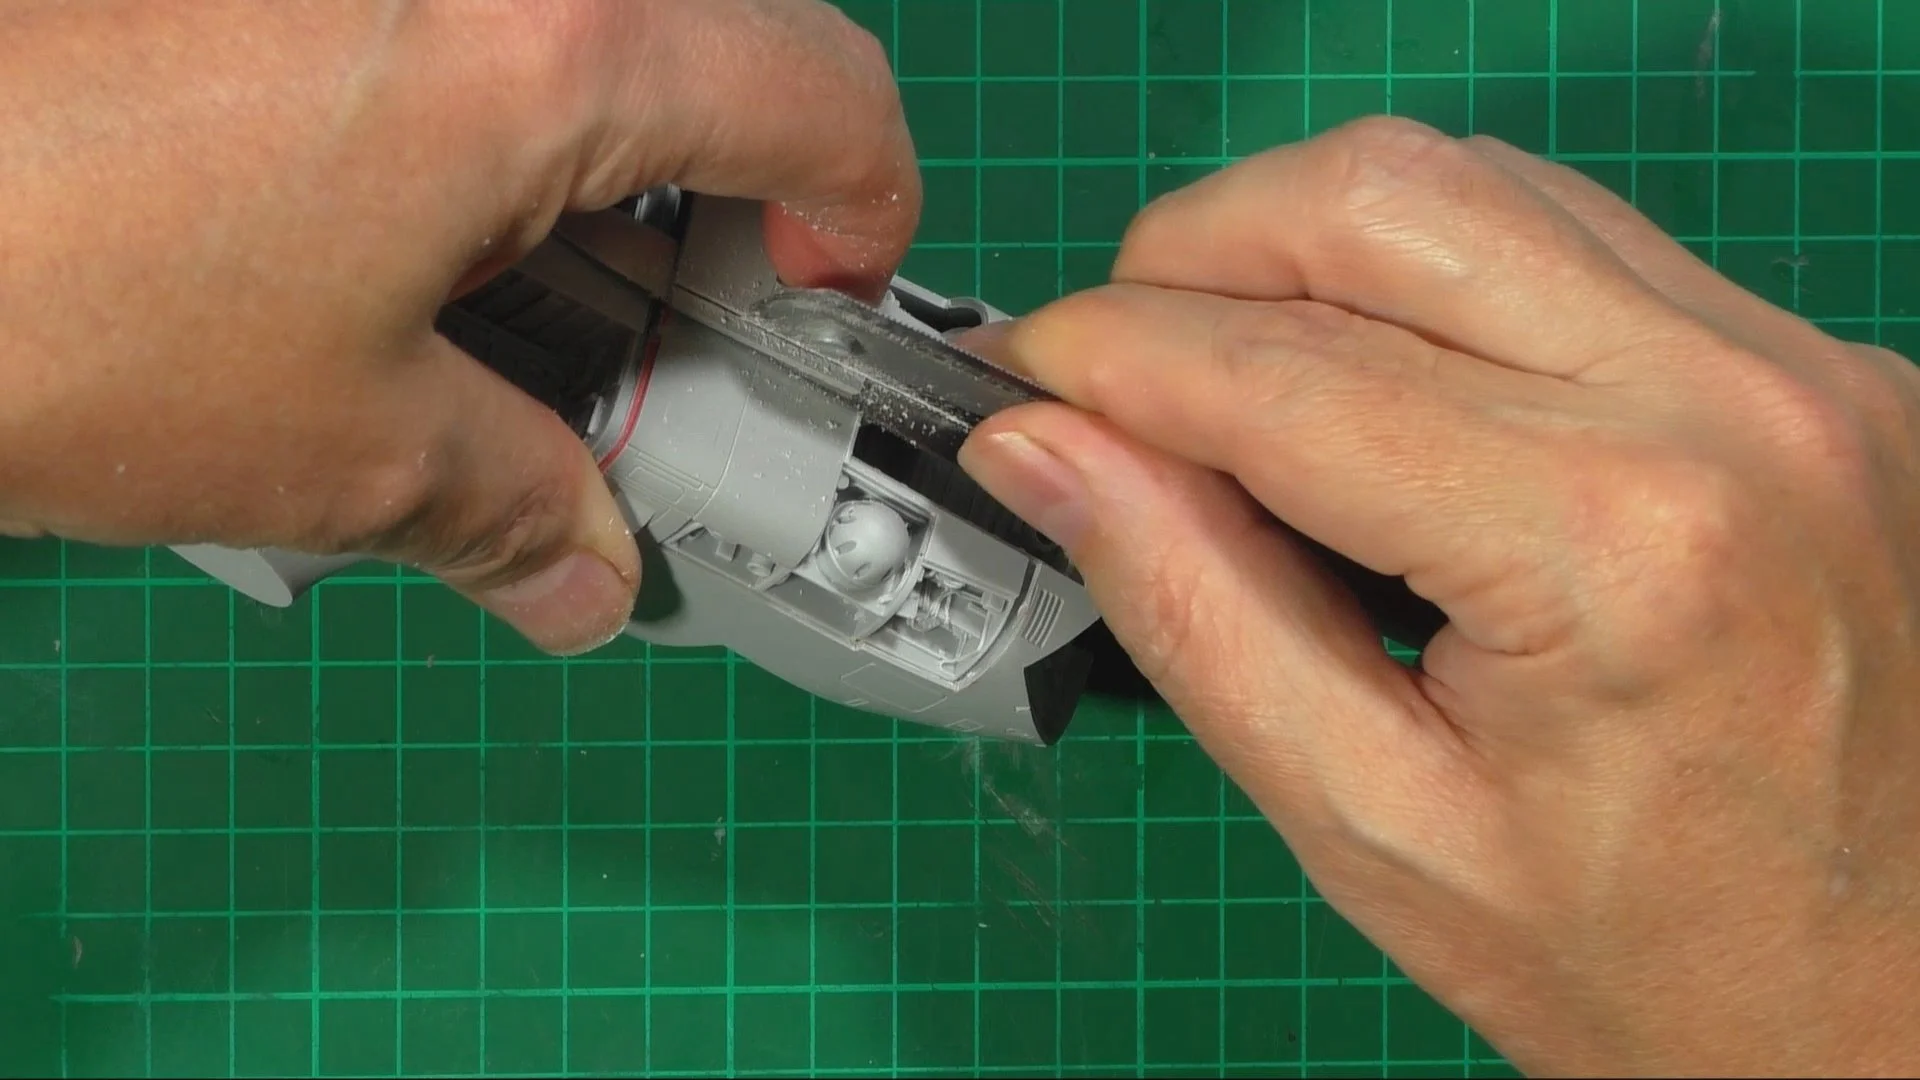
In part two, there’s more cutting and trimming to get the resin parts into the Viking. Not all goes well so we look at how to make it all fit the easiest way. we also look and the ways to glue resin to the plastic and also what to do when it goes wrong !!

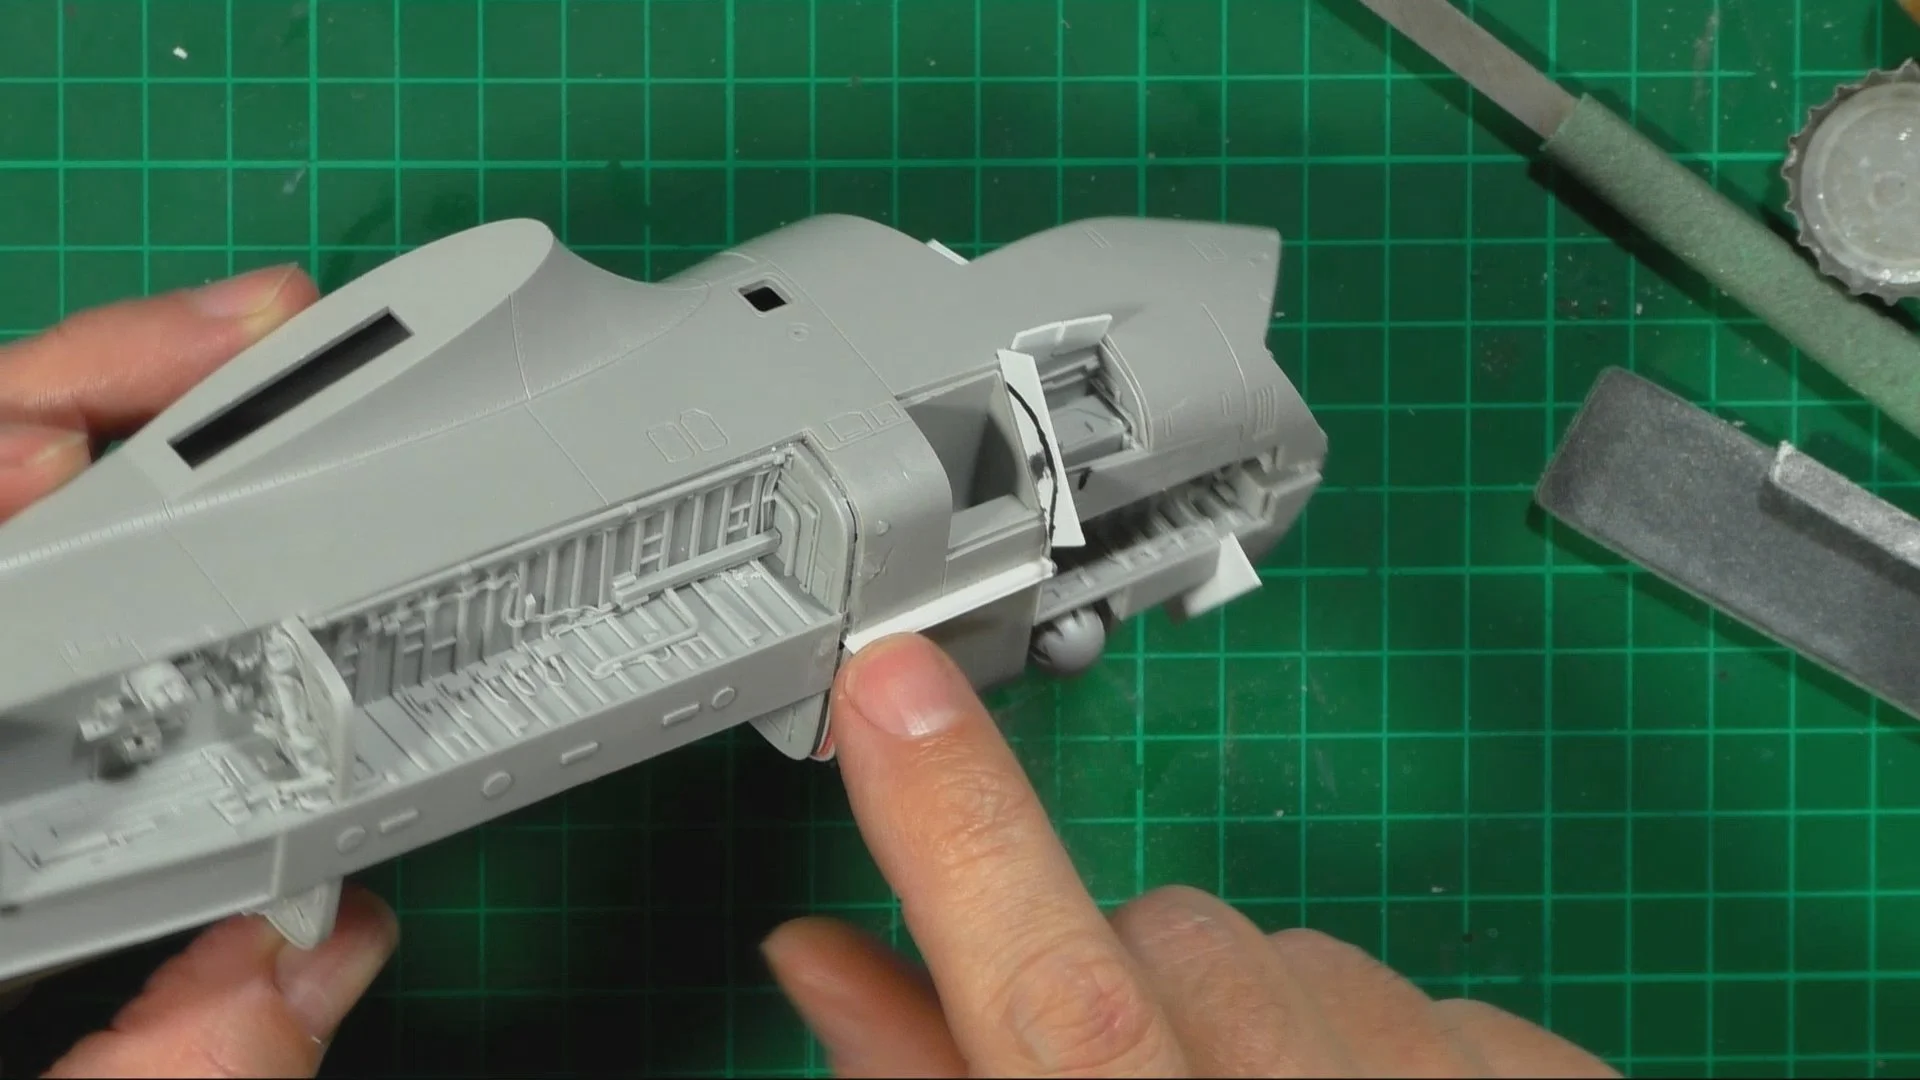
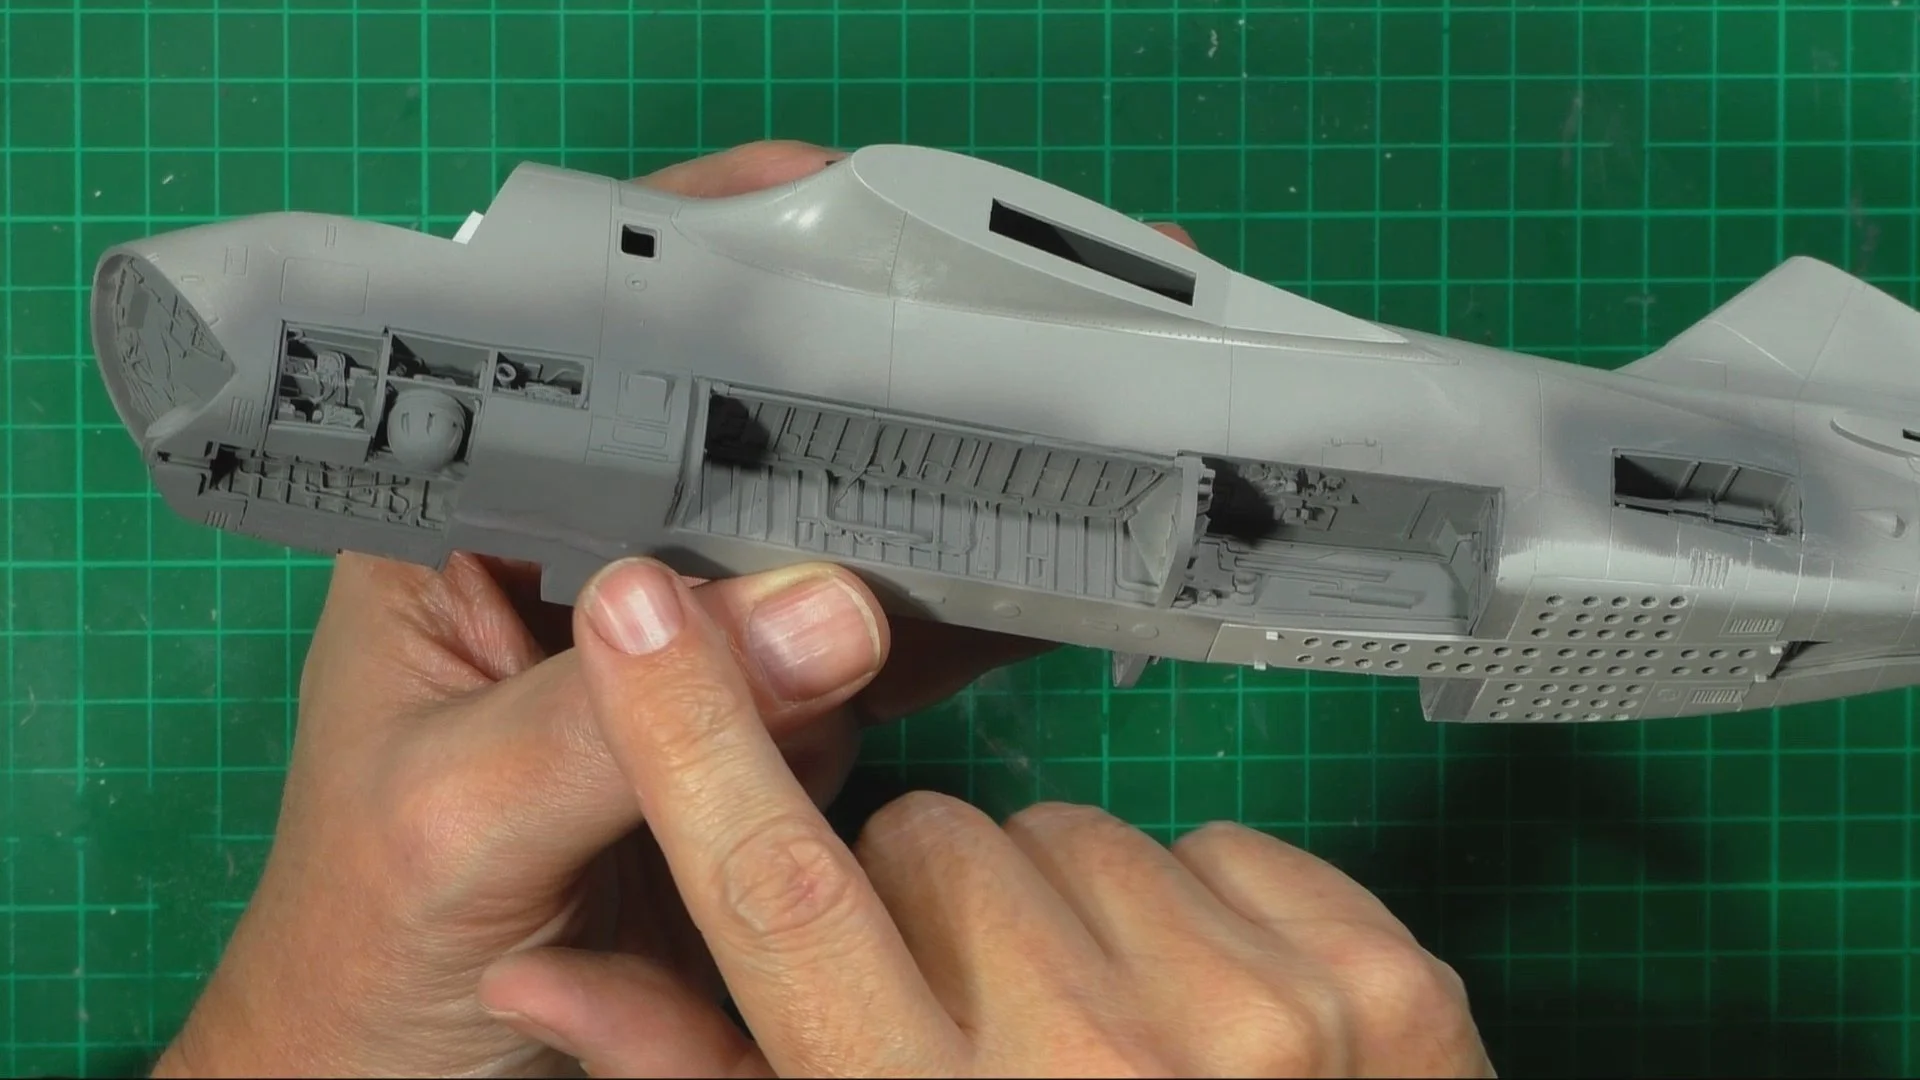
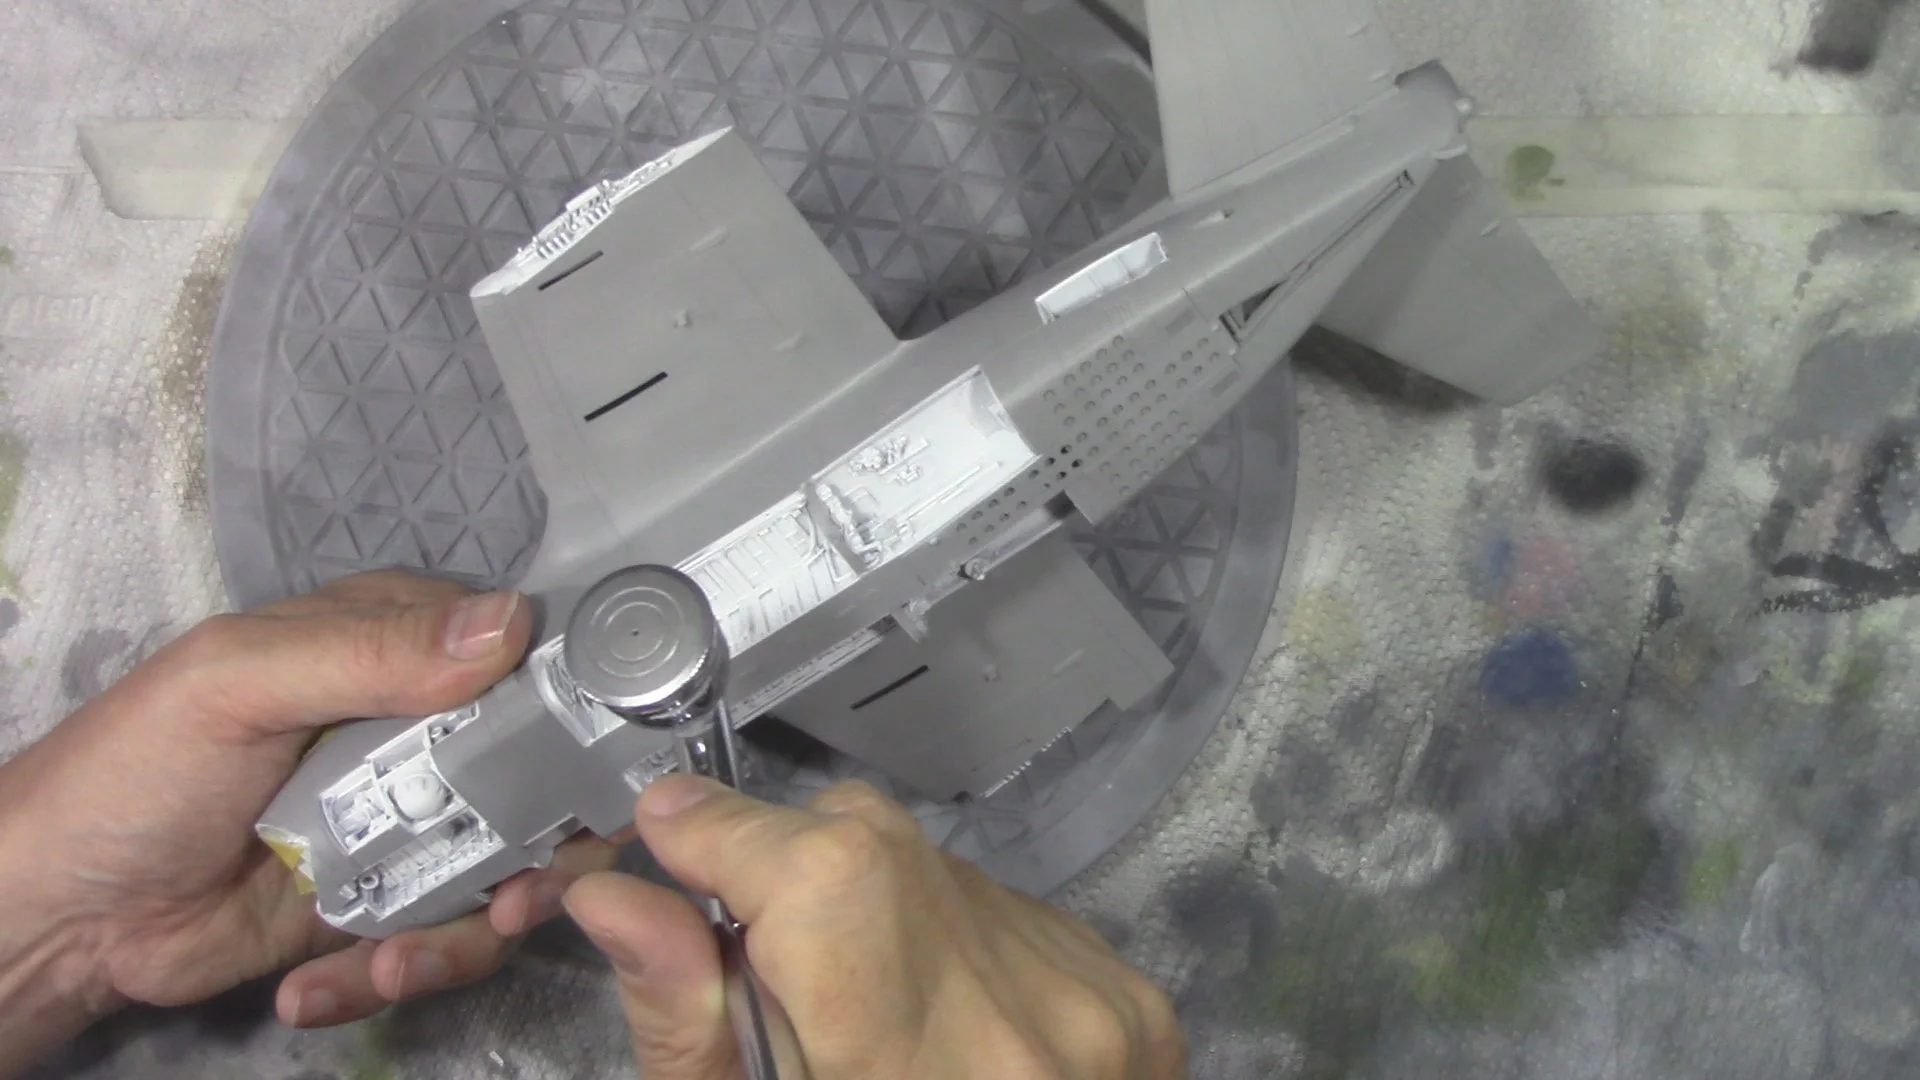
In part three, we take some surgery to the kit to get the resin all to fit in. Then we use plasticard to fill and shim the gaps left over or in my case made. Next, it’s time two cut the tail and wings for the folds and to see if they fit?? Spoiler…. They dont !!

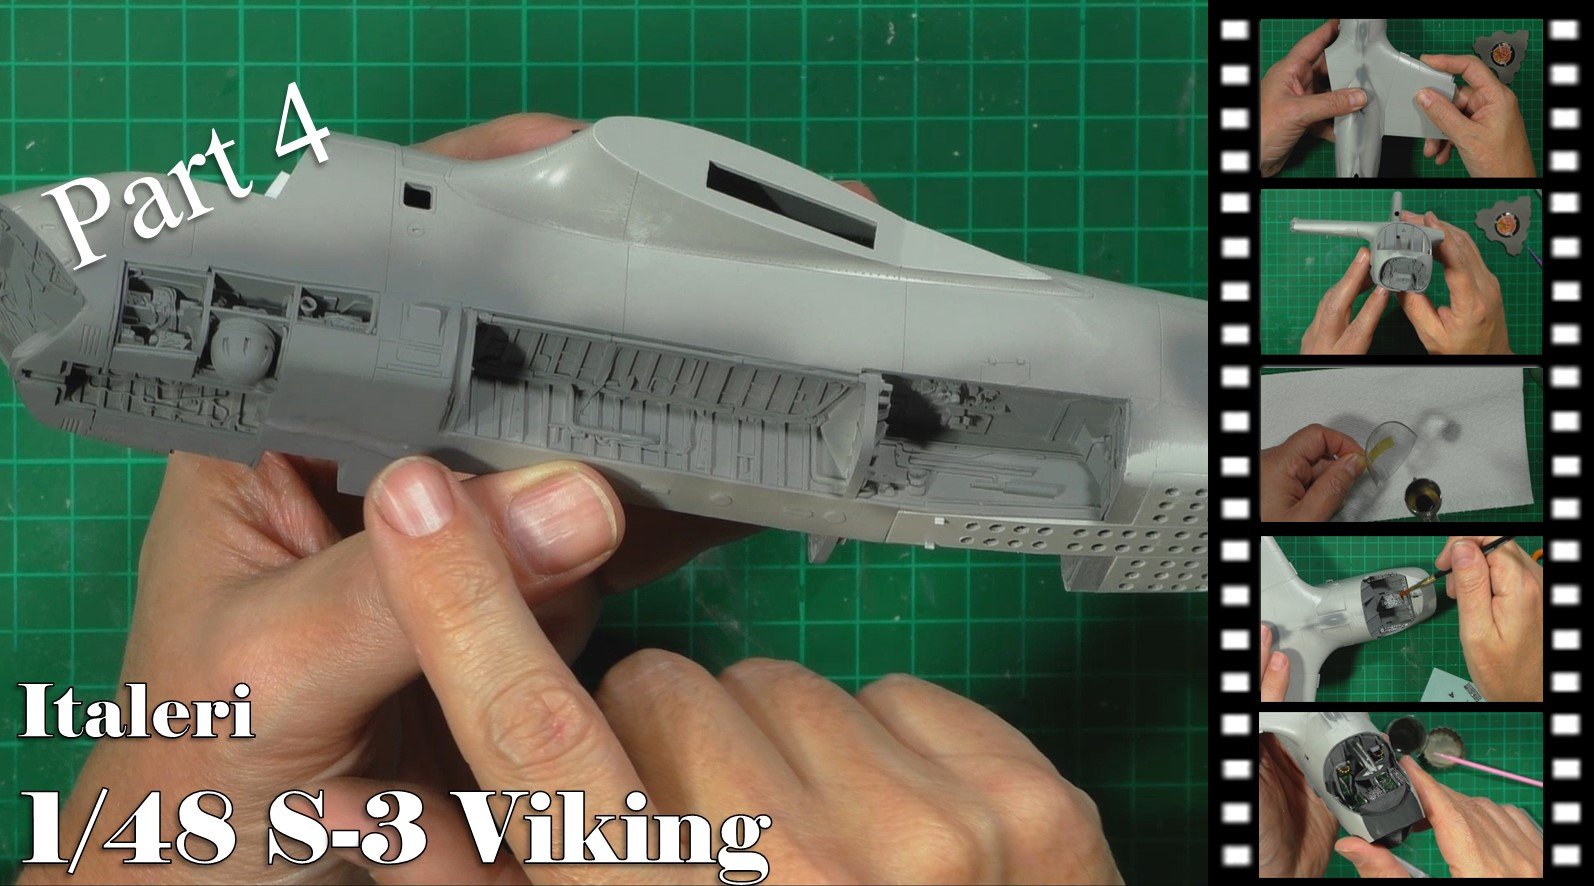
In Part four, we check the fit and seams of the resin parts so we give a primer coat to see. Happy with that it’s time to add the wings and the tint to the canopy, this doesn’t go to plan as there is a silver fleck in the airbrush left over from a previous use. Next it’s time to work in the cockpit, as this won't be sean much I just use the kit's very poor decals and add some scratch build harnesses for the seats.
In part five, we re-paint the smoke tint for the canopy and fix it into place. Next, we build the engines and here we find they don't go together well and look closely at how to fix the problems. Then it's time to put down flat black to see how the canopy fits and the fill and sand to get a sharp finish. Last it's finally time to get the primer on and make sure we have no problems.

In part six, we take care of a few marks around the canopy, fill, and sand. Then it’s time to re-scribe and re-rivet the entire model and here we look at the different ways to do this.

In part seven, It’s time to move into the paint stage. Here we get the base coat down of Gull grey (light ghost grey will follow) and then mask up for the white for the bays. We use a mix of LP2 and LP4 Tamiya for a satin finish. Last we see a flaw in the paint work so we take care of the that before moving on.

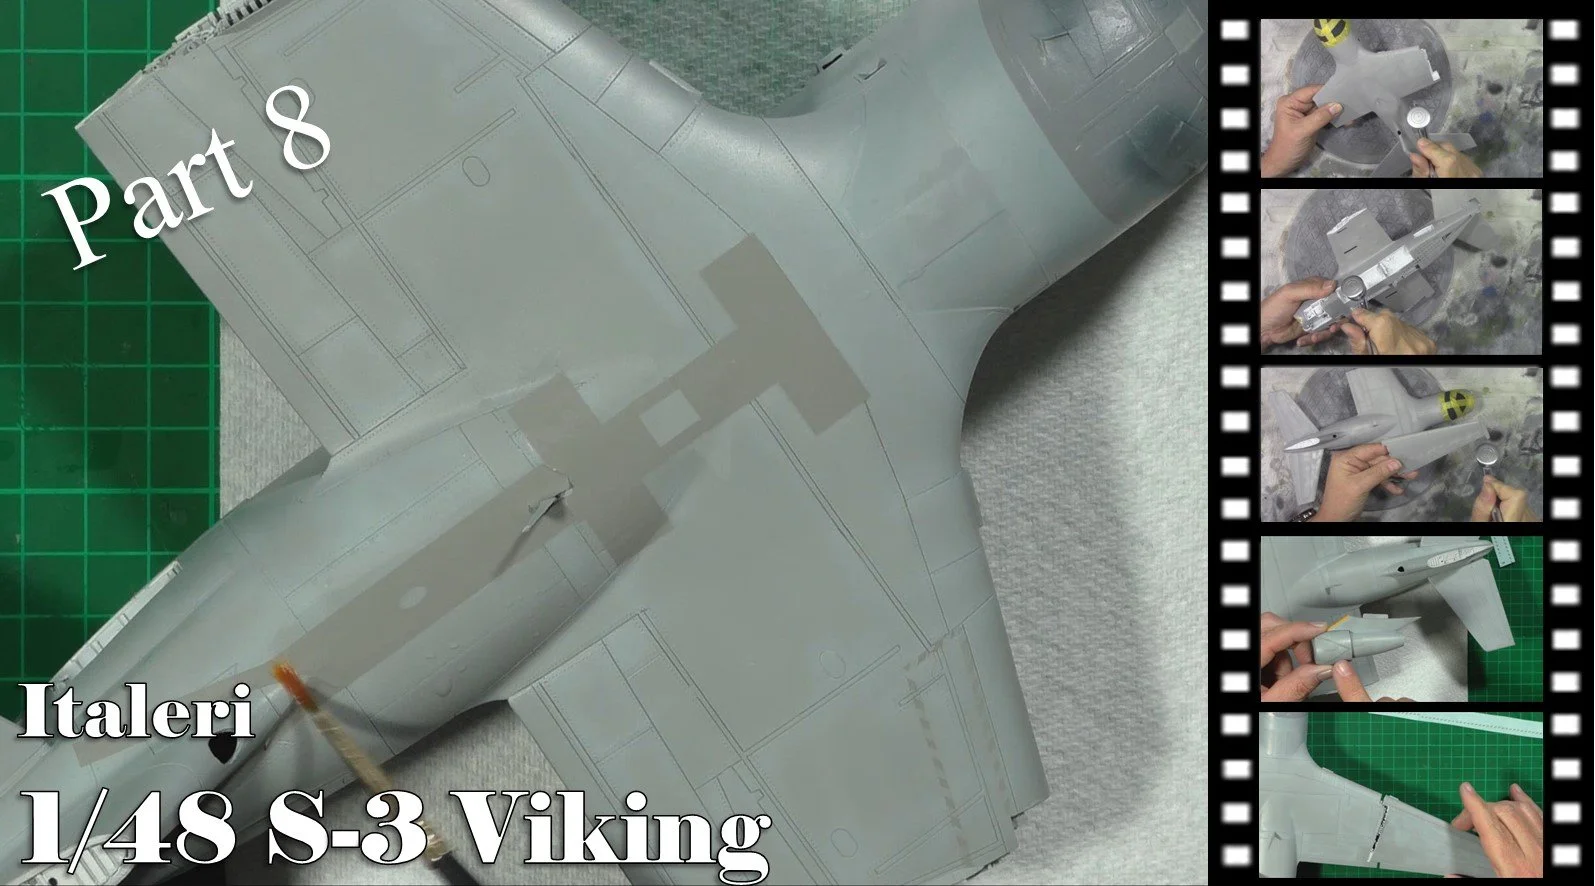
In part eight, we post shade with lighter colors of grey and ending in Ghost Grey to add depth to the paint. we also paint the canopy area in medium grey all ready for decaling.
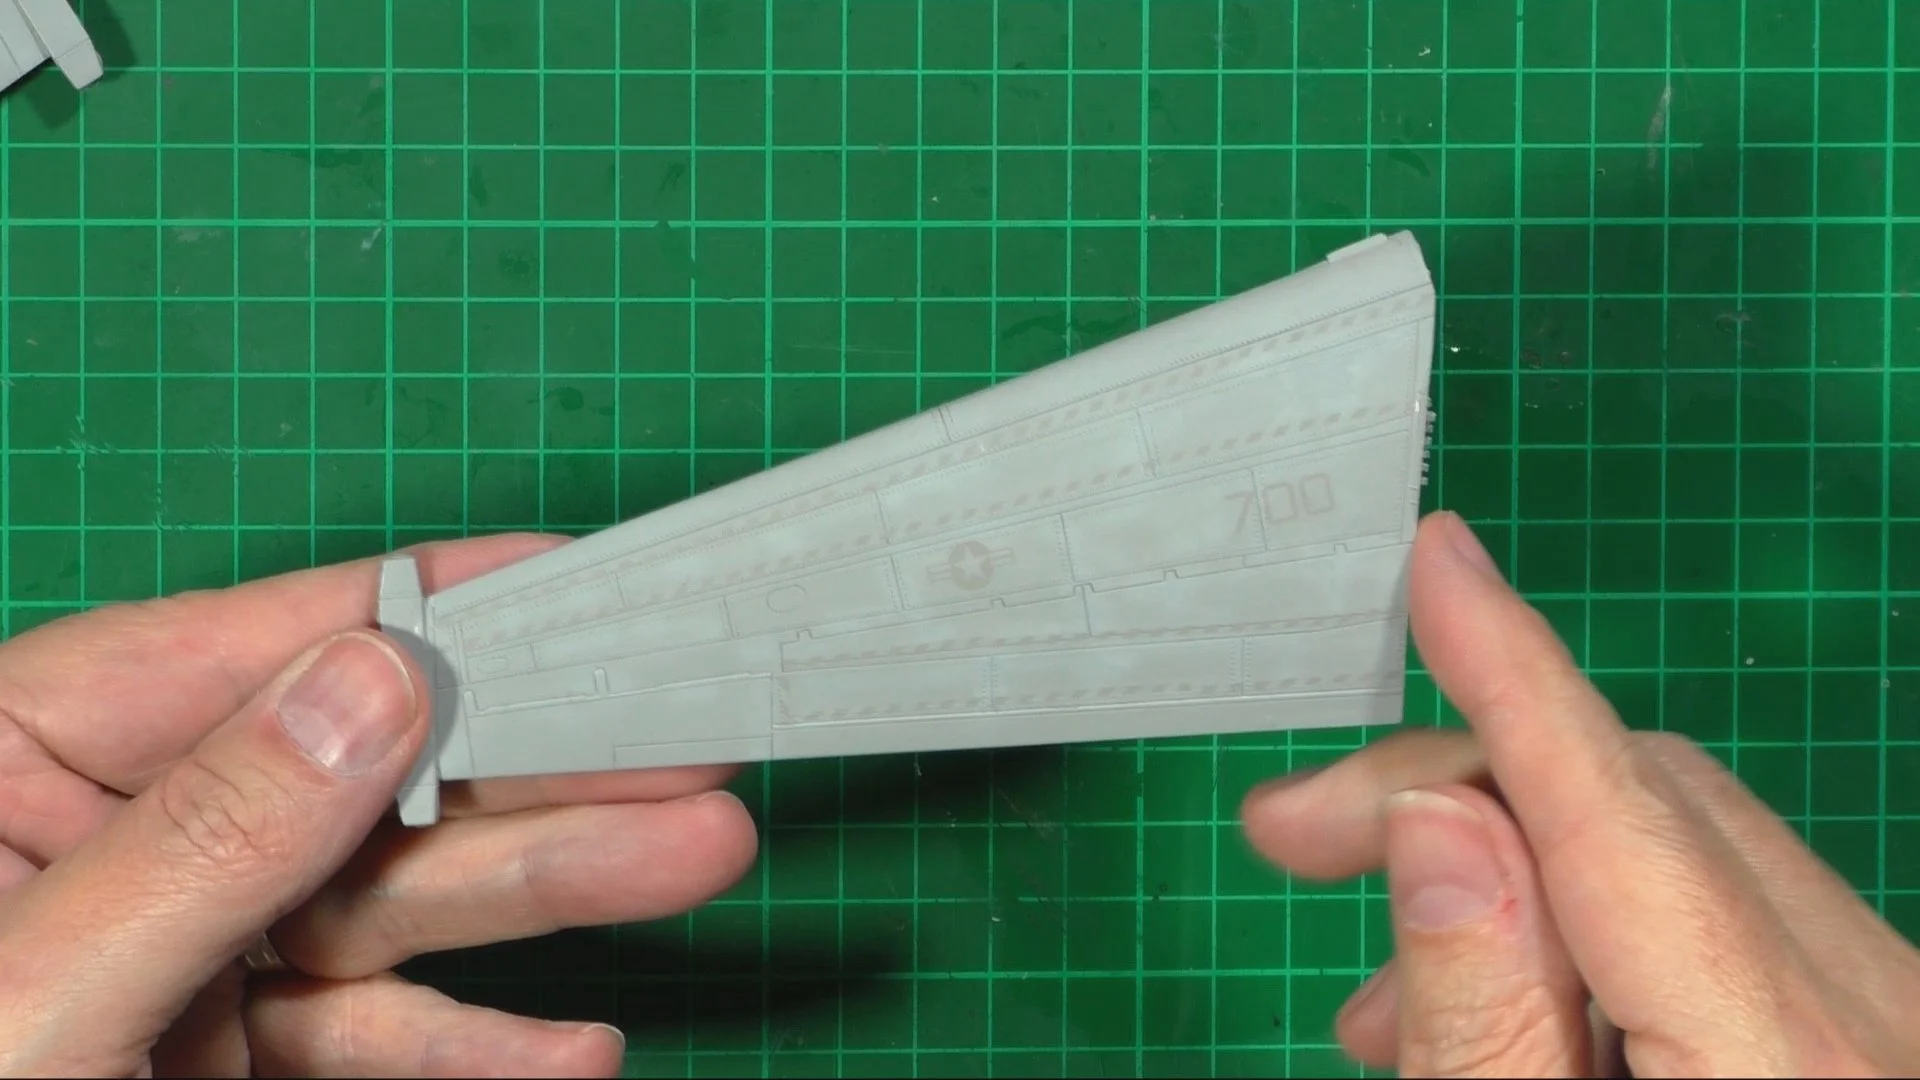
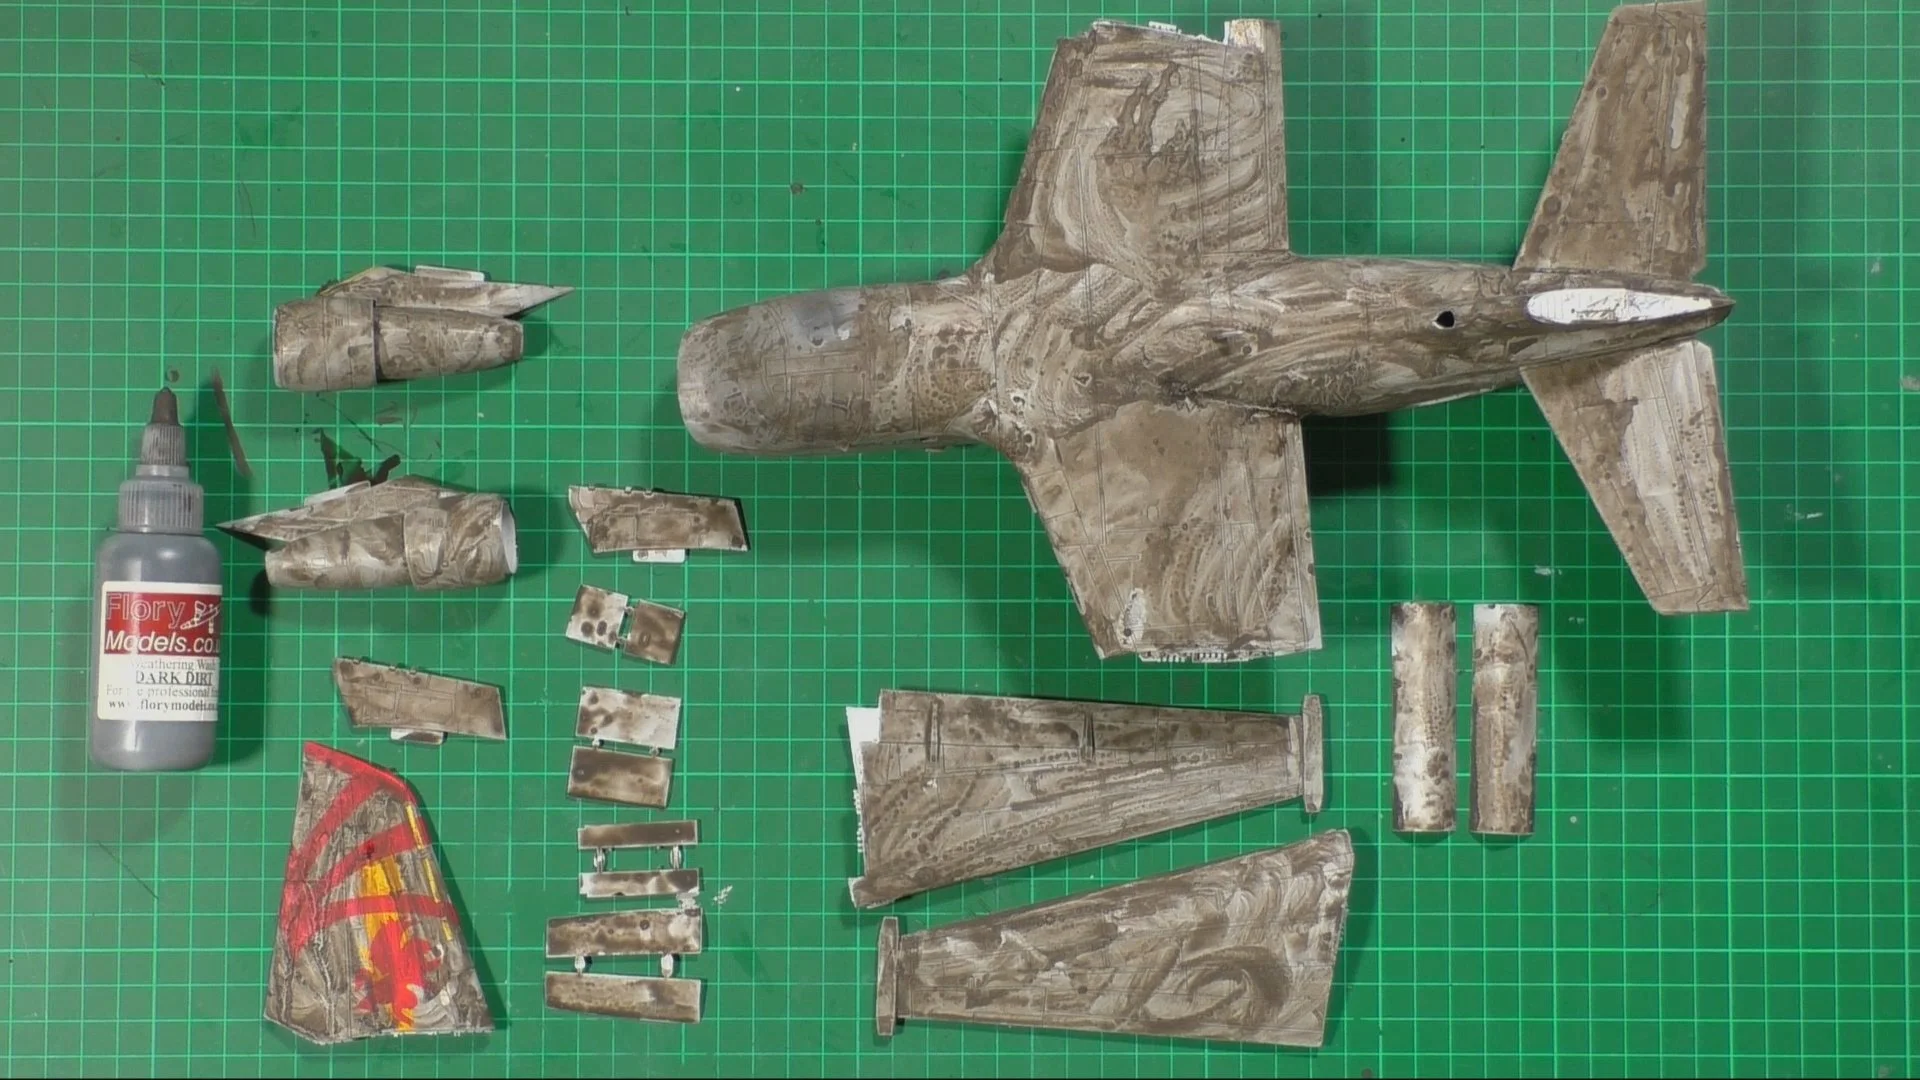
In part nine, it’s time to get the decals on and as we are having it folded up we need to cut the decals and fit them. Then it’s time to paint up all the doors and gear, we black base this so they give a solid look once painted white for the inside. Last we start on the weathering with a coat of Dark dirt wash and then given a worn dirty look.

In part ten, we carry on with the weathering with some more post-shading and then move on with oils to give the model a very heavy end-of-cruse look. We use a lot of different techniques to get a warn look.

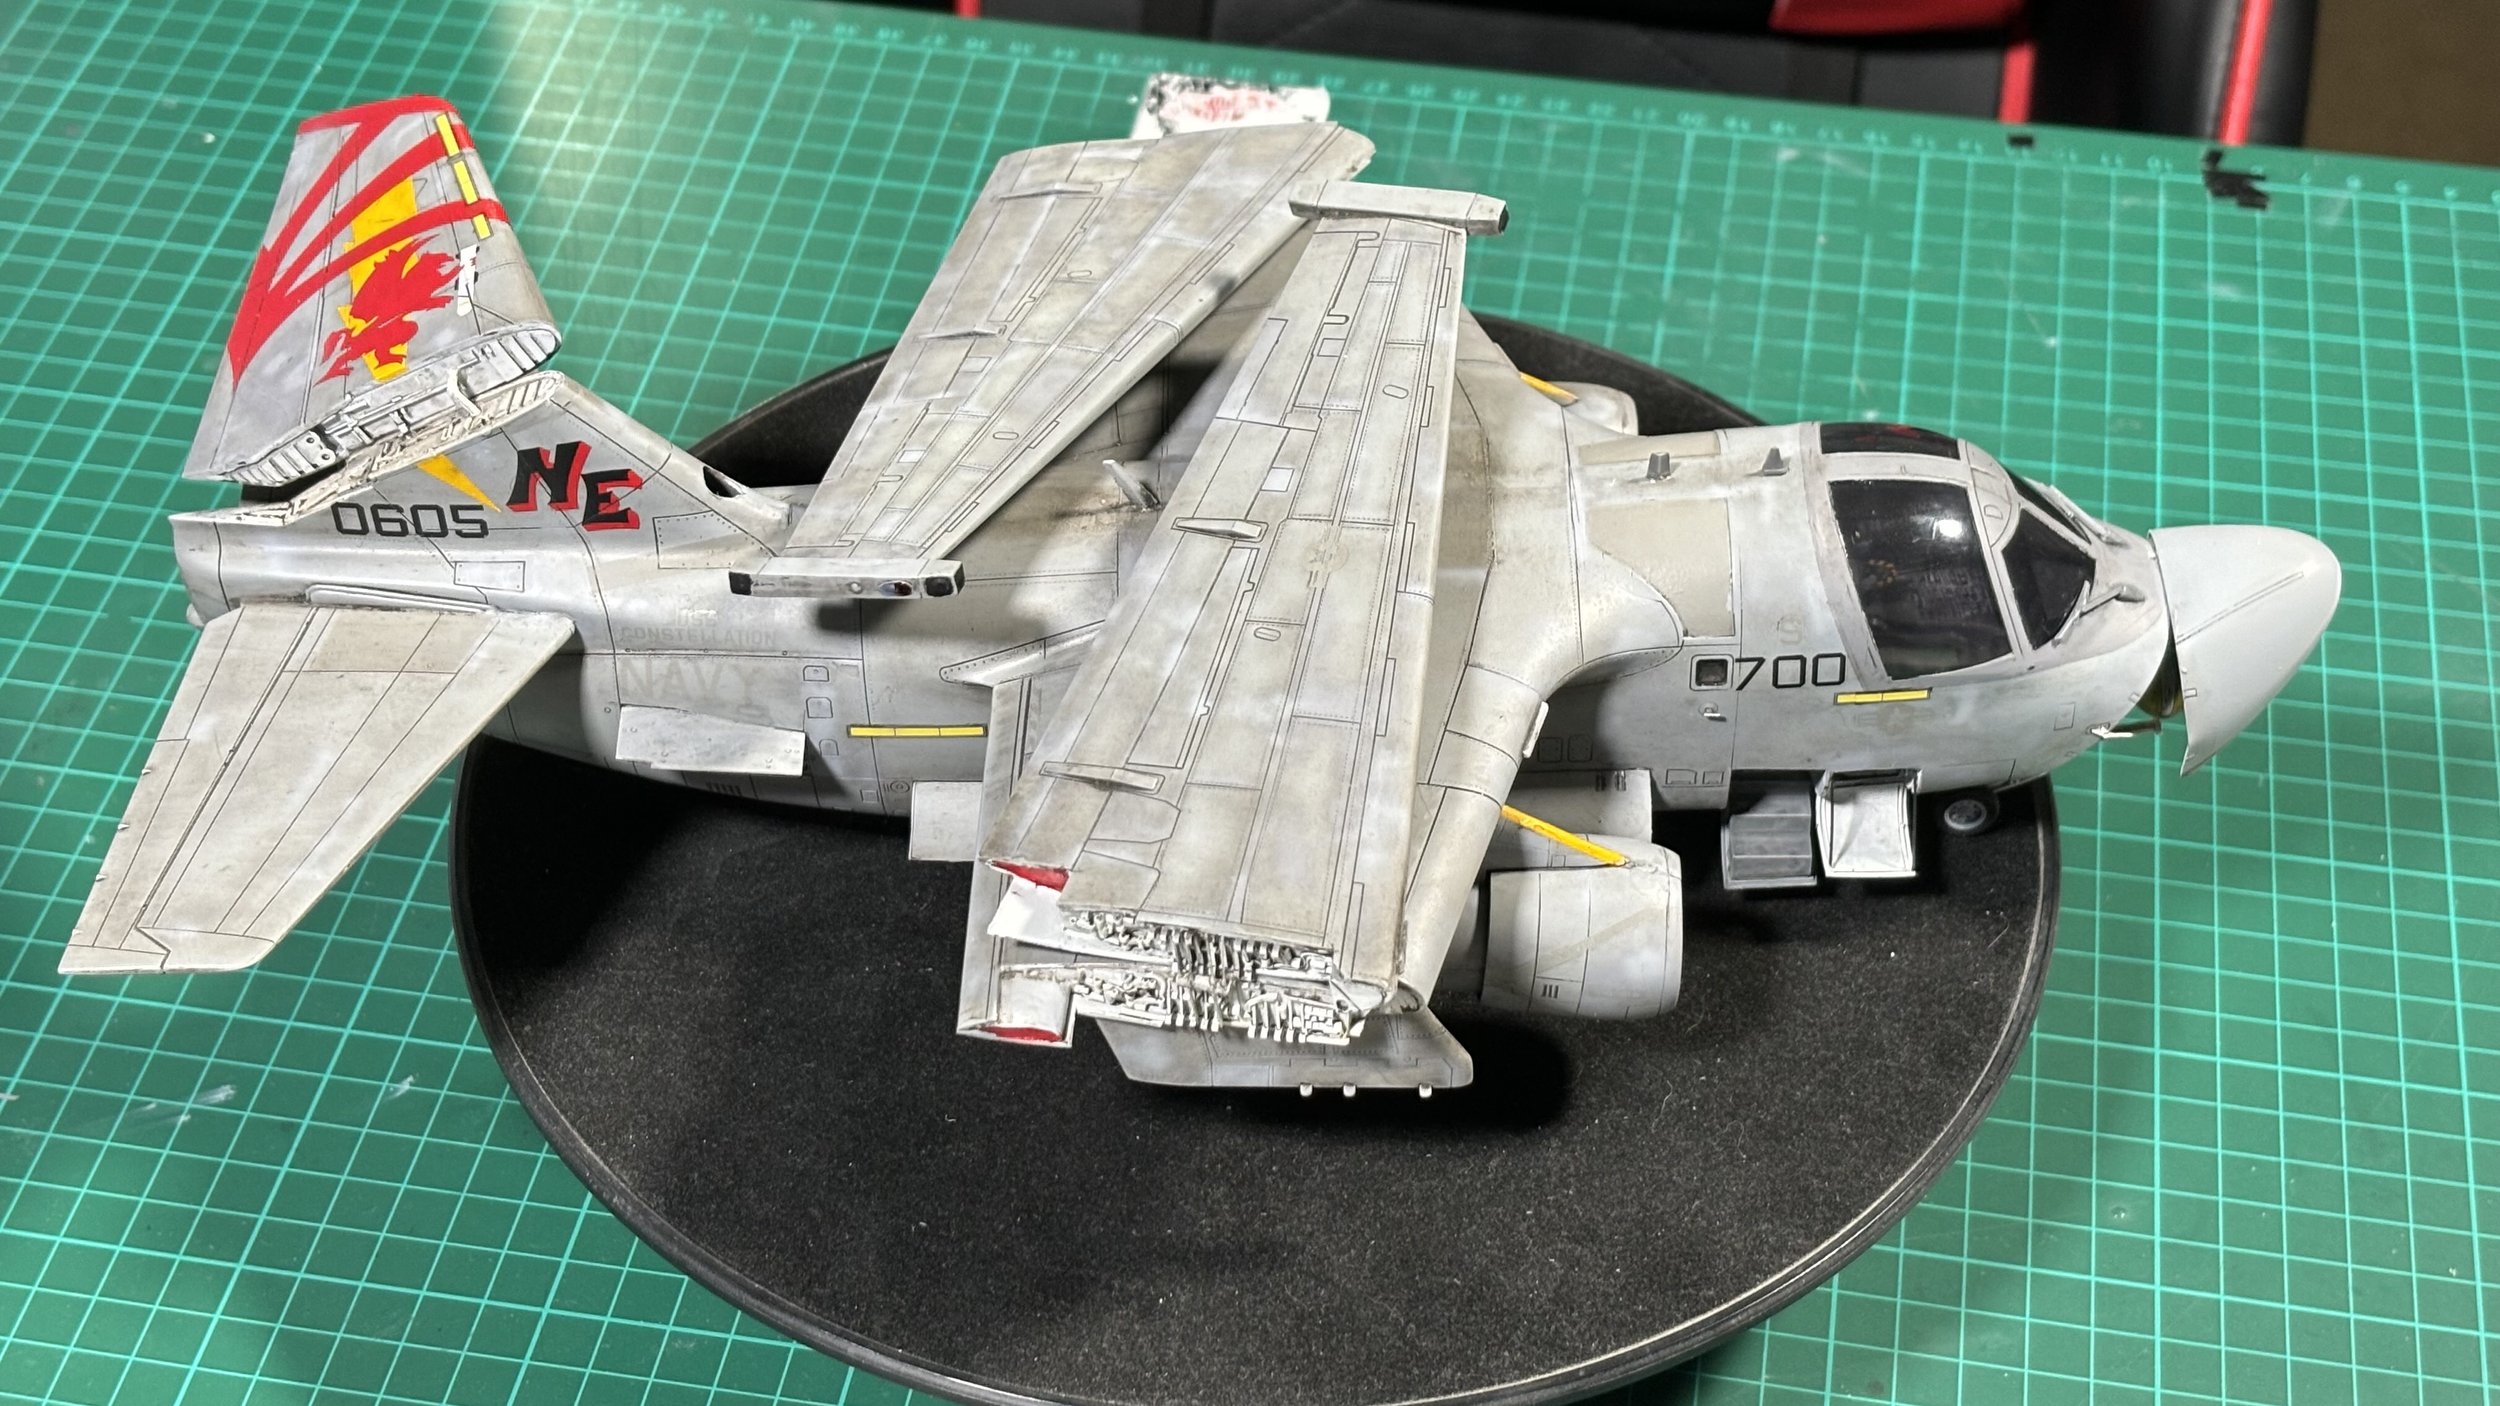
In Part eleven, we weather and detail the weapon and gear bays, we use acrylic posca pens and dry brushing to pick out the details. Next we install the engines and pylons and install and detail the gear and wheels.

In part twelve, we start to bring it all together. We add the red edging to the gear doors using a red sharpie pen and then install these, next we install the weapon bay doors and the access doors for the the equipment bays and add support struts and cables. Last we cut the edges if the making tape on the canopy windows and unmask.

In the final part , we add the final weathering to the open bays and then use PVA glue to make the small windows behind the cockpit. Next it's time to add the folded tail and wings. Here we find that the wing-folds are incorrect and the cut of the error parts and re-attach, the use plasicard to correct the missing parts etc. With the wing now followed we can add the small aerials and pitot tubes. For the final touches I add a few remove before flight tags to complete the build.