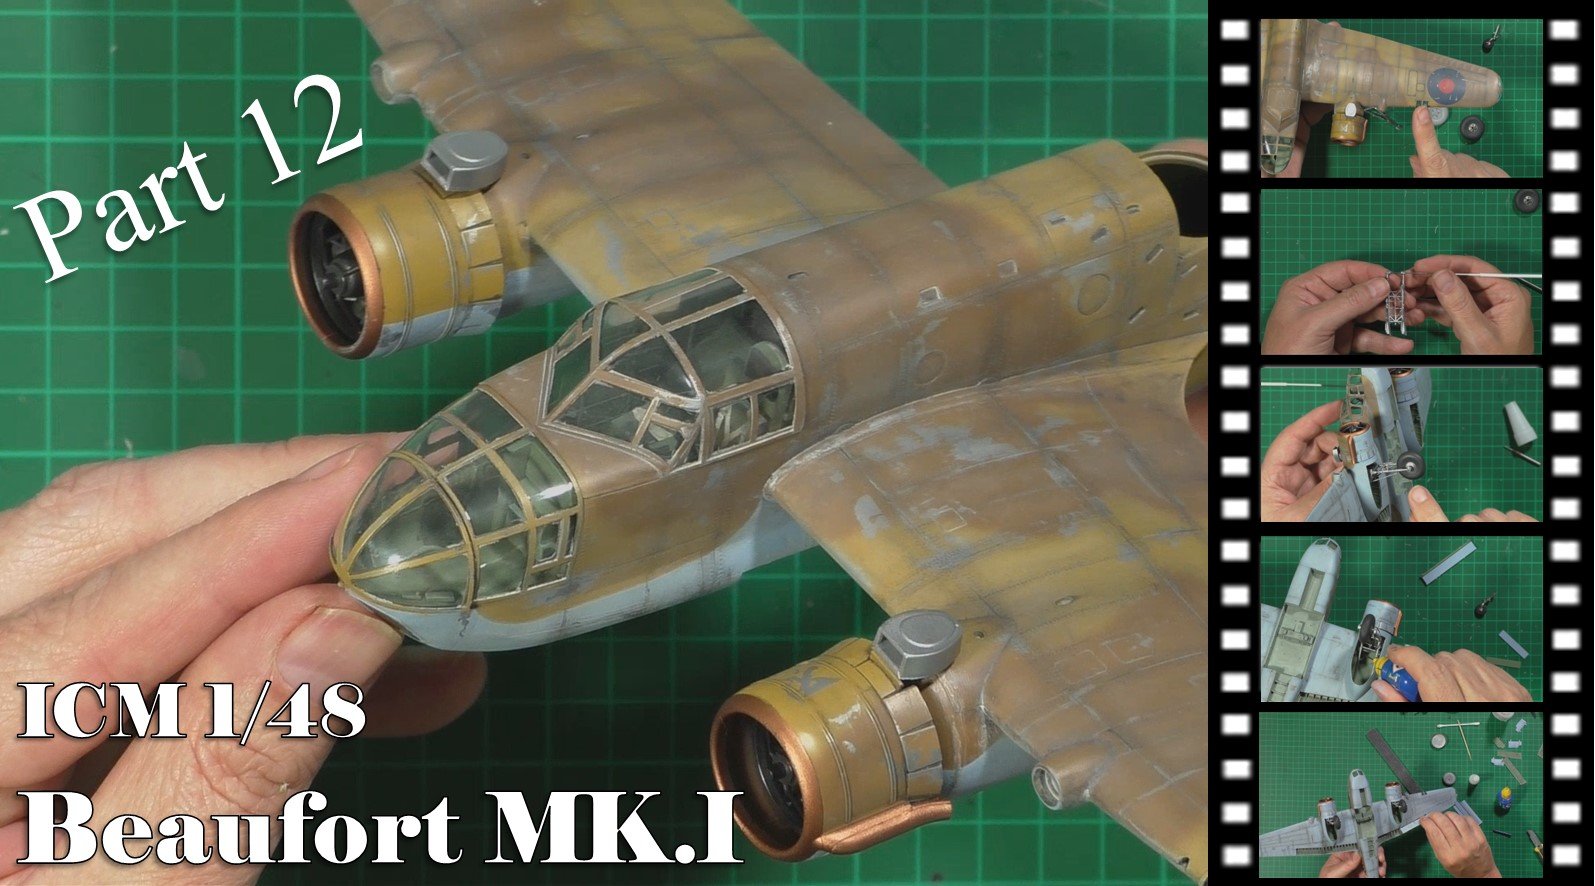
Beaufort MK.I
Scale: 1/48
Manufacturer: ICM
Parts used: WDuard Look Set 644200
Main paints used: XK Real Colors and Xtream Metals
In part One, we look at the build ahead and the Look set and start on the construction of the fuselage. Then we move into the Spreybooth and paint the interior with Tamiya XF-71, Although not a perfect match, with weathering done it will look about right. Lastly, we weather the interior with a metallic scrub and then an oil wash.

In part Two, we weather the interior with oil washes and dry brushing. Next we install the instrument panel and add the PE harnesses and then bring the fuselage halves together and take care of a few small joins and rescribe before popping the wings together along with the engine nacelles.

In part three, we add a little more detail to the kit by riveting the whole model. I used 0.75mm riveting wheels, single and dual types to add the riveting. There is a fair amount of artistic license in the riveting as getting good references for locations was proving difficult.

In part Four, We attach the wings and then put together the engines and the very fiddly exhausts. Then it’s time to mask up all the clear parts and for this, we use the Eduard mask set 909 BUT!! there is no masks included with this set for the flatter top turret, only the taller type. So no problem we have the kit mask template in the instructions to follow…………. After a quick look, we discover they are not the right scale and too big !!!!! so plan ‘‘B’’ the old way of masking up and cutting them to shape ourselves.

In part Five, It’s time to install the clear parts, we use a mix of Tamiya extra thin and PVA glue. With the glass work install we turn our attention to the engine cow flaps and cowlings, the instructions are a bit vague here so we have a look and find the best way for this to work. Next, we install and mask the lights and then spray the interior green firstly and then black for the classwork framing to give a solid color.

In part Six, we mask up the inner flaps and wheel wells all ready for priming. We use AK micro filler primer AK758 Grey with Rapid drying thinners. Next it’s time for the lower RAF Azure Blue color AK 3rd Gen AK11845. Last we add a few drops of flat white to the Bleu to fade out the centers of the panels for a little weathering to the paint.

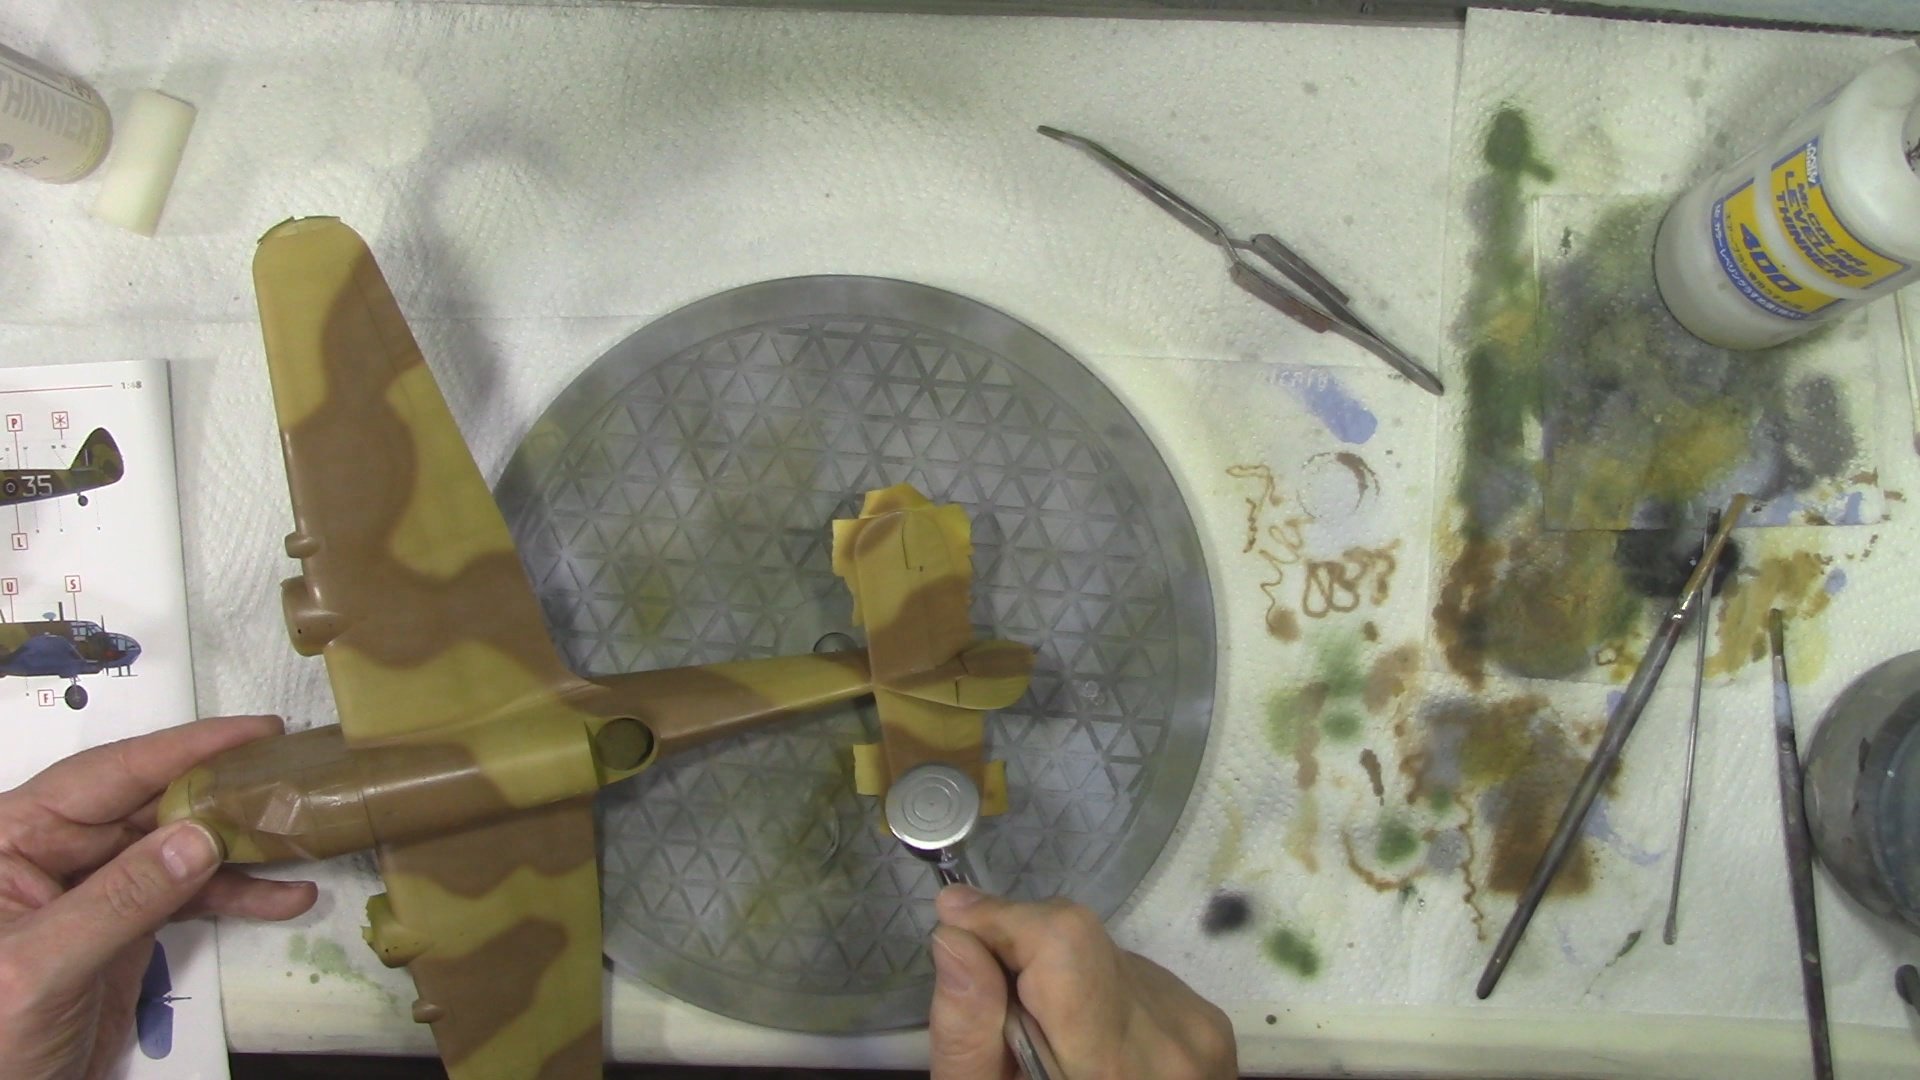
In part Seven, We first put down a coat of Silver for the chipping color to show through and then decant a cheap acrylic hair spray and hand brush it over the silver to act as a chipping fluid. With that dry we start the free-hand camo with the middle stone color and then Lighten with white and bleach out the centers of the panel to start the weather off as we did on the underside.

In part Eight, we free-hand the Earth camo over the middle stone, we use free hand to give a softer warn look to the paintwork. We then lighten the earth the same as the mid stone. Next we use acrylic airbrush cleaner to soften the paintwork so the chipping can show through.

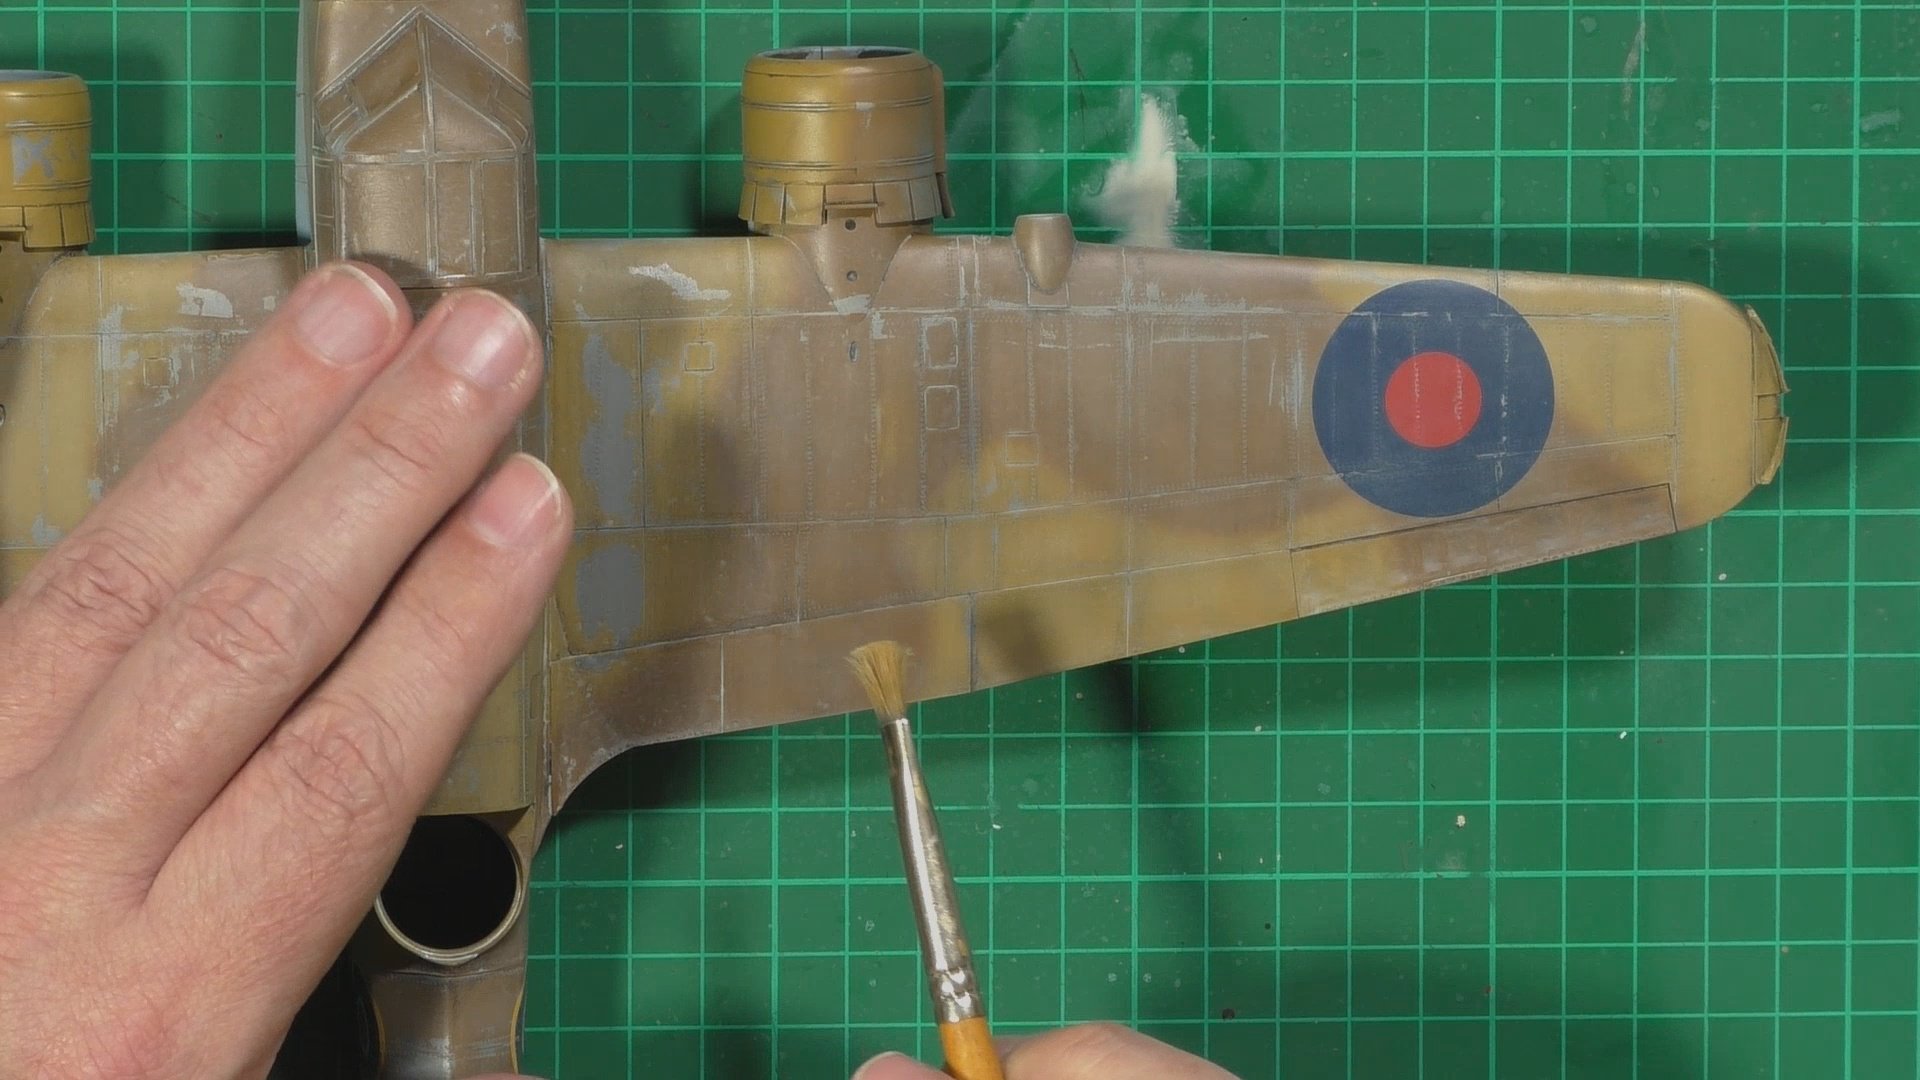
In part Nine, we continue the chipping work around the cockpit framing and fuselage and the free-hand chipping by brush on the underside. Next it’s time to decal and then weather those in with sanding the decals.

In part Ten, with the decals done and weathered with put a matt coat coat on the models to seal it in and add a little texture to the surface so the light filter wash has something to grip too. Next we put on a Dark dirt wash to get a nice weathered look to the paintwork. We next use a Buff oil to make a sash and then apply it to the whole topside, allow it to slightly dry and then blend.

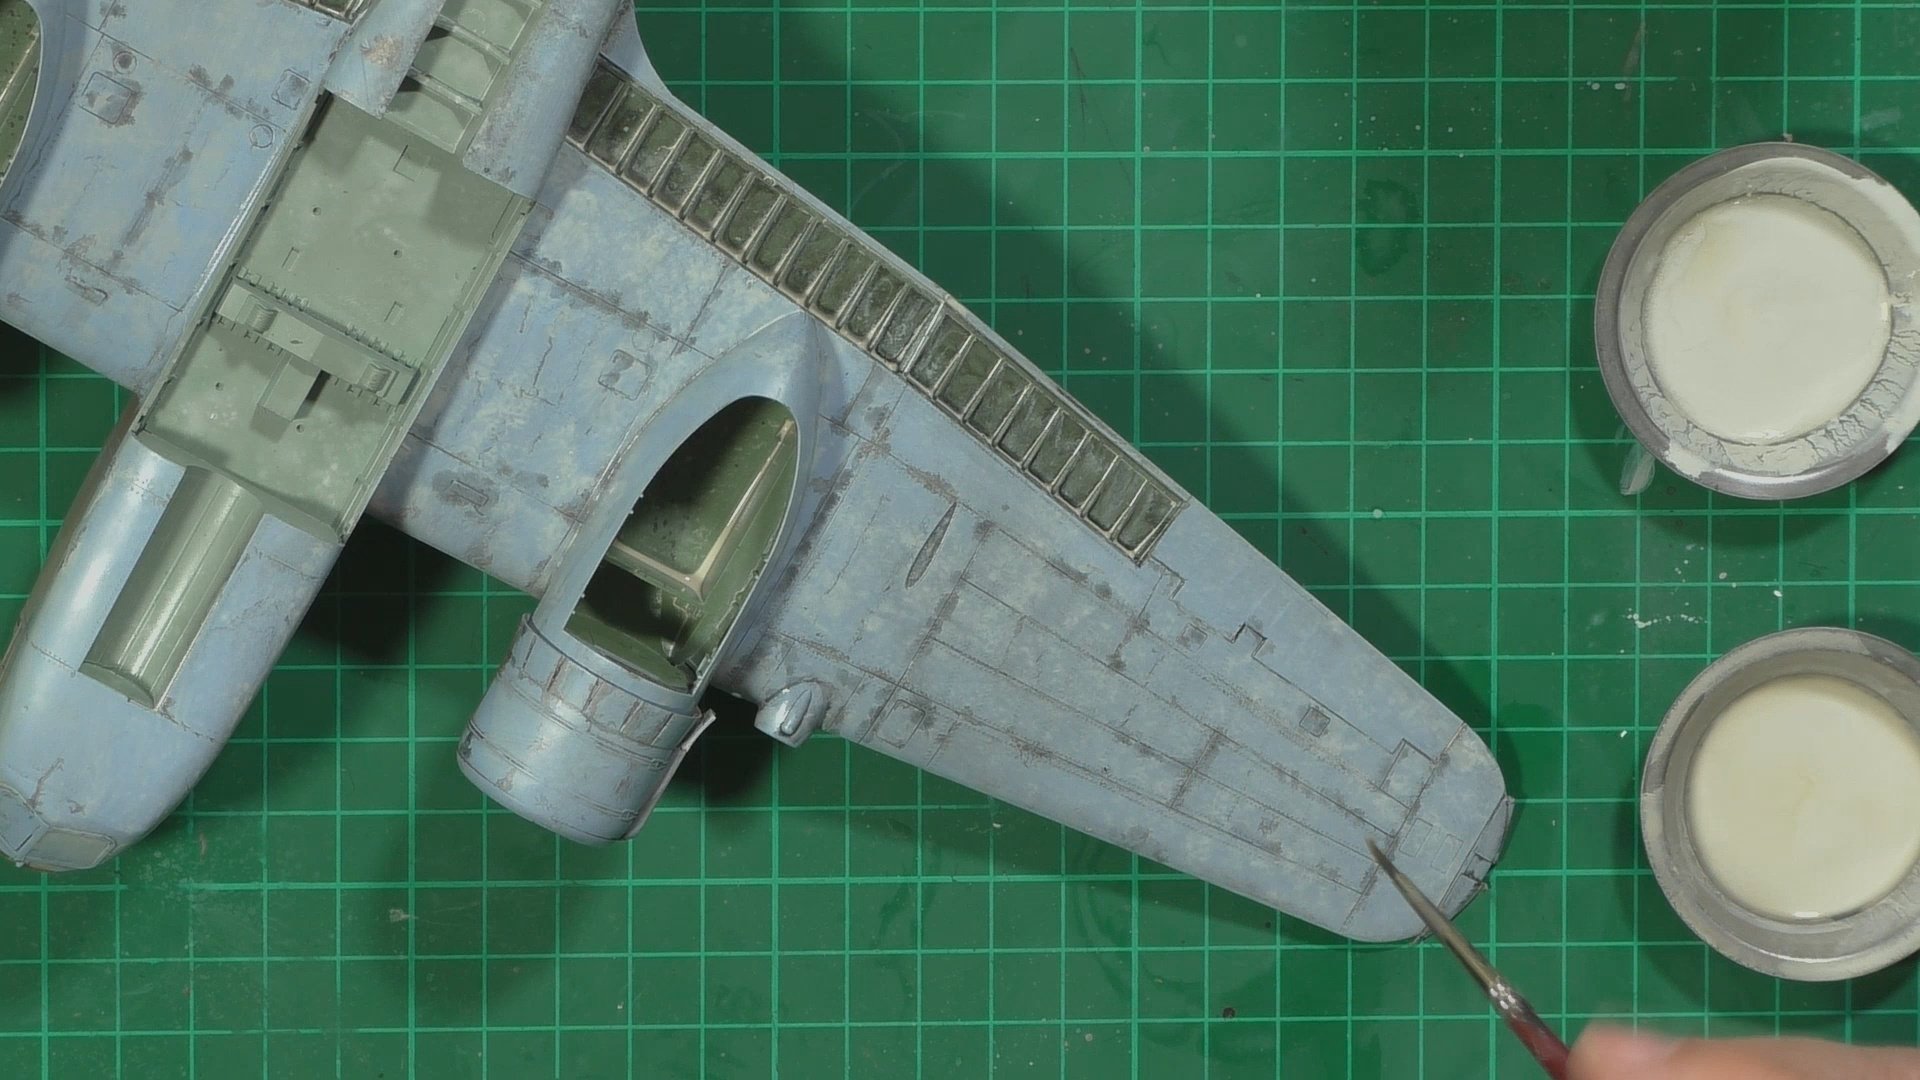
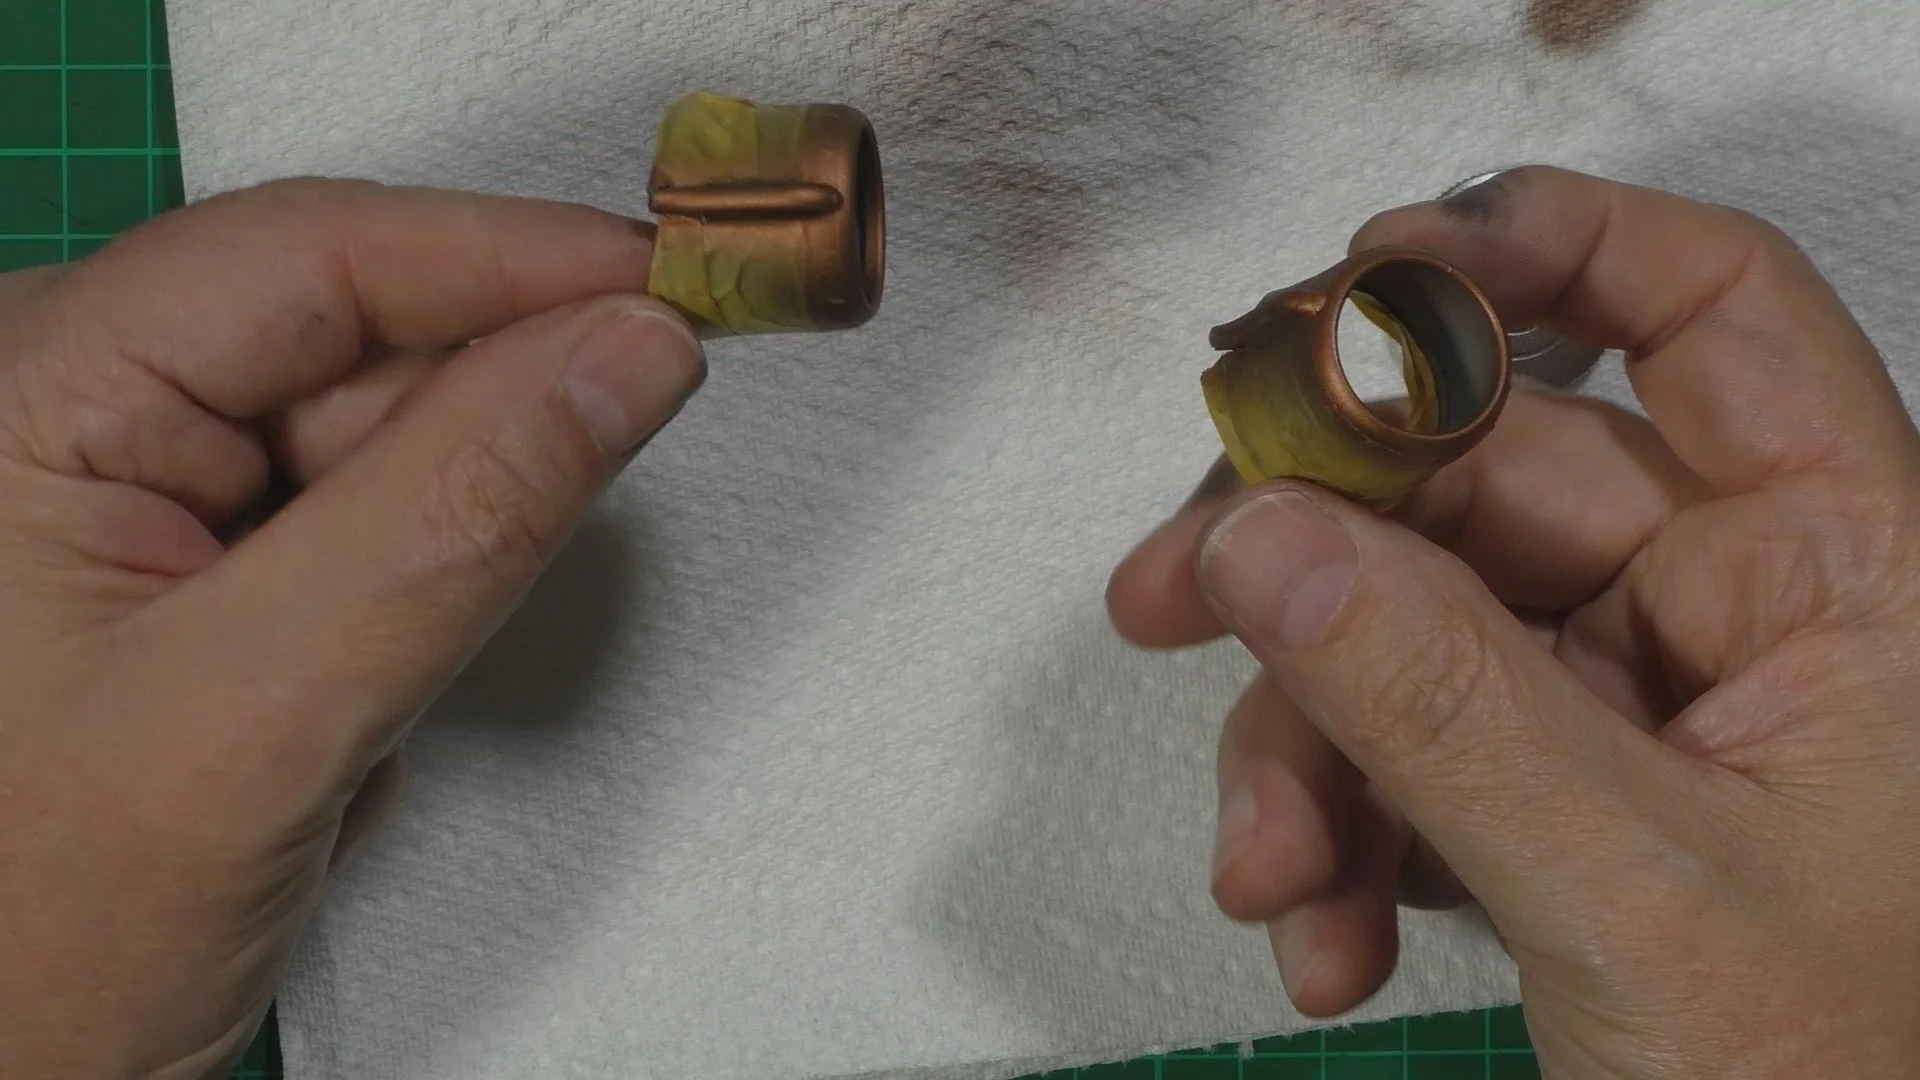
In part Eleven, we weather the underside and this time use wet oils. This is where we put enamel thinner on first and then add the oils on top. Next we dry Brush/Buff the shadow oil color for post shading the panel lines. Lastly, we paint the engines and buff with dark iron and the mask and paint the brass area on the front of the cowlings.

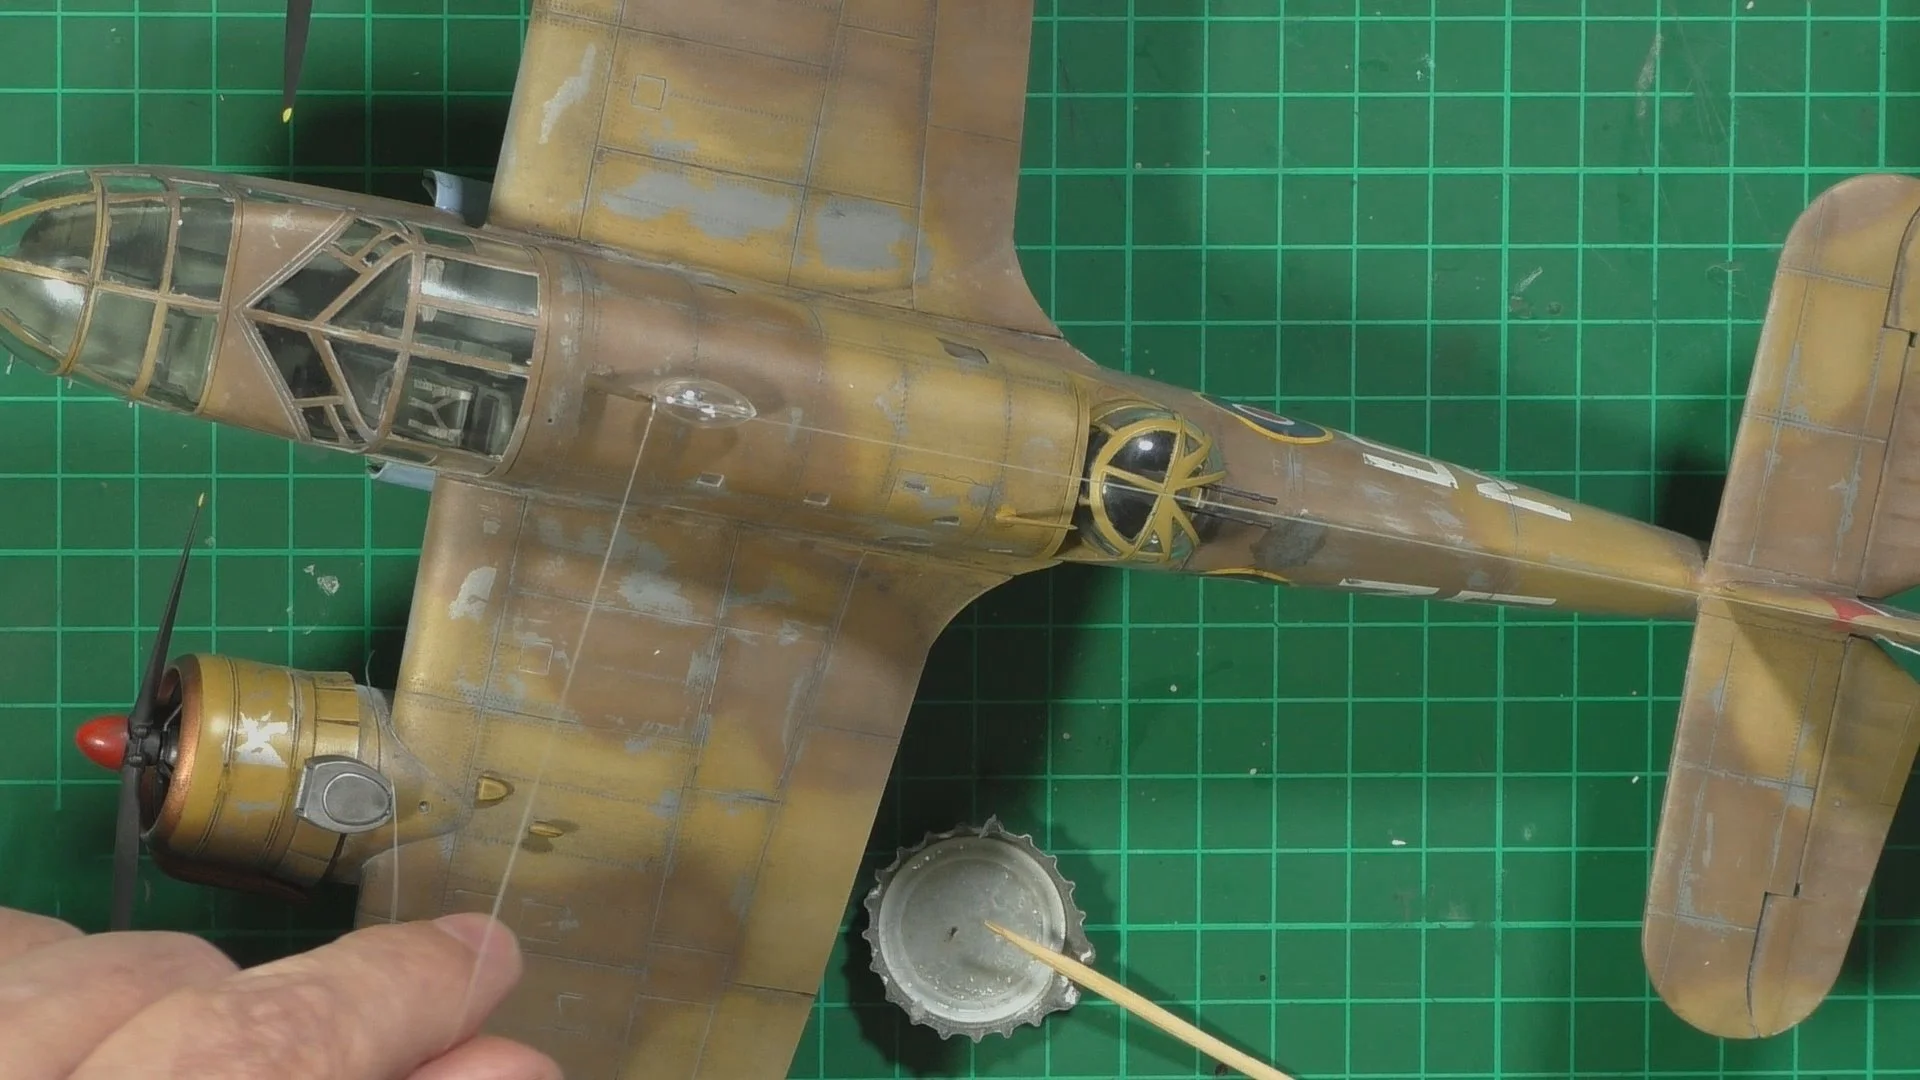
In part twelve, we work on the gear it's quite complicated but once together is quite strong. Next we un-mask the clear parts and then paint the gear and have to pin the wheels in place.
In the final part, we install all the small details and then paint and weather those in a thin oil wash. next, we install the antennas and posts. A nice touch with the kit is the torpedo and dolly which are mini models all on their own. a bit fiddly but once together a great-looking display. The last job is to add the antenna wire from the post to the tail to finish off the build ready for the final reveal.