AH-1G Cobra
Scale: 1/32
Manufacturer: ICM
Parts used: Out Of The Box
Main paints used: Tamiya and AK
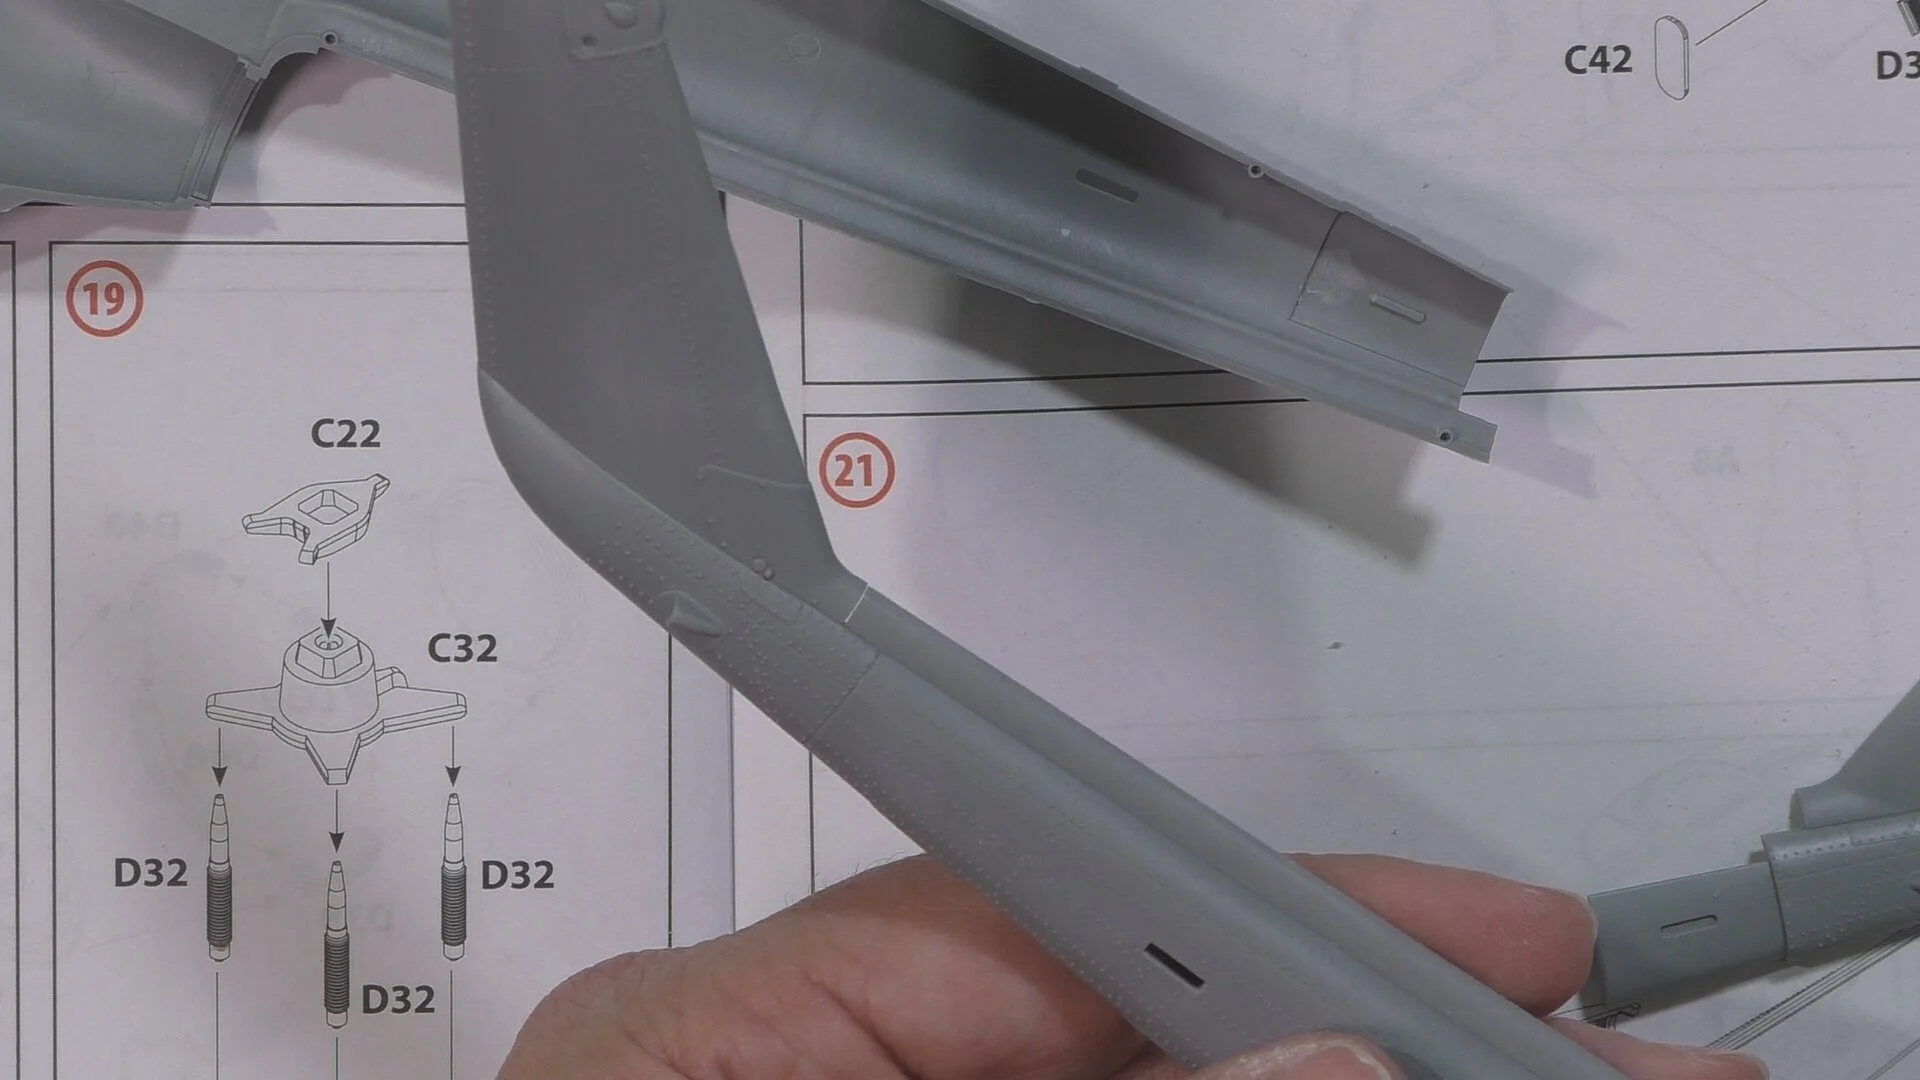
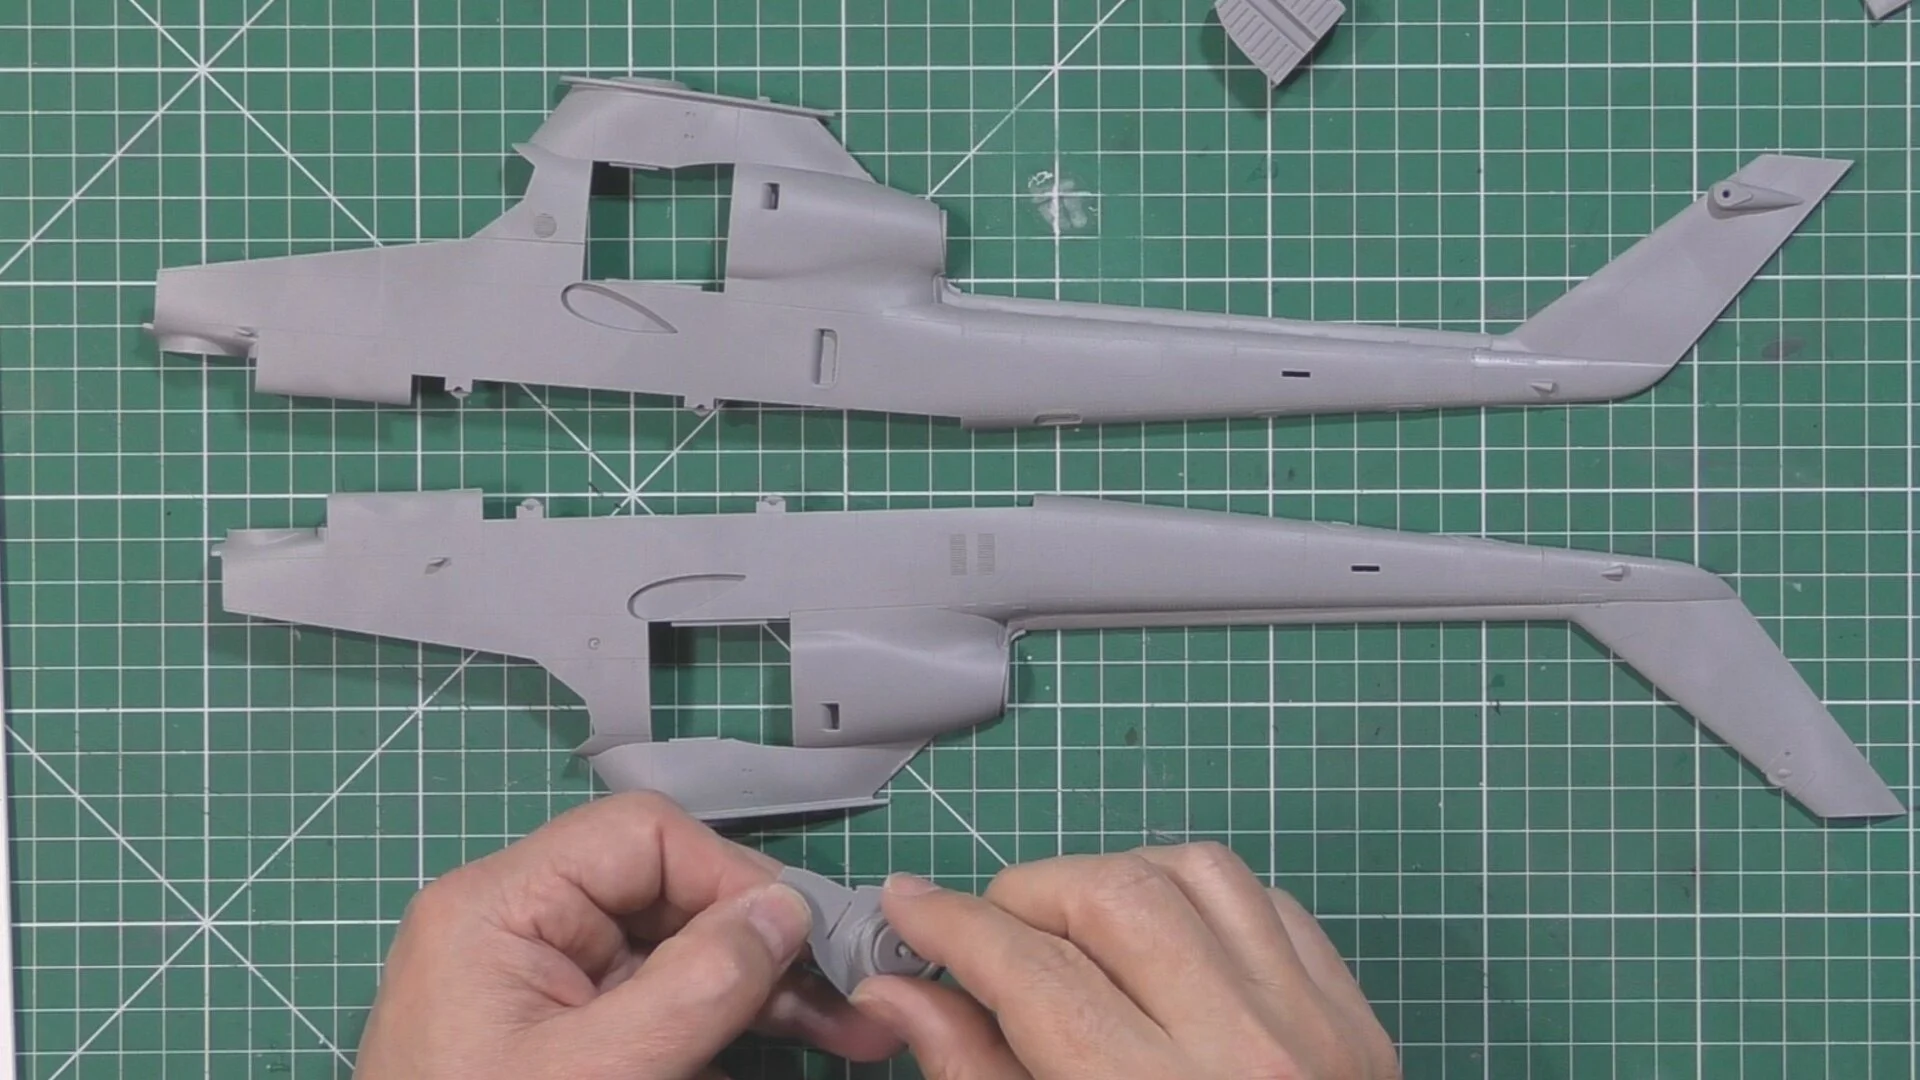
In part one, we start work on the cockpit and then the reduction gear and gearbox. Next up the Tail is added and use white top Tamiya glue for a seamless join.
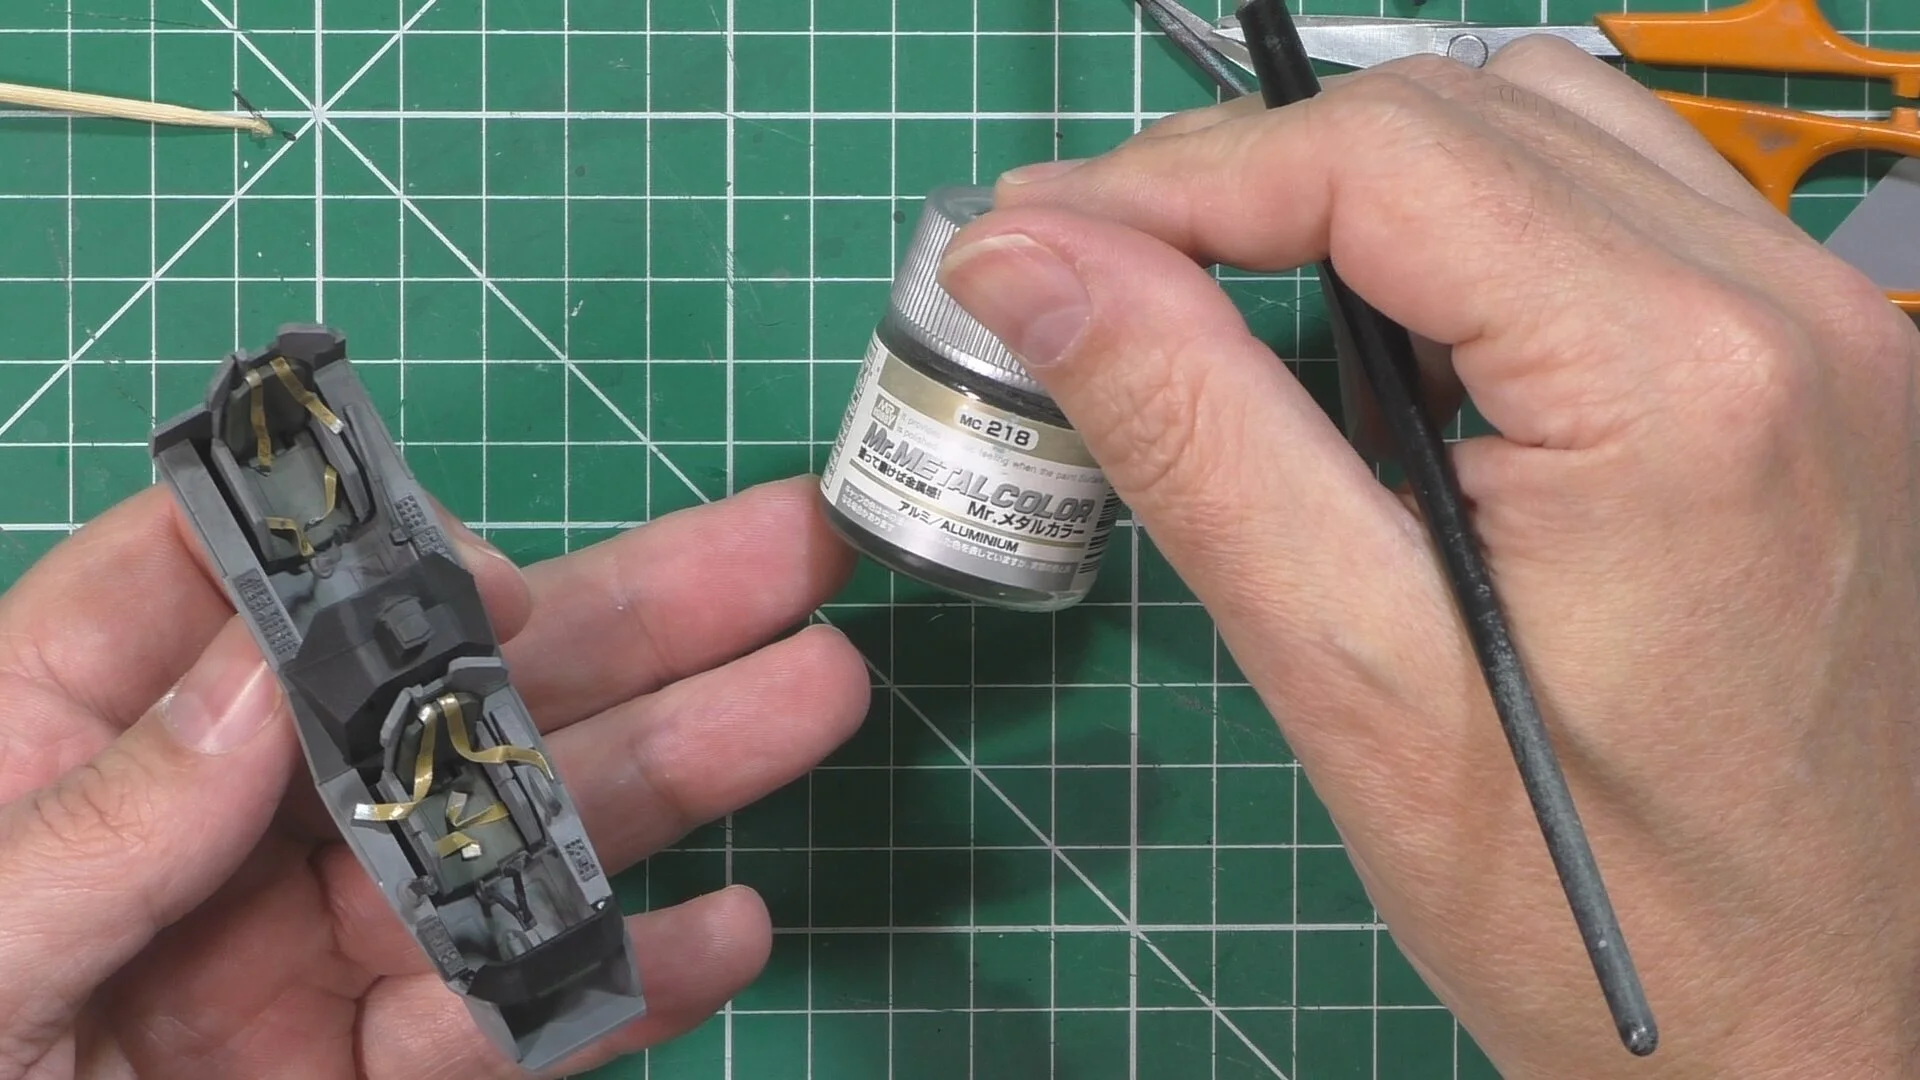
In Part two, we paint and weather the cockpit and scratch build some simple foil harness. We use the kit’s decal panels but would wait till the aftermarket resin of PE sets are available.
In part three, we finish off the cockpit area with more weathering and then paint and wither the gearbox and engine areas. Next, it’s time to install them into the fuselage and get them lined up to make a good join between the two halves.
In part four, we look at seam scrapping and making seamless seam joins with no damage and risk of ghost seams coming back. We then take care of a missmold in the tooling to get the gearbox door panels to close properly. Next we fit the tailplanes and the skids to the fuselage and mask up the clear parts.
In part five, We work on the rotors and then start to install the clear part not without a few problems along the way !. Then it’s into the spray booth to pre-paint the canopy with black and then into primer.
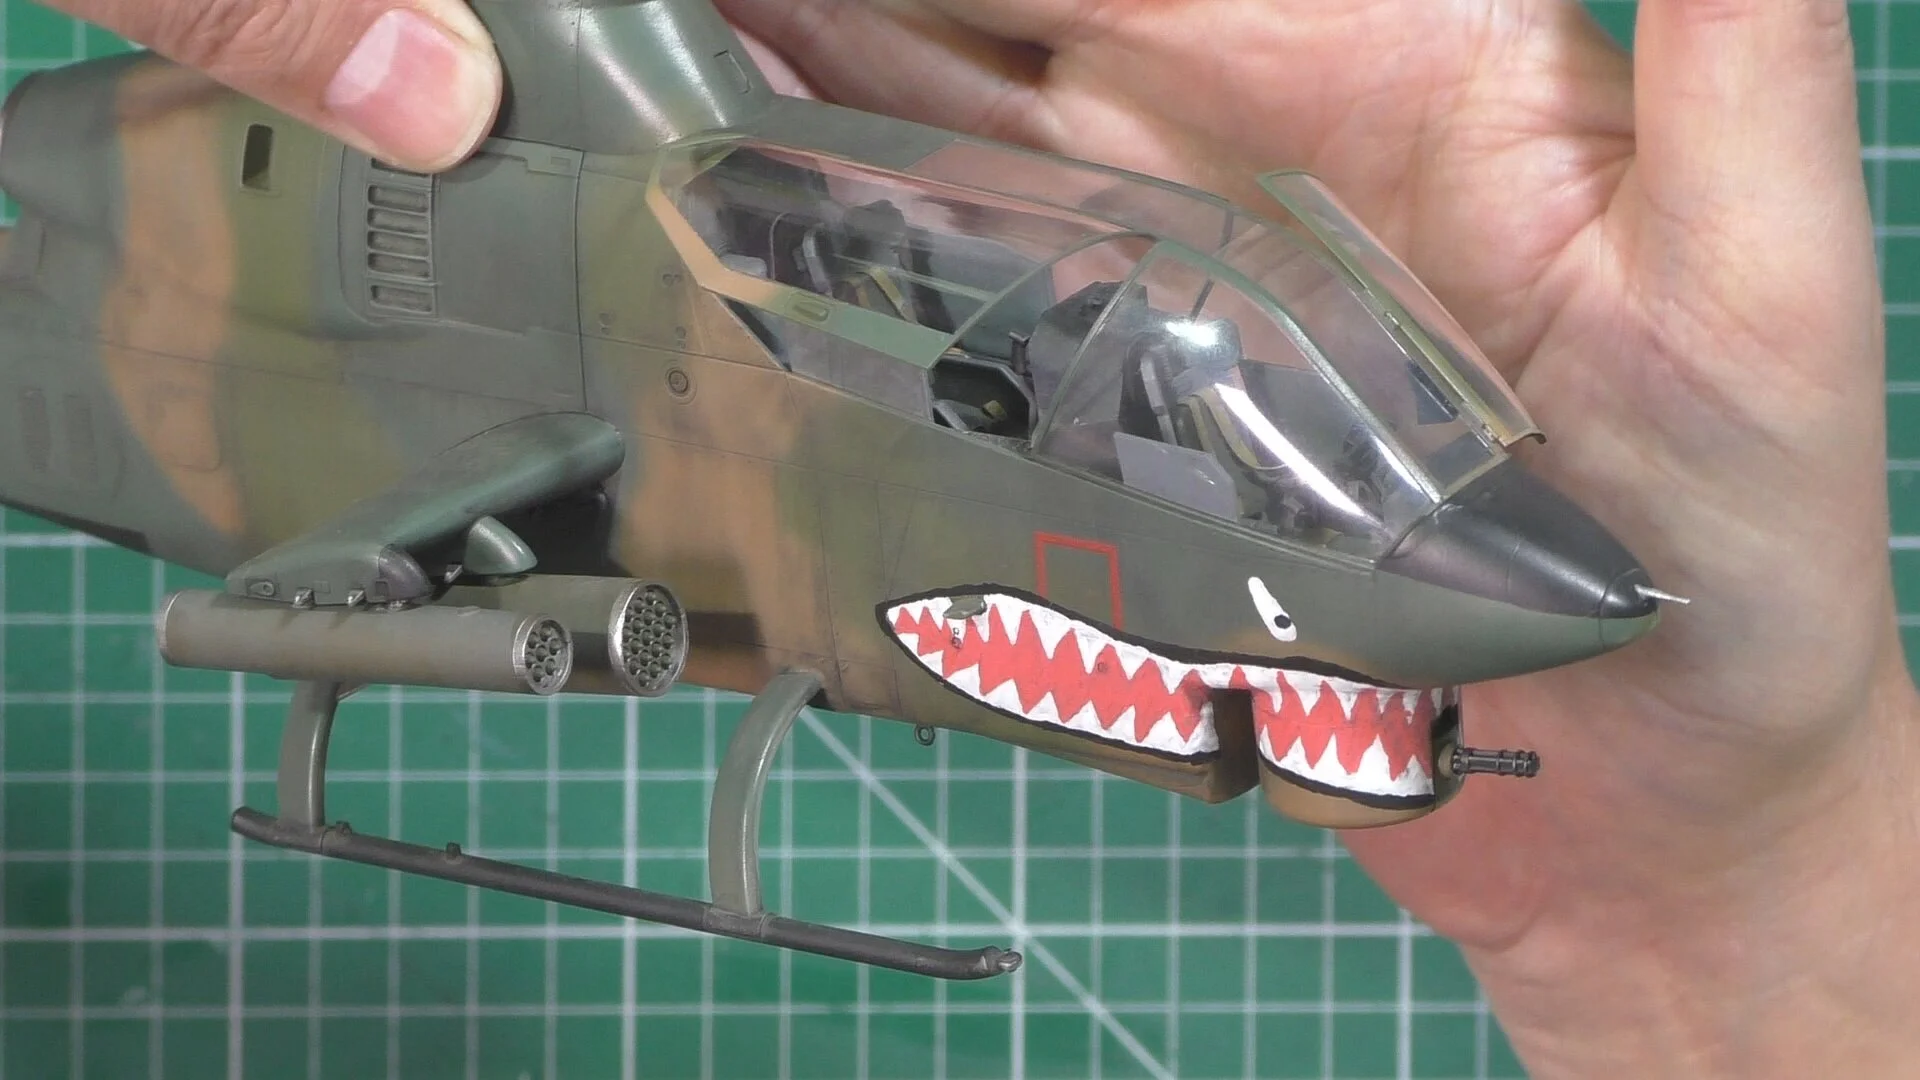
In Part six, we are working on the paintwork and the South, East Asia (SEA) camo. I wanted to do something a bit more from the normal one tome of olive drab and found a great scheme that used by one unit in theater. So we use AK Real colors. So first up the FS30219 Tan (RC225) and then FS34097 Green (RC231) and last up FS34092 Dark Green (RC230) All done free hand to give the warn weathered look.
In part seven, we continue the paintwork with the dark green camo FS34092 Dark Green (RC230), next we post shade with the airbrush the weathering for the first stage. next we paint the rotors XF-85 Tamiya rubber black and the tips yellow.
In part eight, we move into the weathering of the Cobra but first, we knock back the post shading with the Green and white weathering sticks. Decaling goes well and the very thin works great with Mirco Set and Sole. Next we unmask and check for any glue marks or overspray. Then it’s time for the Flory models Dark Dirt clay wash.
In part nine, we continue with the weathering this time with oils using the neat, thinned and as a filter. We also use buffable as a way to weather black and give a heavy look.
In this the final part of the Cobra build we look at adding some rain marks and streaking effects, we then arm up the helo with the rocket pods and add the lights and small aerials. Next, we had draw on the mouth with POSKA pens all ready for the final reveal.