B-25J Mitchell
Scale: 1/48
Manufacturer: HK Models
Parts used: Eduard Space set
Main paints used: Tamiya and AK Real Color
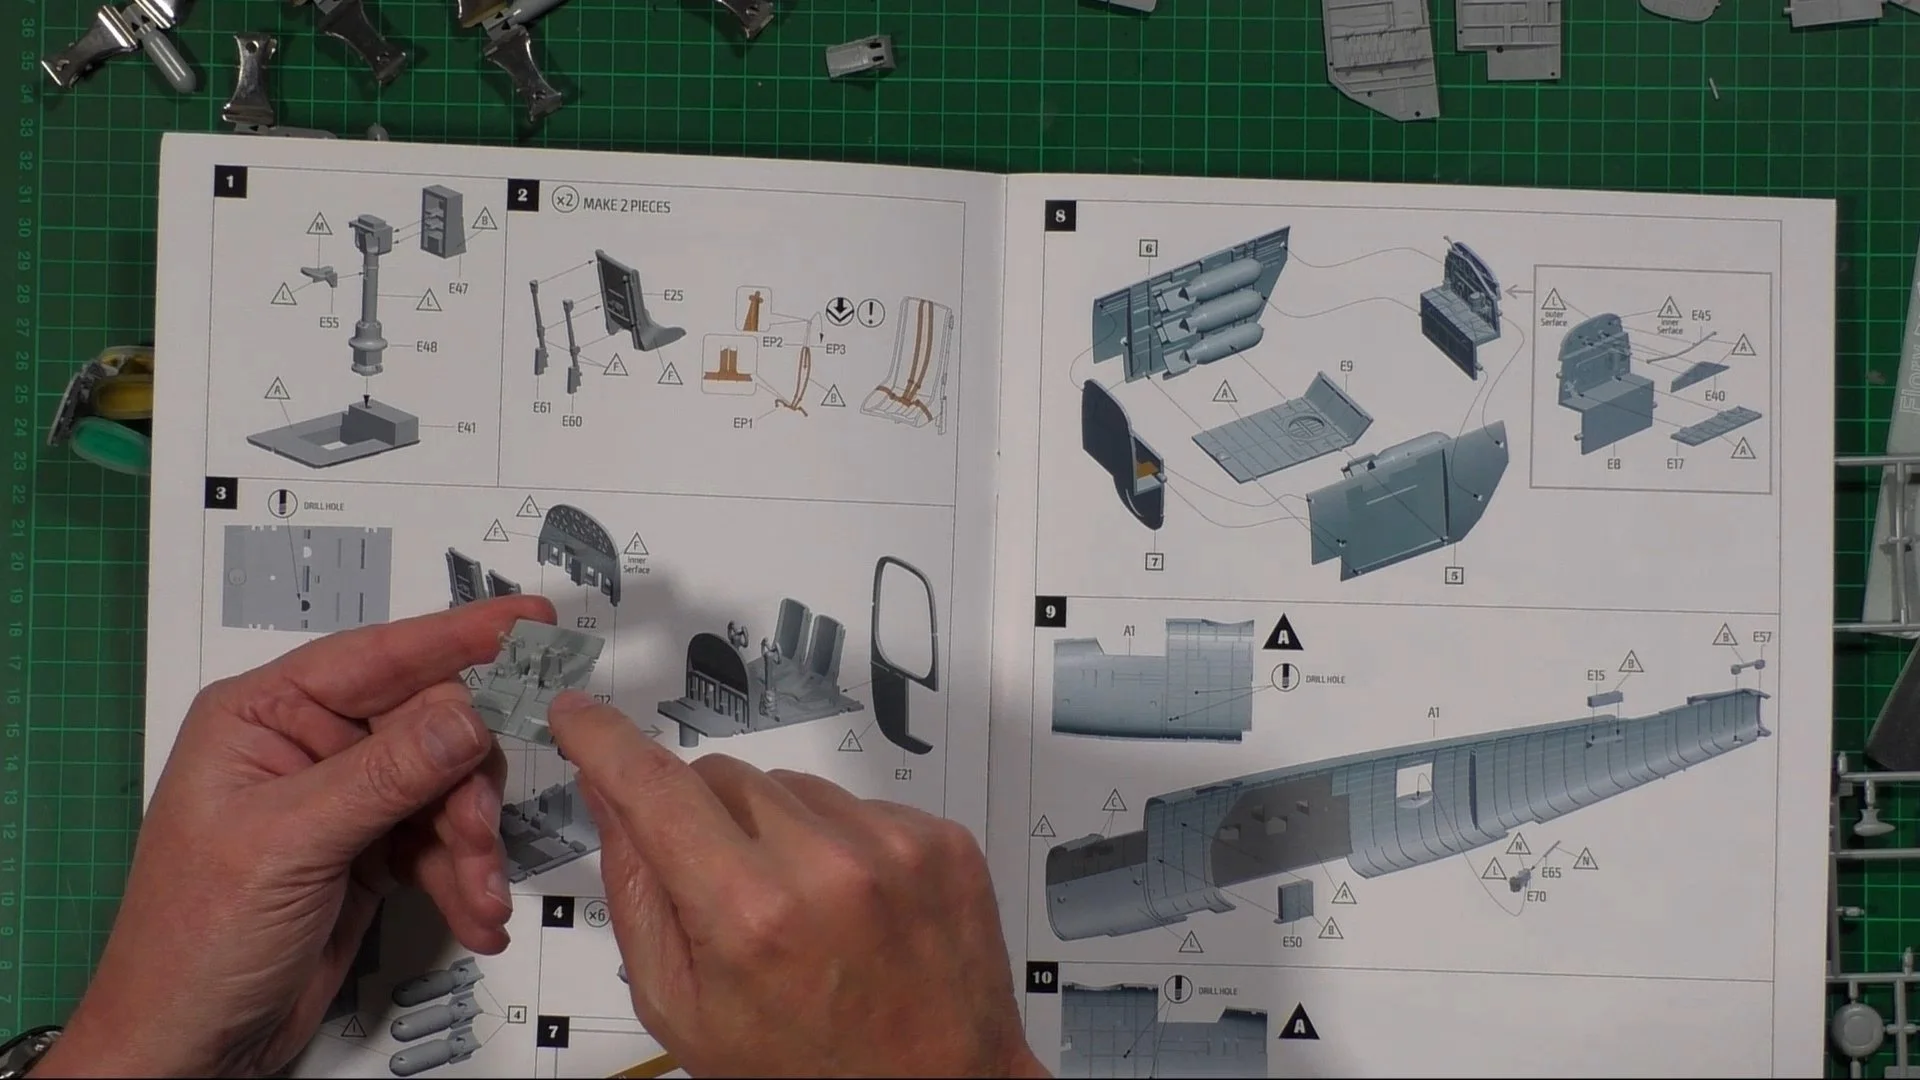
In part one, we look at the build ahead and the way will go about painting the interior. We then put the cockpit, Bomb Bay, and Tail gunner’s positions together and the pain with AK Real colors RC262 and RC230 and the Bomb bay in Tamiya LP-70. Last we put an oil wash made with Abteilung ABT005

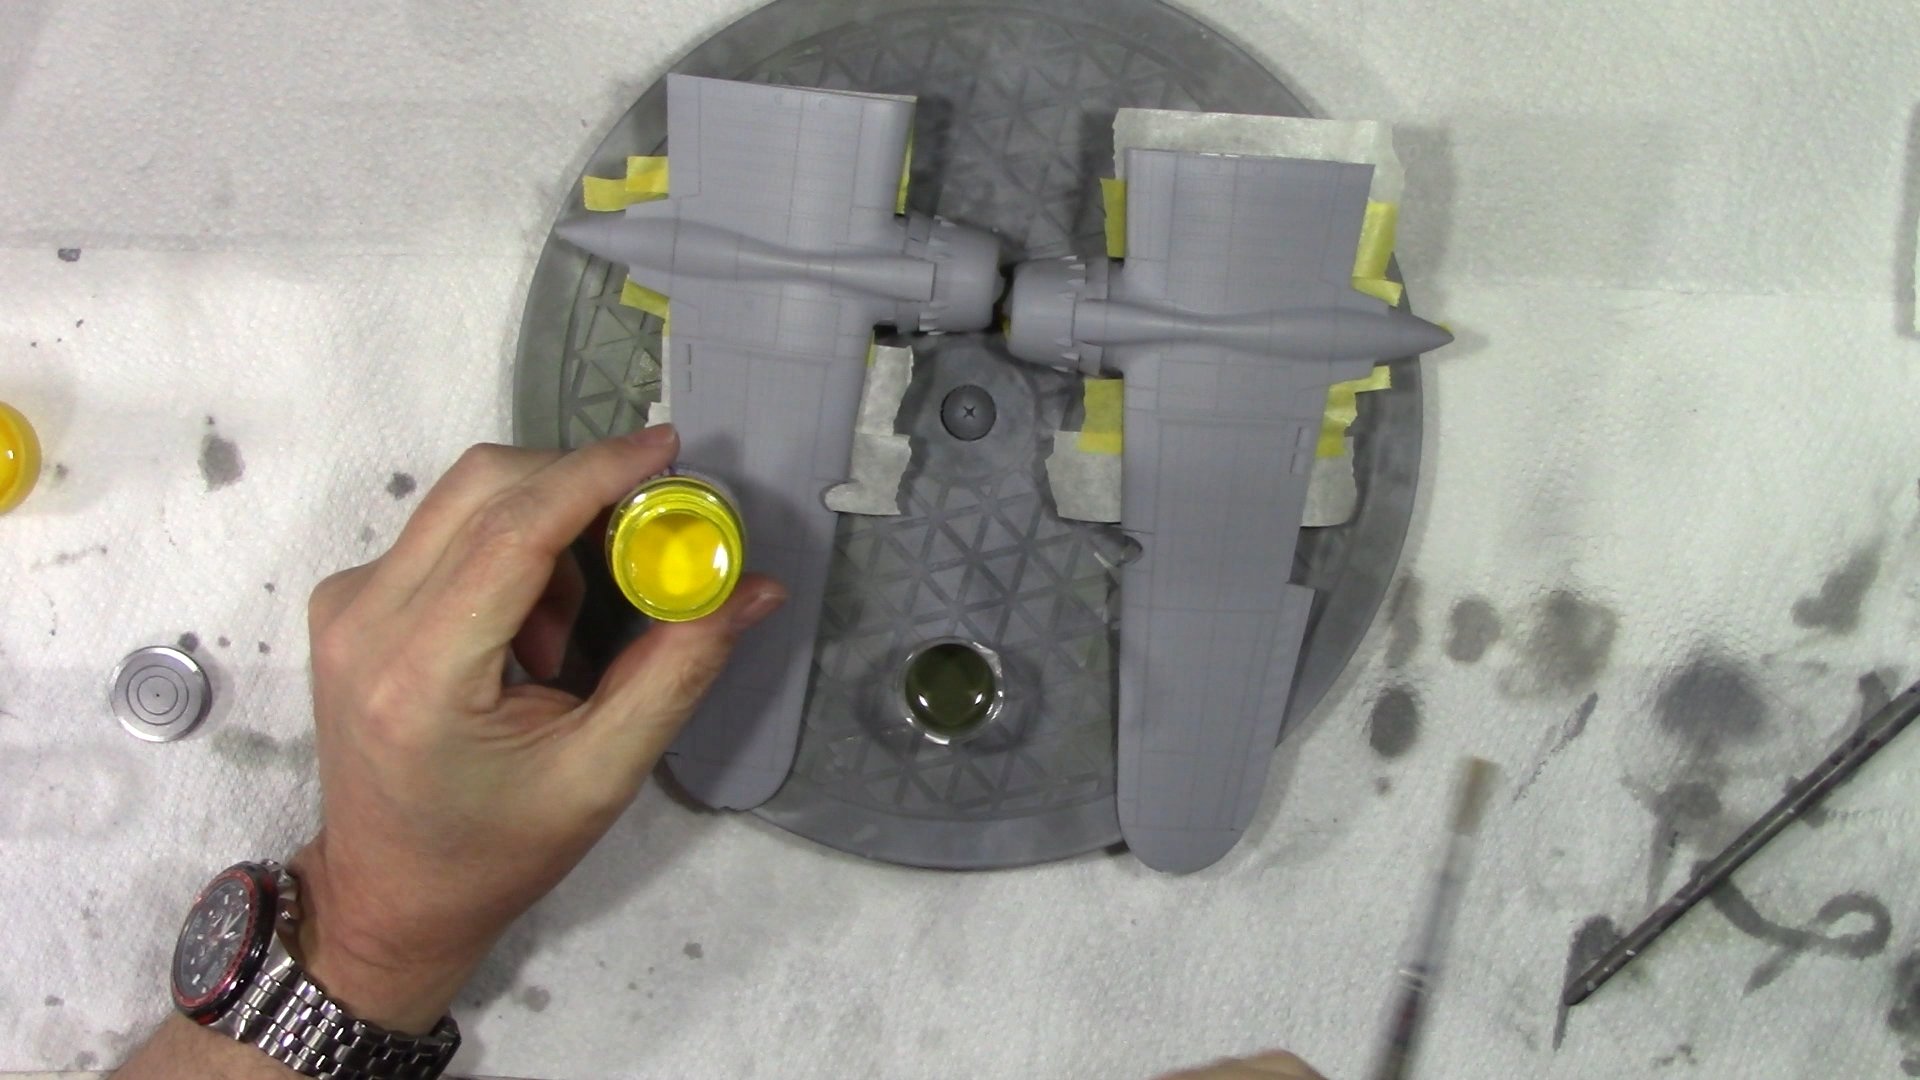
In part two, we detail paint with the RC230 dark green and then with Mr Metal Color MC214 and dry brush to give a warn look and also to blend the oils. Next, we put together the top turret and the tail. Last up we put together the engines and the wings.

In part three, 0:00 Engine installed and painted with RC262. 2:10 Paint and weather the engines with Mr Metal 214 and buff. 13:16 Guide to using the 3D printed Eduard Space set. 19:05 Installing the color PE and the 3D printer Color instrument panel and details. 24:49 Bringing the fuselage together and buttoning it all up.

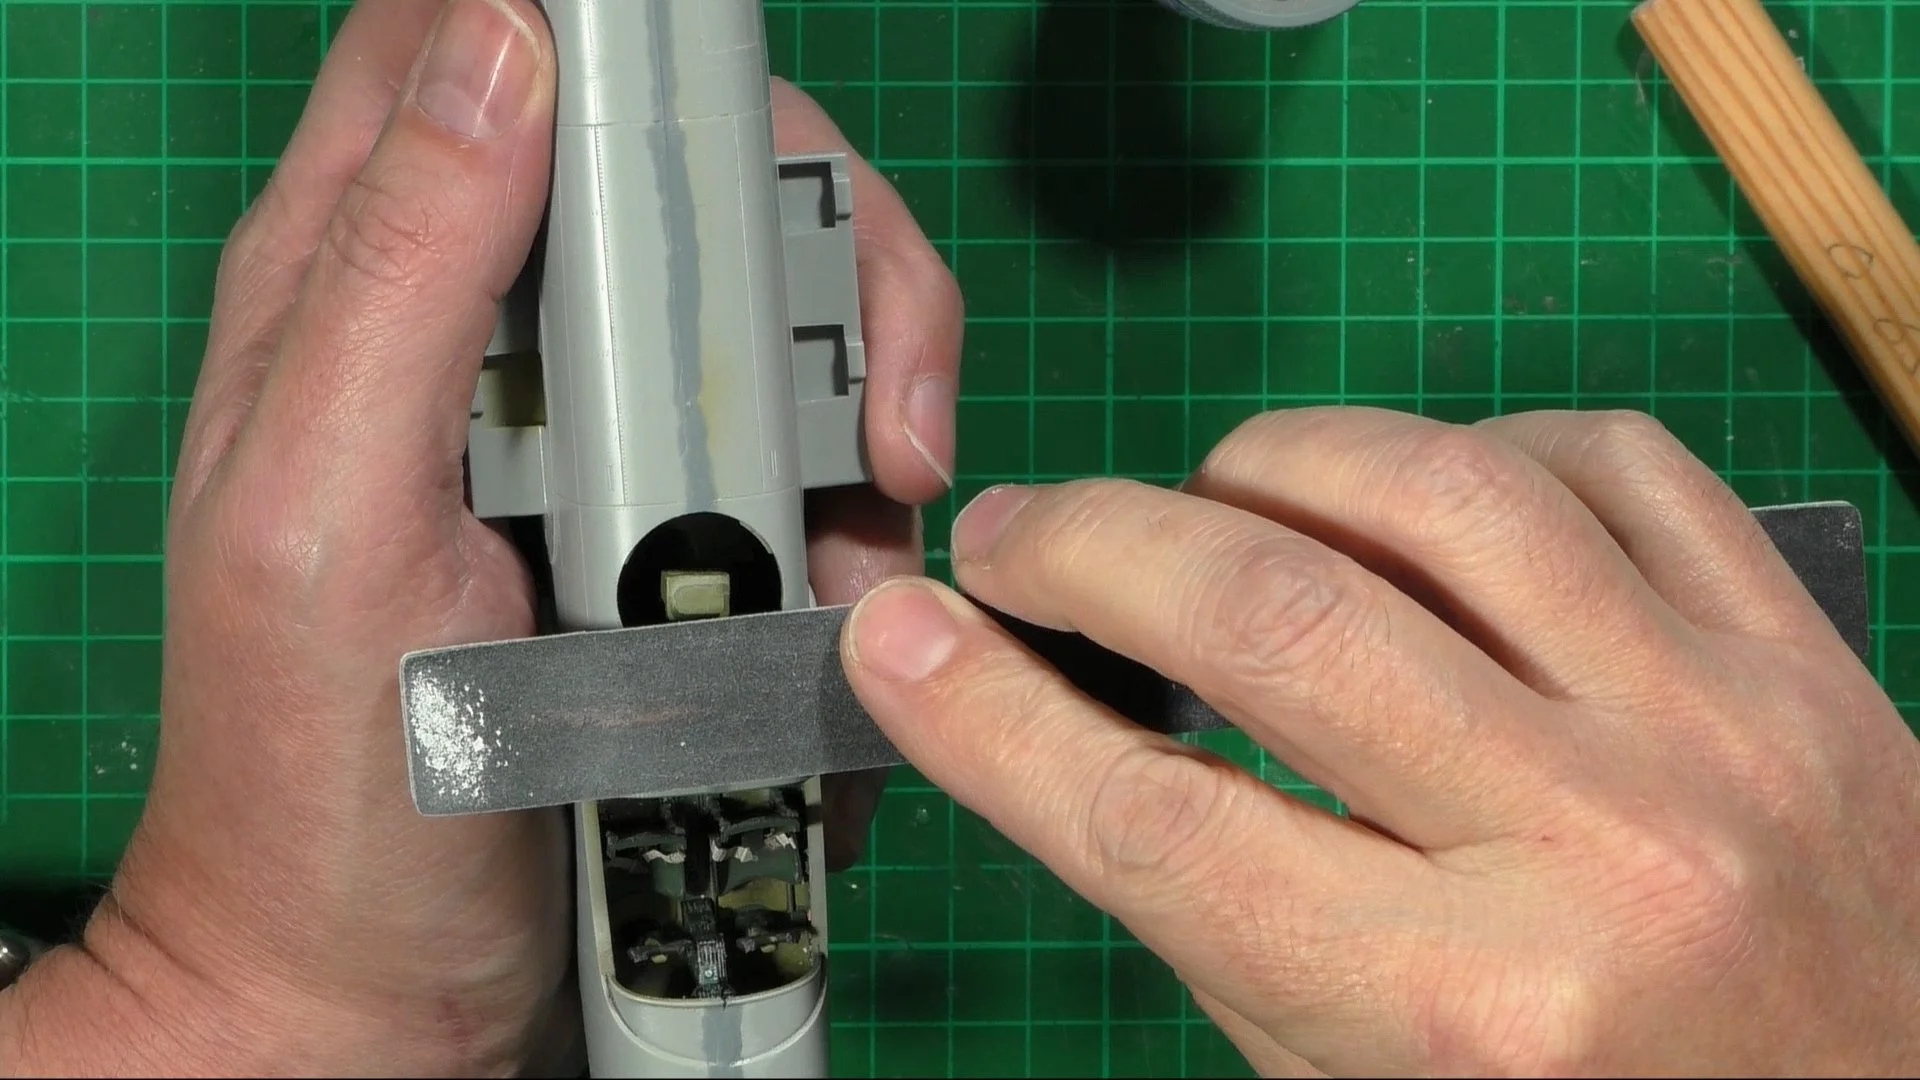
0:00 We work in the front bomb aimers area and fit to the fuselage. 7:55 Next we fill and then scrape, sand, and polish. 19:54 Then re-scribe and re-rivet all the details back on. 25:54 Adding the nose section.

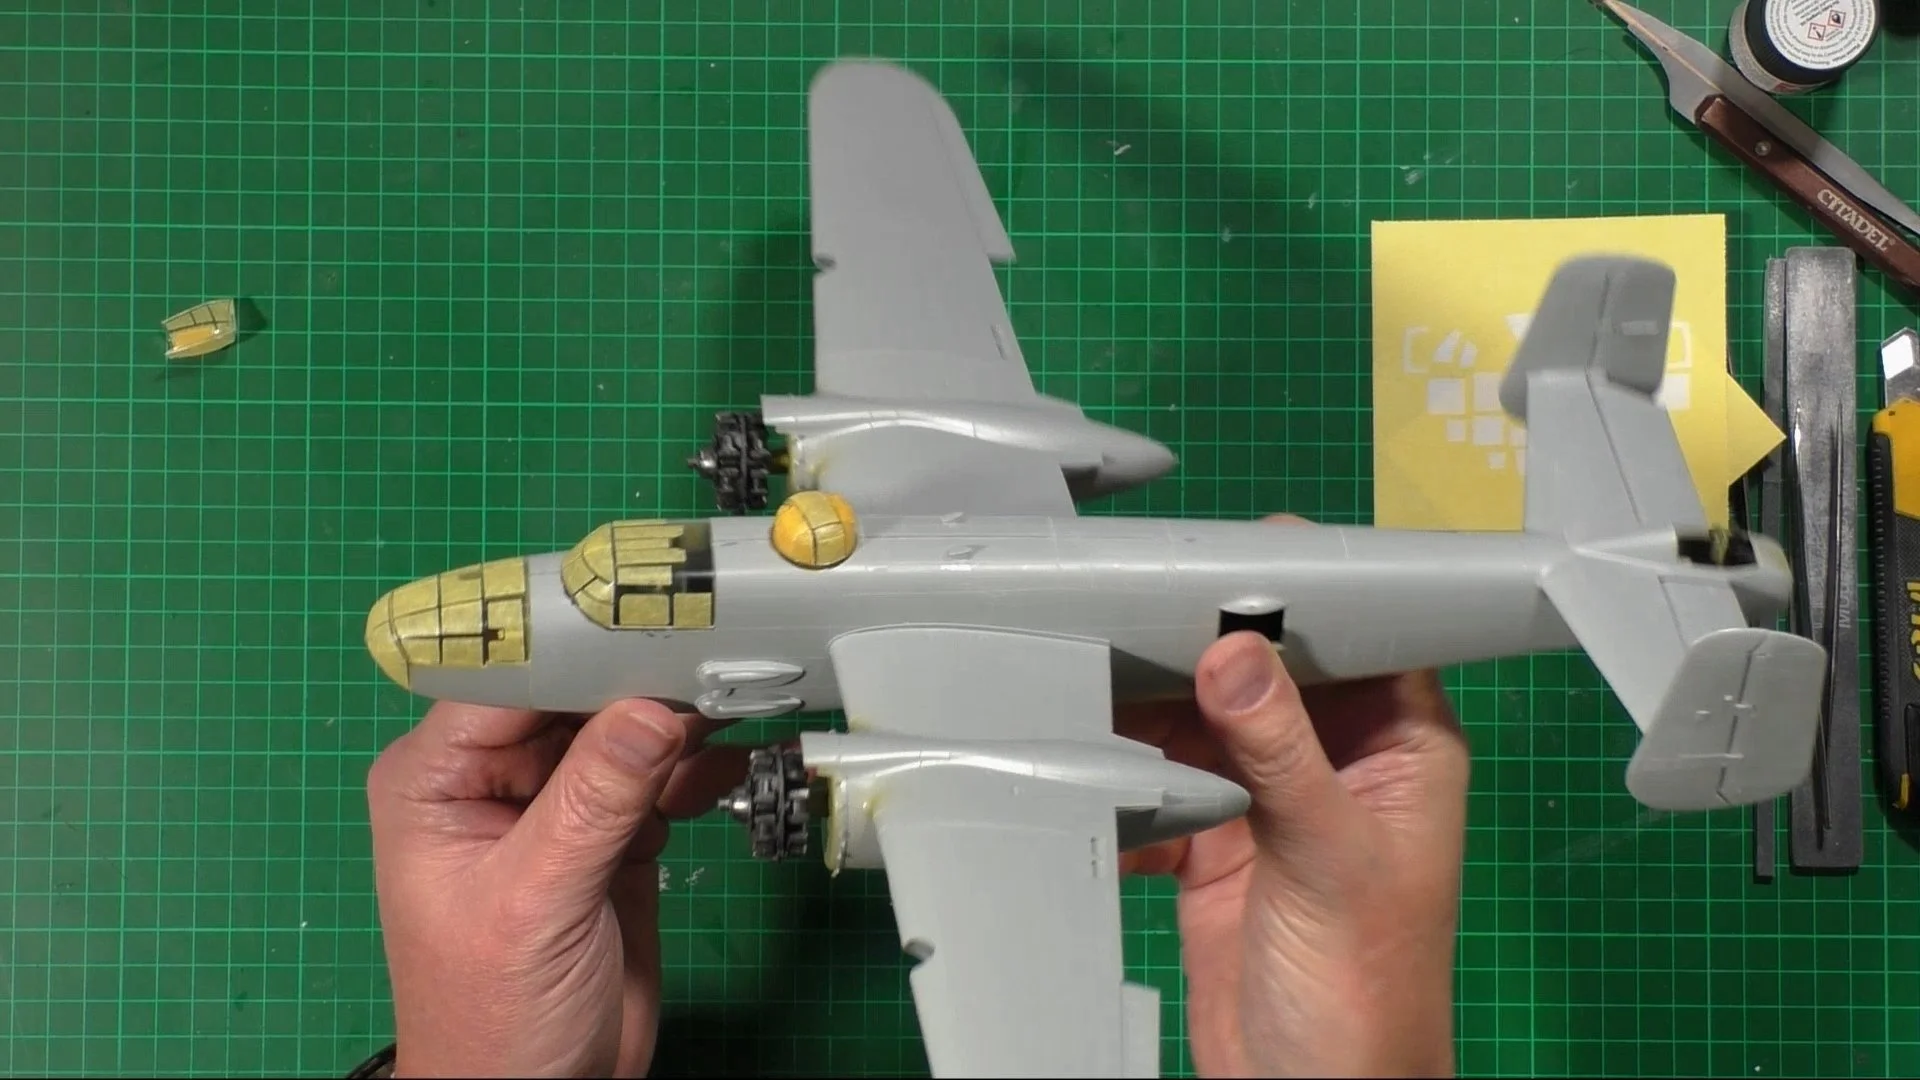
0:00 Masking up with the Eduard mask set EX925. 4:00 Attaching the clear parts with Christal clear PVA glue. 14:51 We Have a problem!! We fix the armor plate that has moved and dried in the wrong place. 21:44 Using Extra thin glue we melt and soften the part to remove it. 24:34 Once totally dry we sand and polish back to a like new look. 32:05 We then add back all the riveting details that had been lost in the clean-up. 34:19 We re-attach the armor plate to the fuselage.

0:00 We base coat the interior green color to the outside of the clear parts so they will show the green from the inside. 0: 55 We put a coat of black XF-85 Tamiya over the green to colorfast the framework ensuring a solid look. 3:26 Priming with model with AK Grey Miro filler primer AK758 with a few drops of Mr Hobby quick-drying lacquer thinners. 8:33 Next we move on to the grey underside, for this, we use Hataka C033 thinned 40/60 with Rapid Thinners. 21:52 Next we lighten the grey with a drop of Tamiya LP2 white and thin 30/70 with Rapid thinners and blow in the center of panels to lighten. 26:07 We add another drop of white(now 2 drops) to the grey and repeat but this time just in a few areas. 30:12 New we add a drop of black to the grey and post shade on the panel lines and access hatches etc.

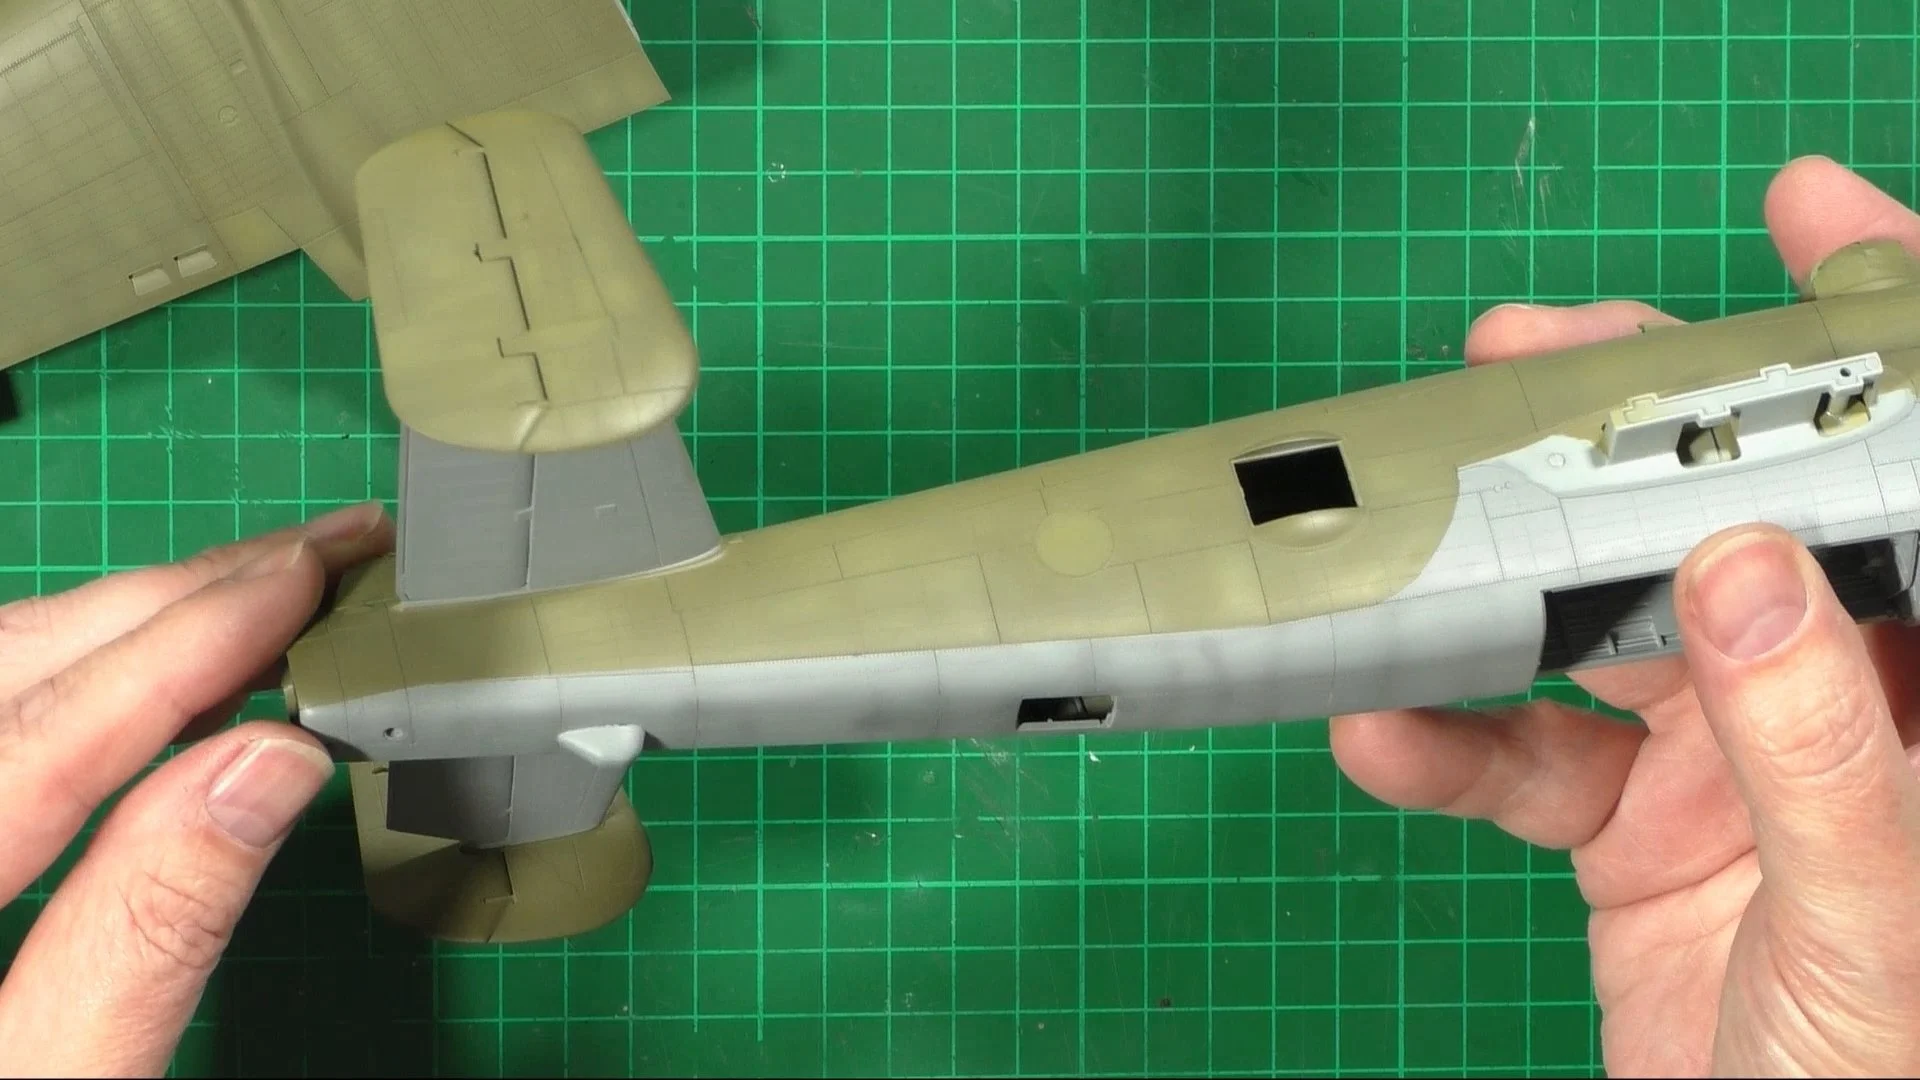
0:00 Masking up the B-25 ready for the Olive Drab color.17:04 We lighten the Olive drab with a few drops of Tamiya LP-8 into the Hataka C004 Olive drab.21:00 We airbrush on the mix thinned around 70% onto the model.

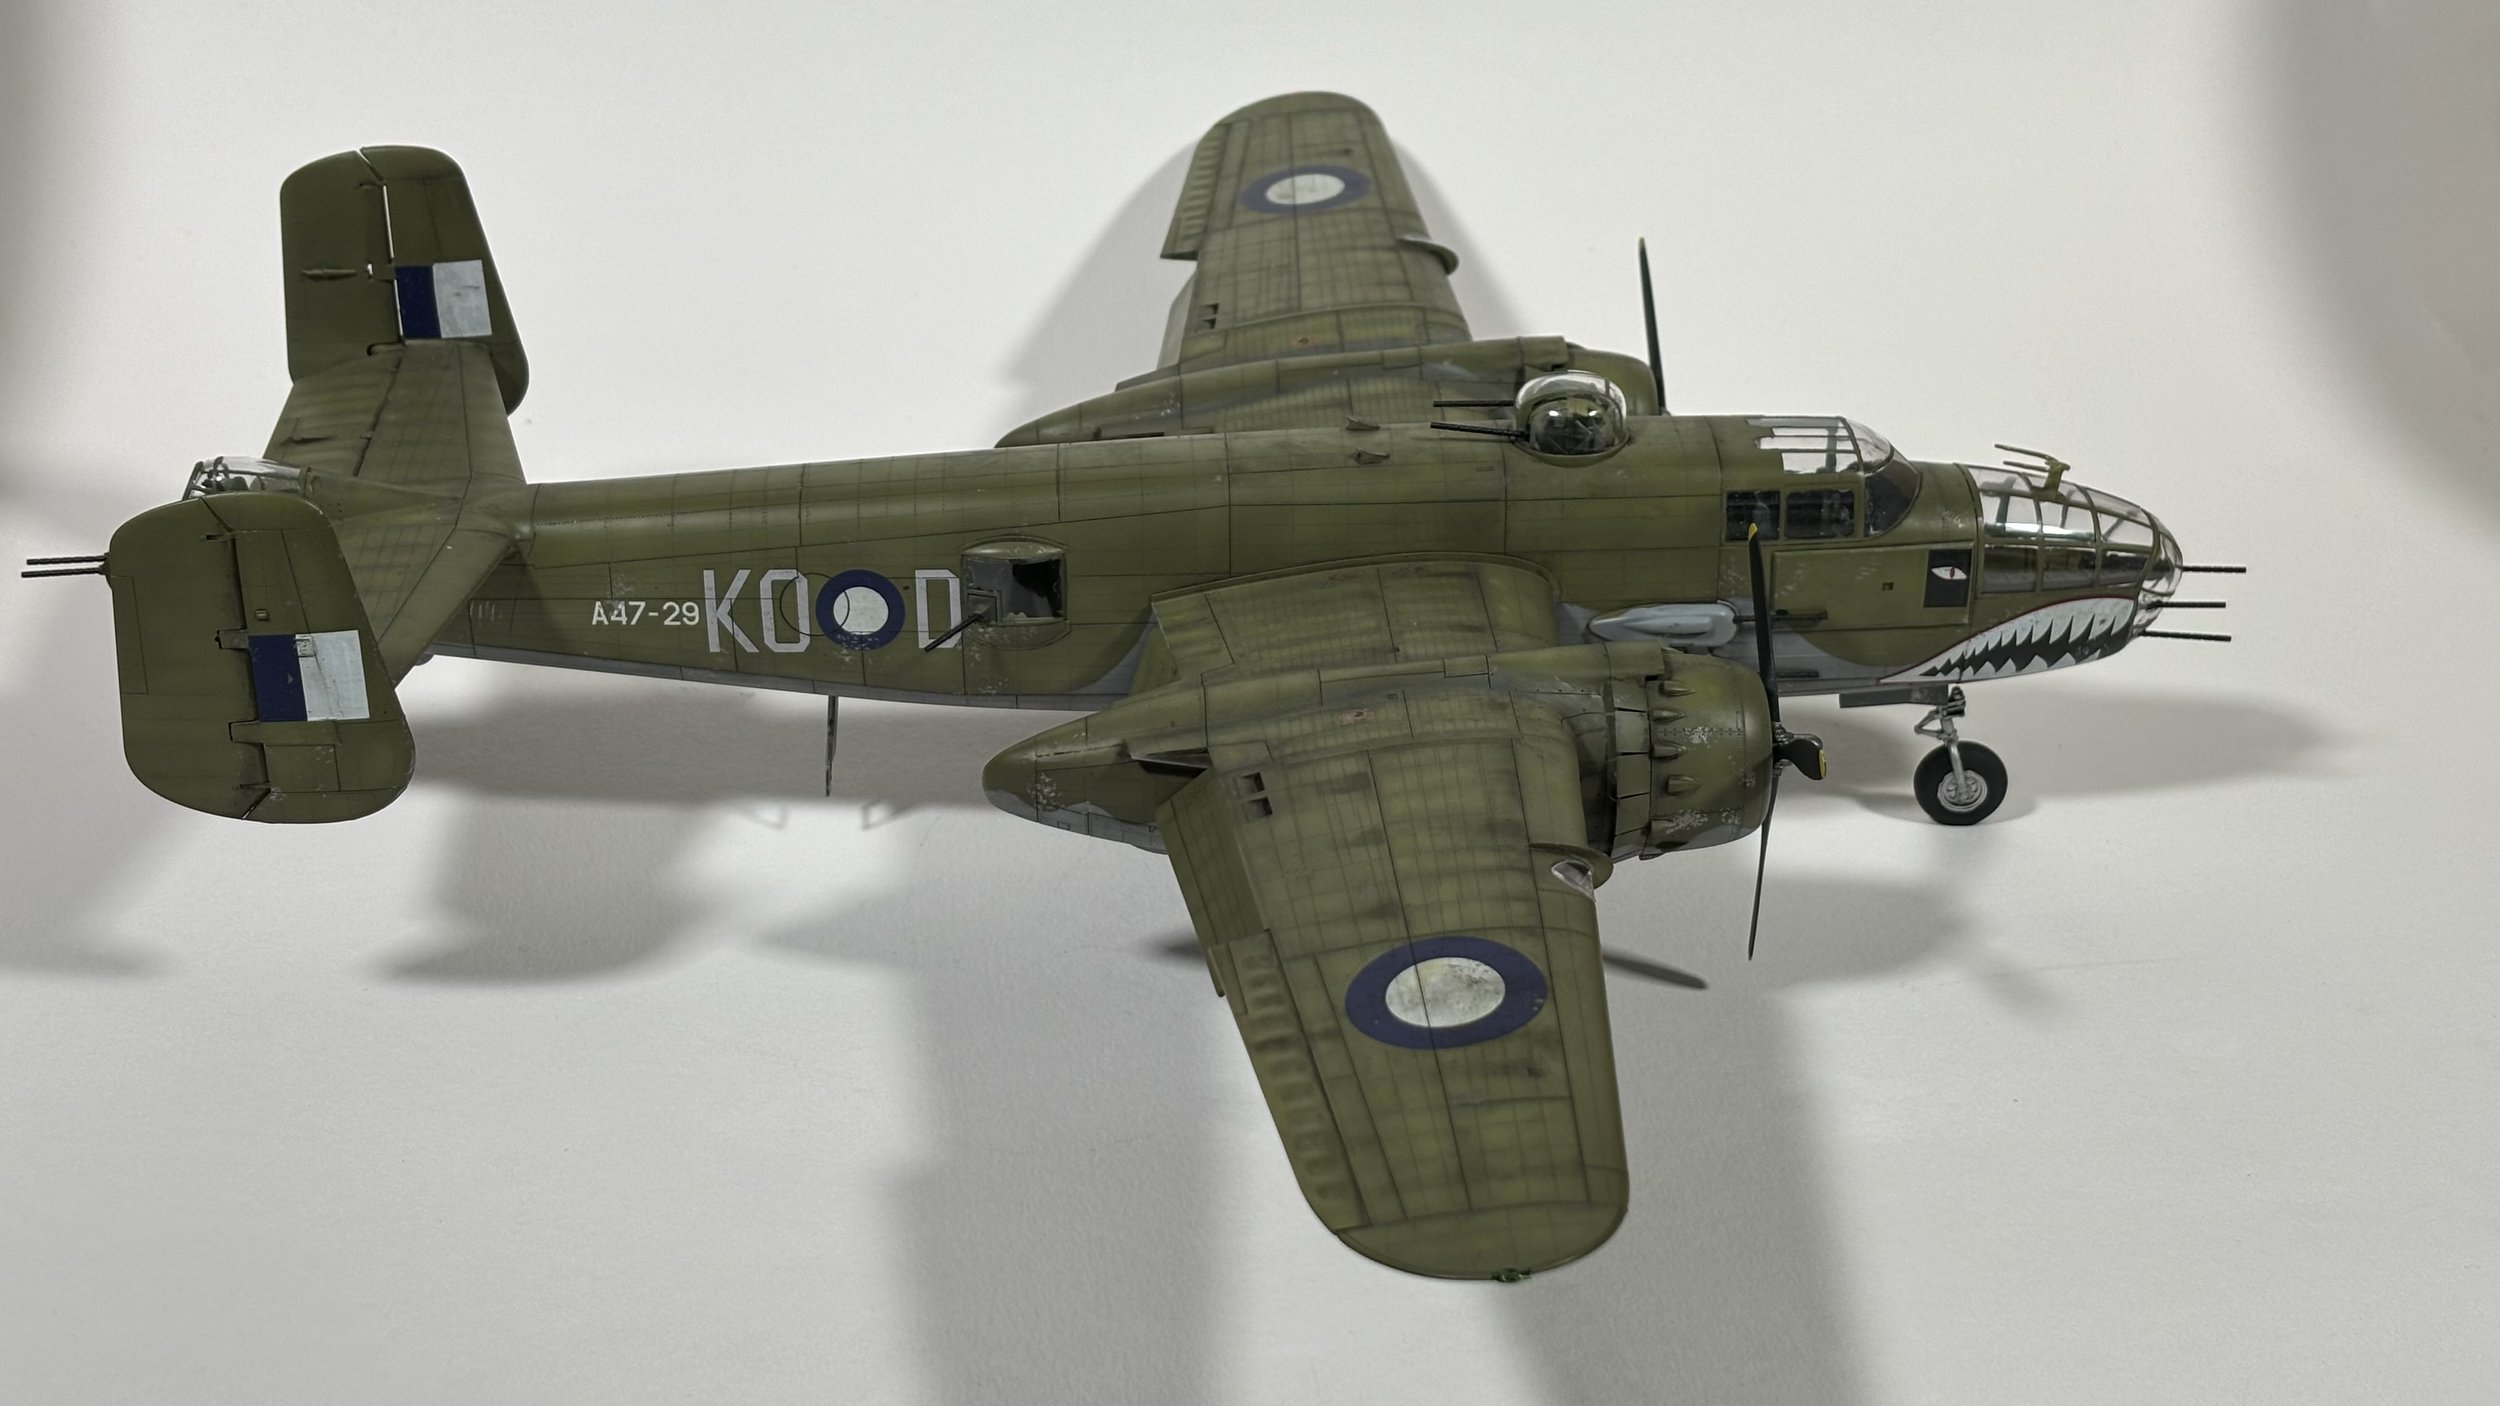
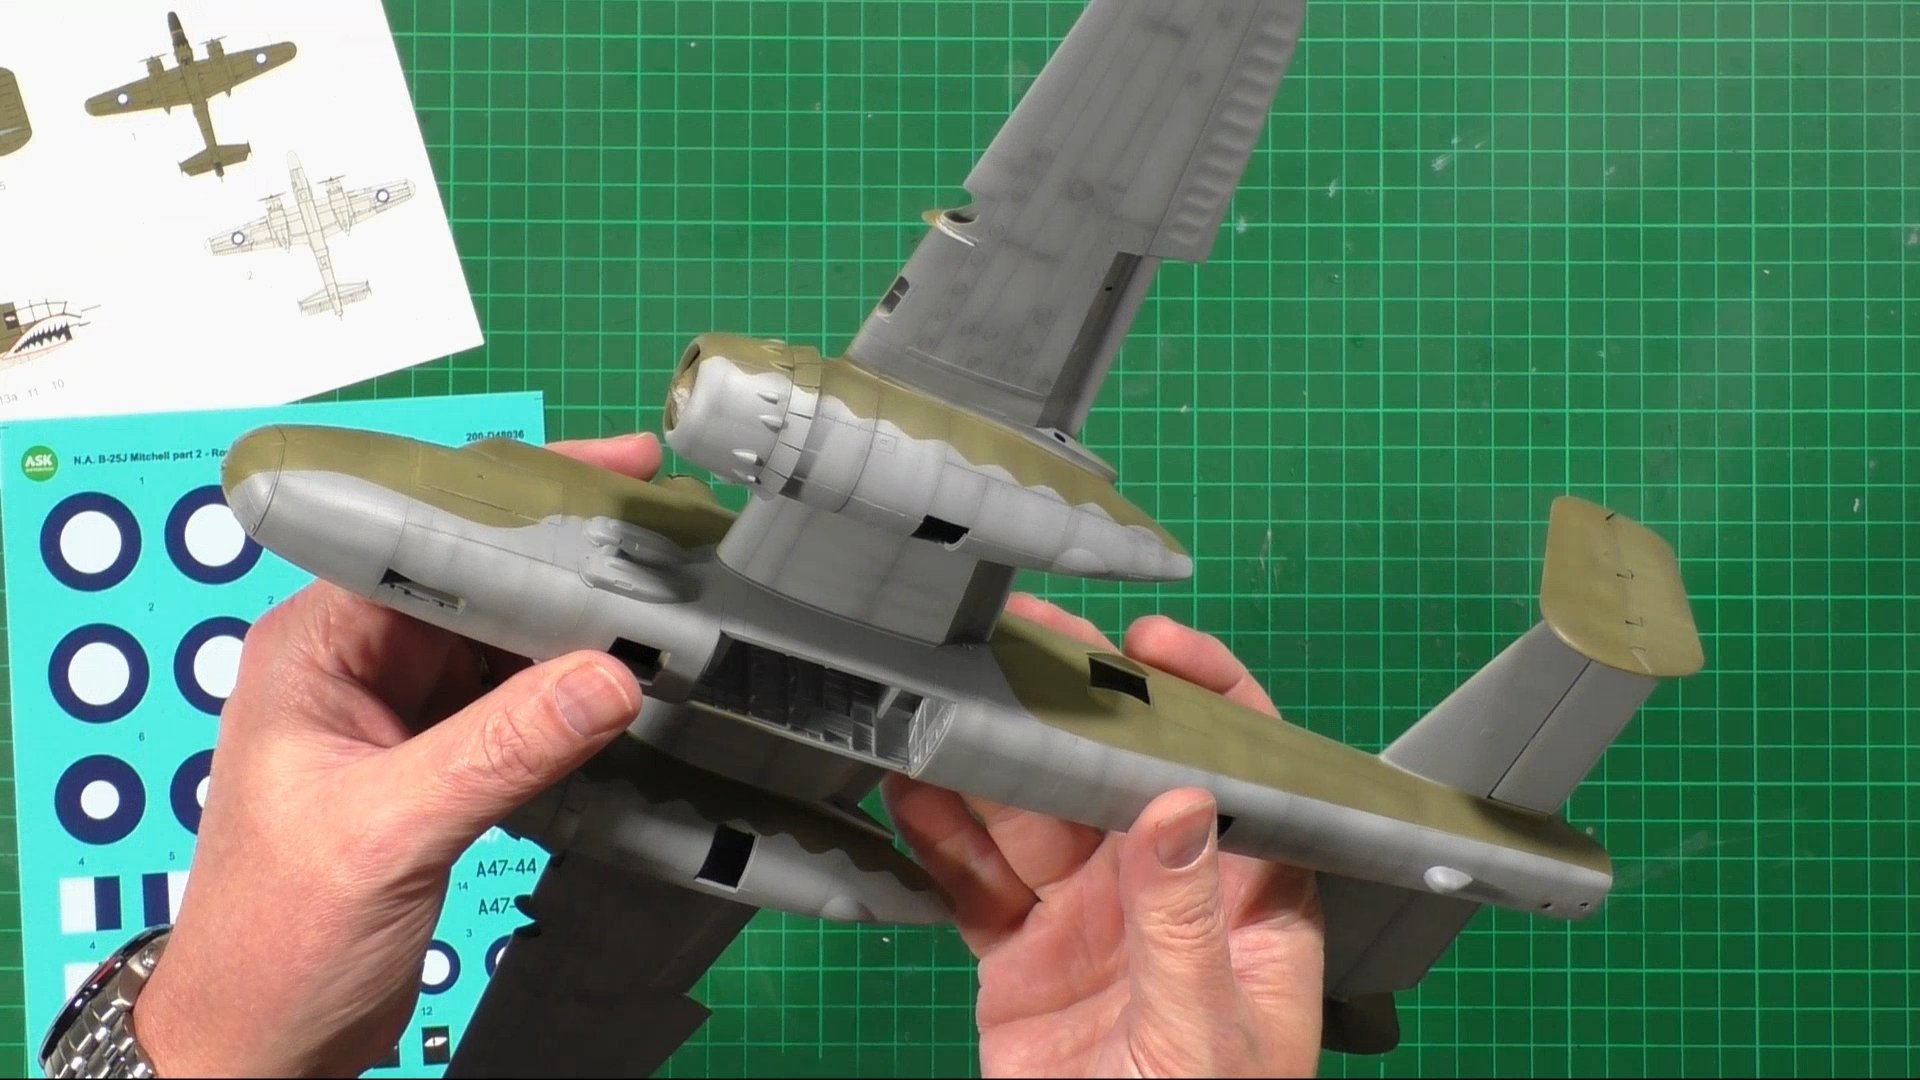
0:00 We add more yellow to lighten the olive drab even more to fade the color 7:40 Next we add some buff color to our lightened mix (Tamiya Buff) and then thin a little more 30/70. 15:28 We unmask and have a look to see if there are any bleeds in the paint. 19:27 We use ASK decals for the Australian 1944 markings and apply them to the model.

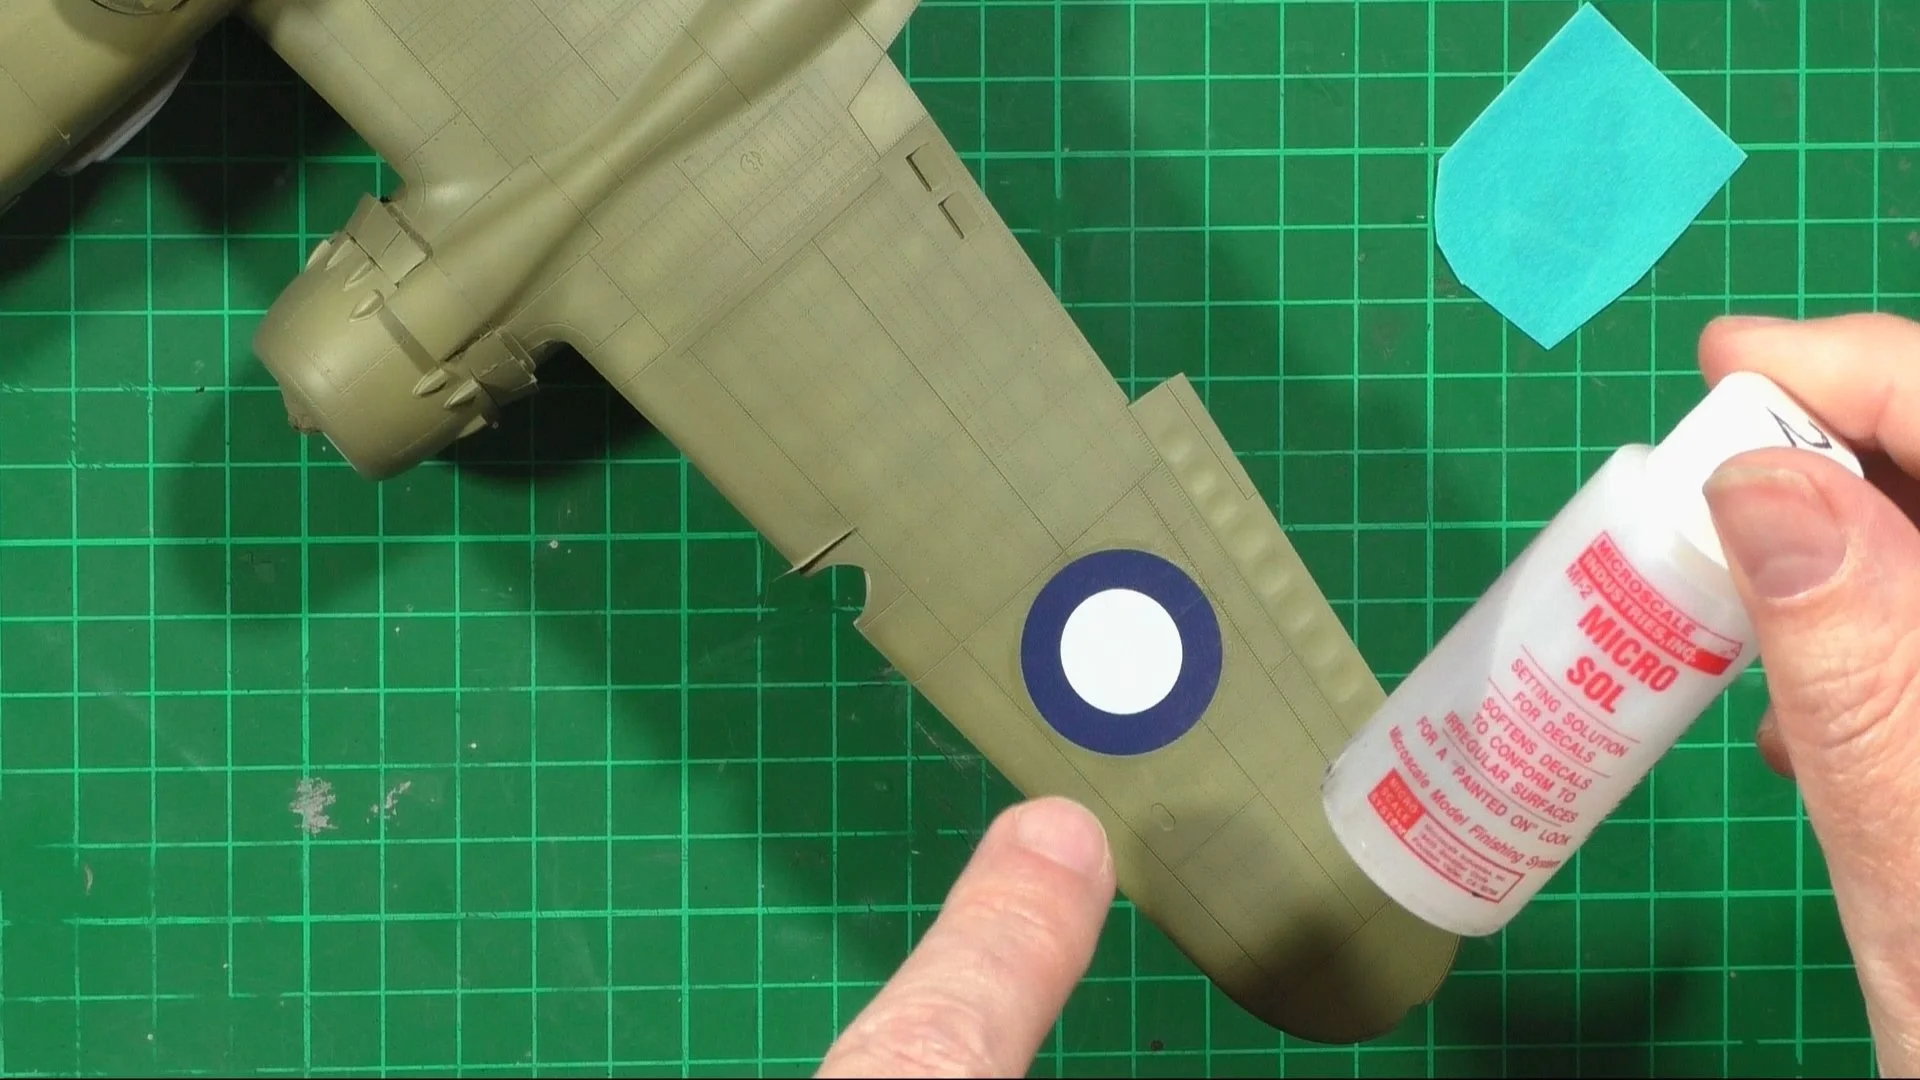
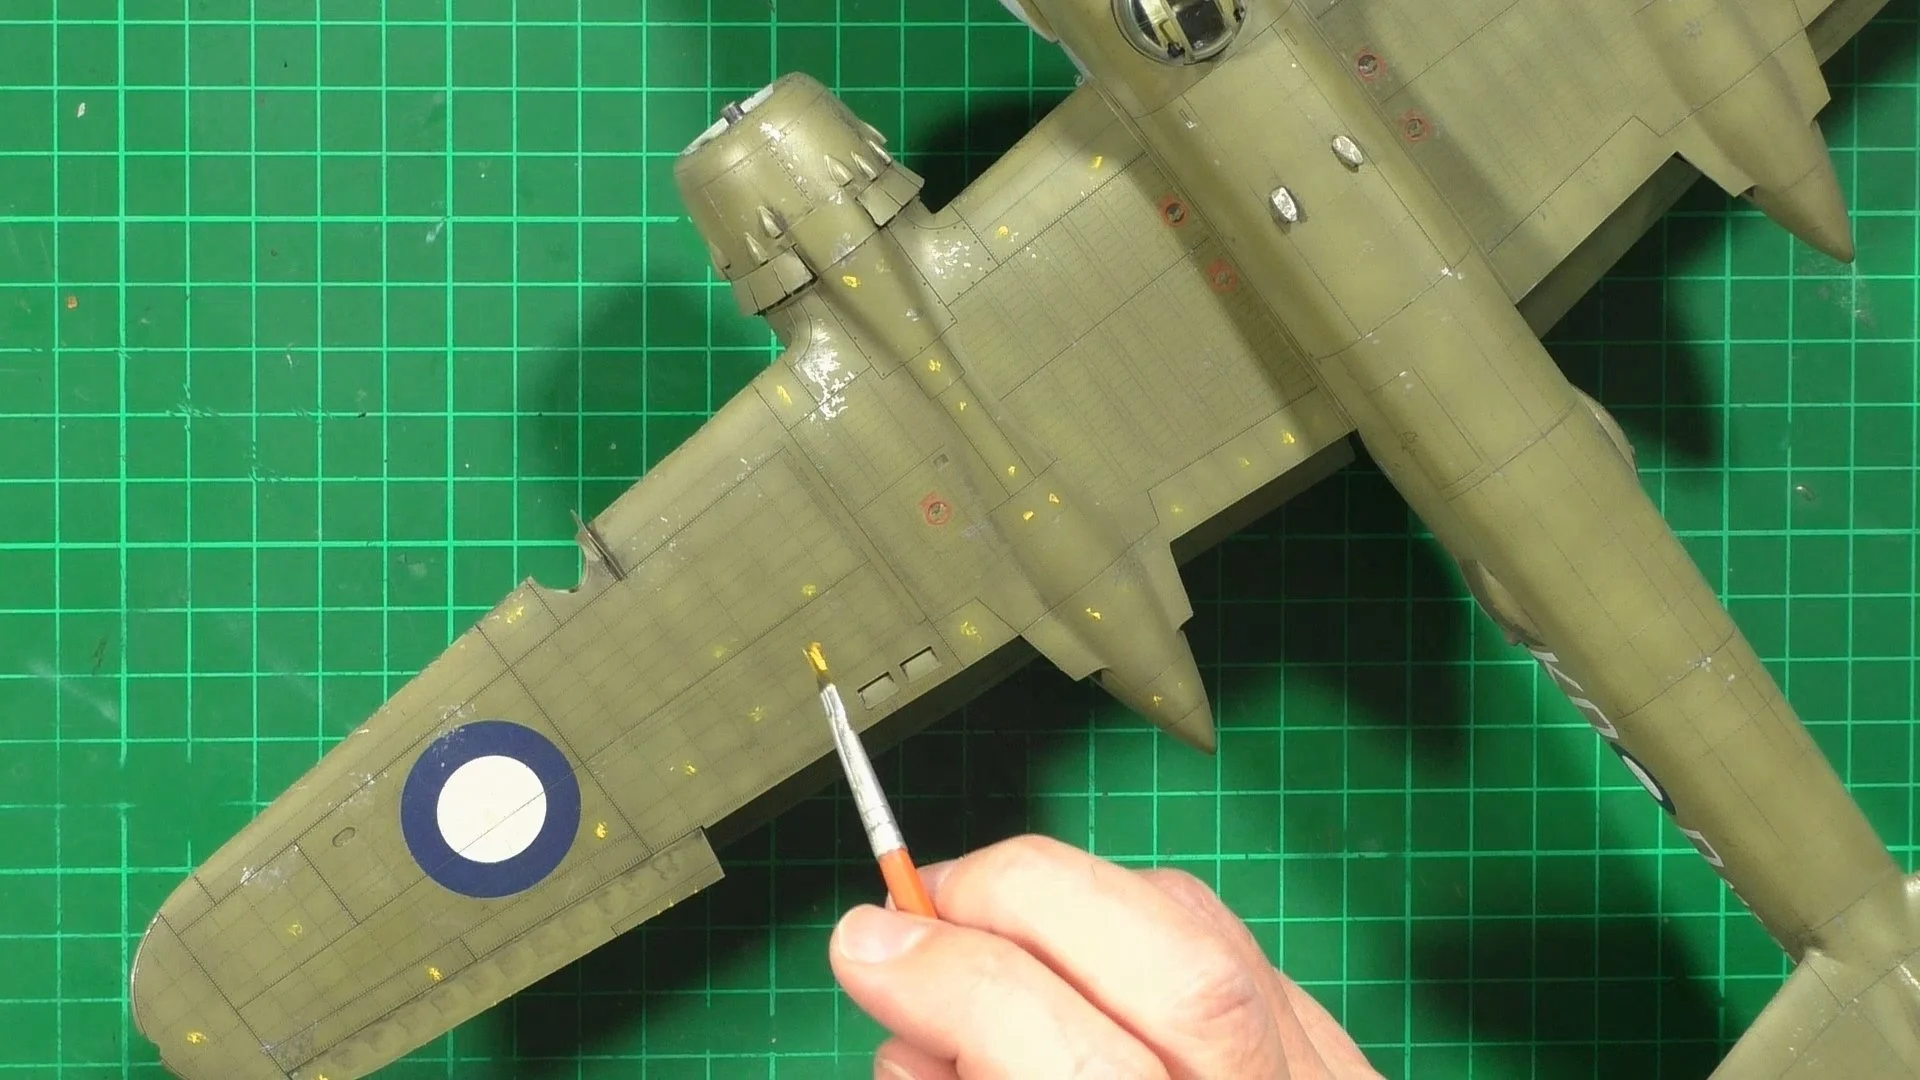
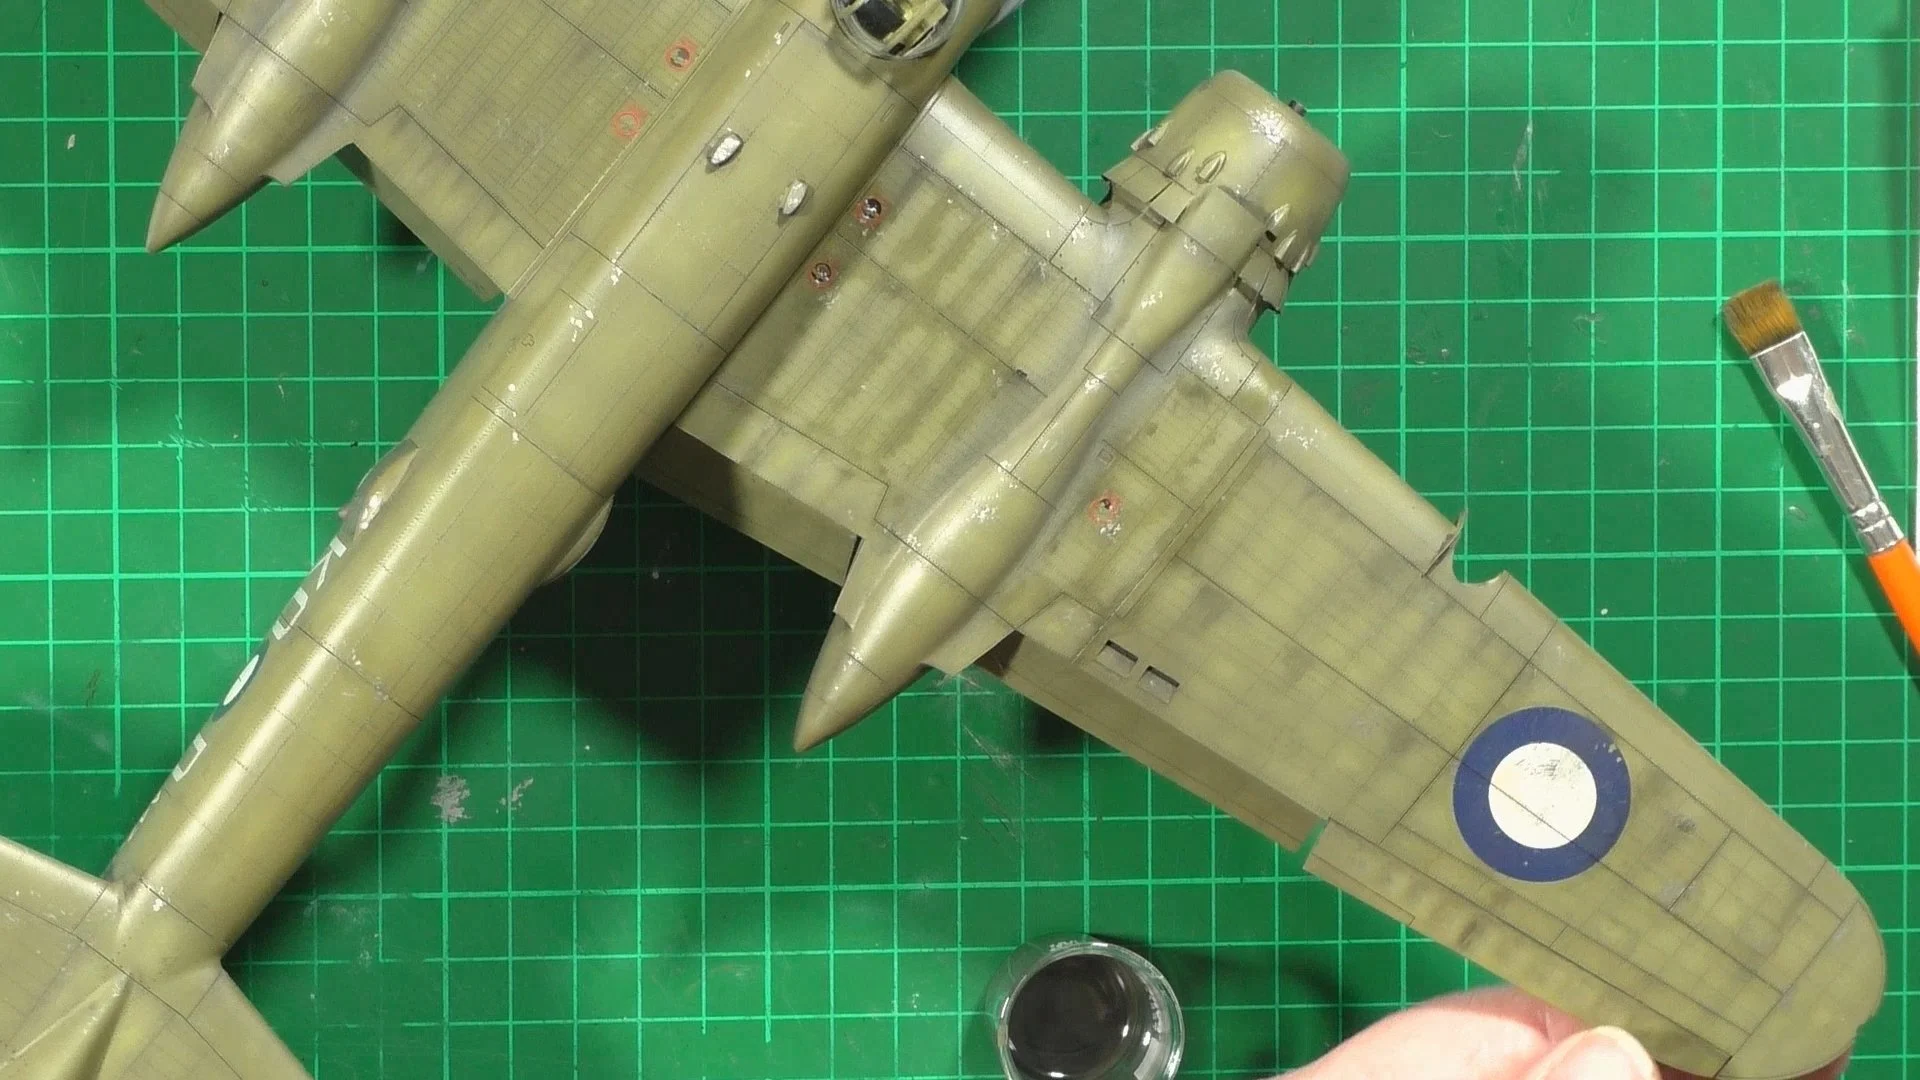
0:00 We put down the last of the decals. 13:02 Looking at the decals that haven't gone down very well so after a few days of setting solutions and cutting the decals to get them down properly. 13:30 We seal the decals in place with (AK 3rd Gen Matt Varnish AK11237). This is thinned around 80% Thinners. 23:18 Next it's time to add the wash to bring out the details and to start the weathering. For this we use the (Flory models Dark Dirt Wash FMW002) This is just brushed neat, all over the model and left to dry. 27:56 With the wash totally dry we use a damp kitchen paper towel to remove the wash.

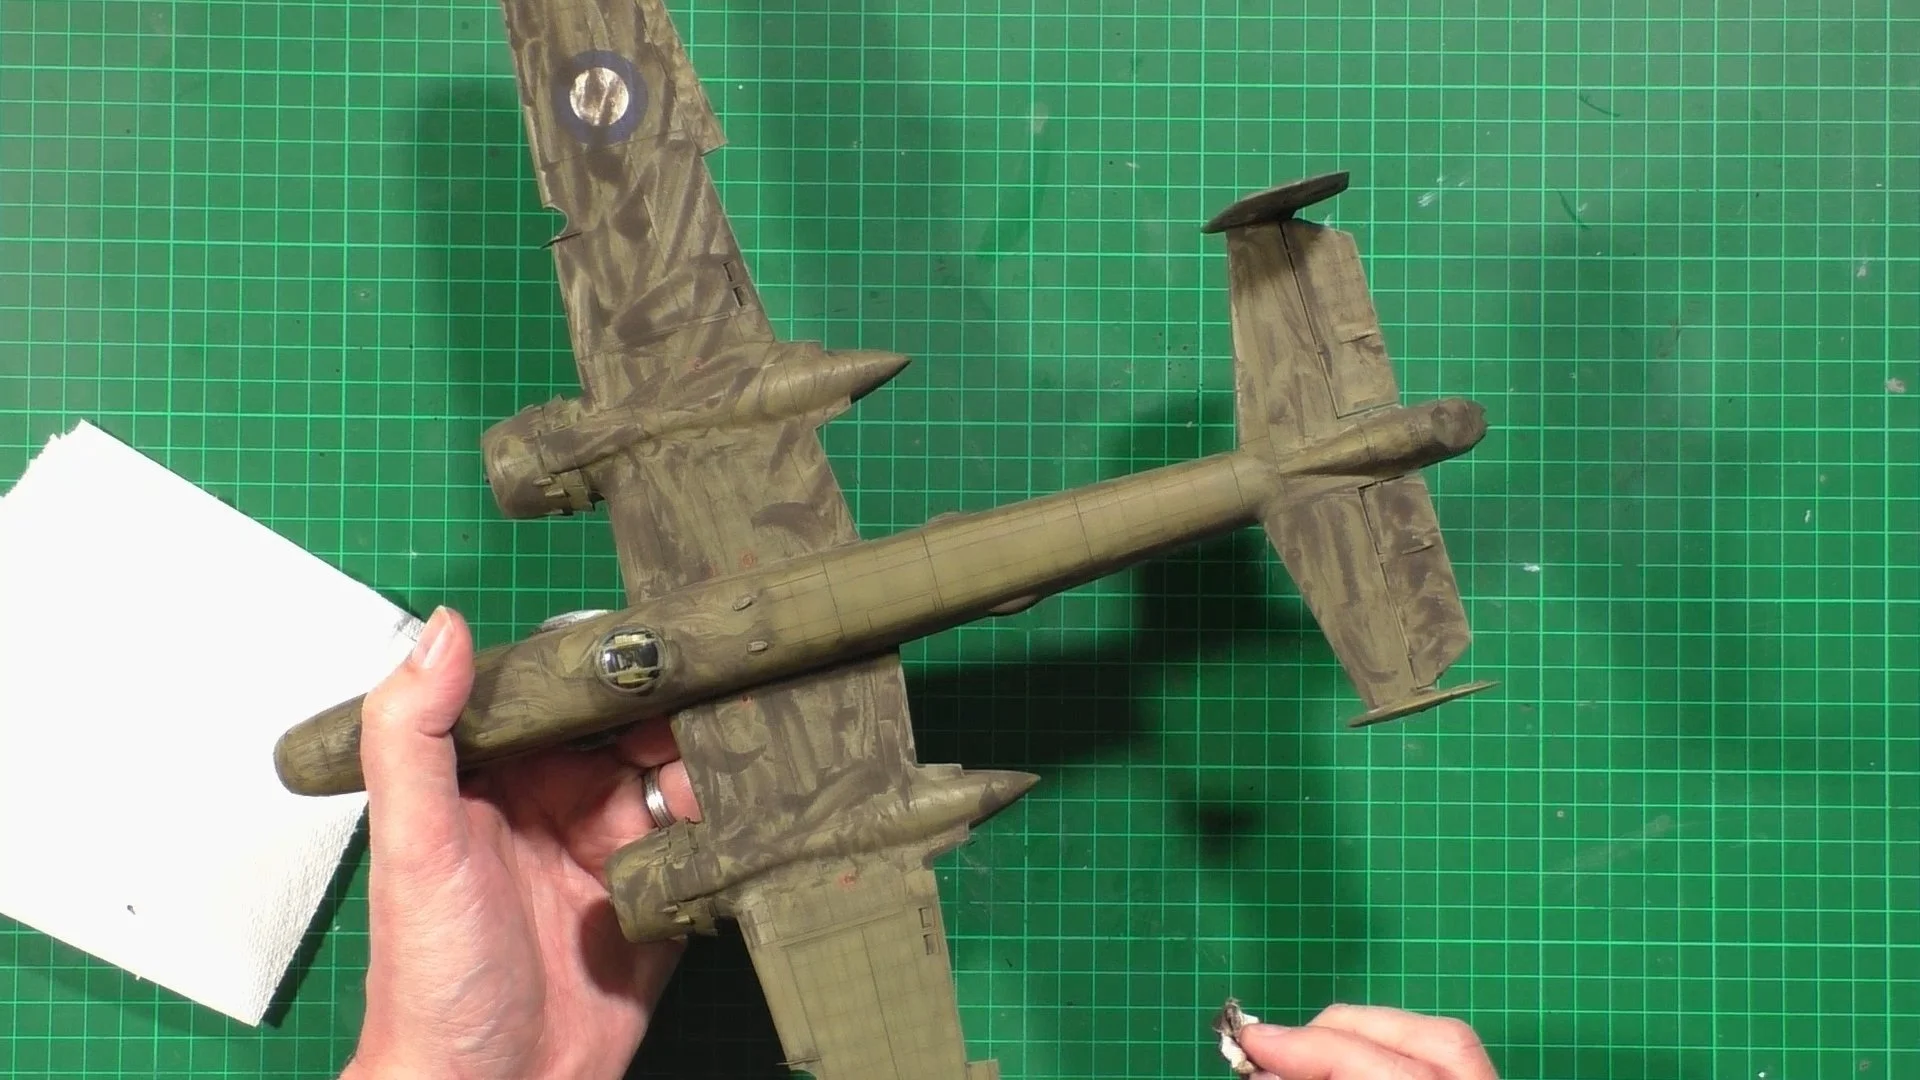
0:00 Here we use (Mr.color Super Metallic SM201) for the chipping color and use a sponge to add chipping all over the model 20:05 Next we attach the wings and lock into place and then add the flaps, gear doors, and bomb bay doors into place. 25:02 With the model together we continue the weathering with oils to fade and highlight areas over the model. 37:15 We use oils to post shade in areas around panel lines a details.

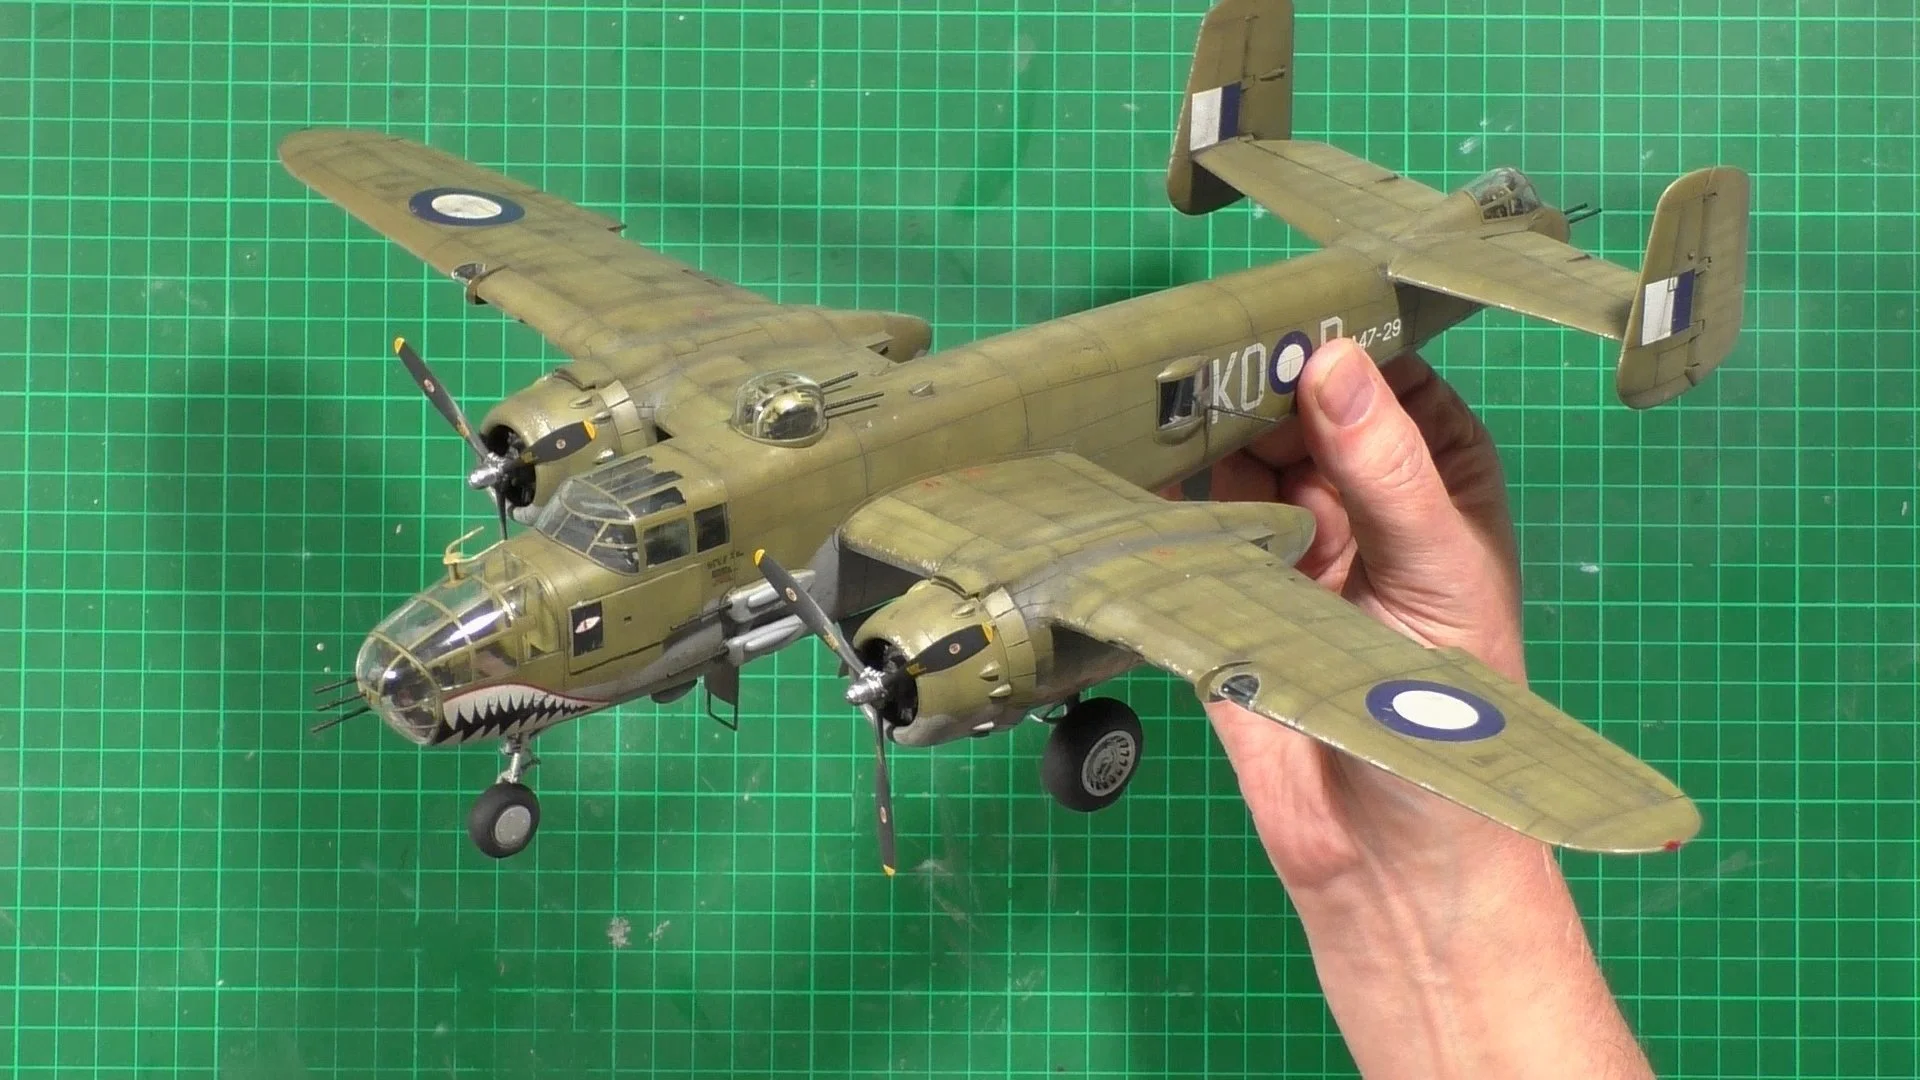
0:00 Here we use neet oils to recreate streaks and stains onto the paintwork. 9:00 We make a thin oil wash to make more stains on the surface of the model to give it a worn dirty look. 24:13 Next we paint and weather the props ( https://youtu.be/ZIs4u-fZ-5M) 28:28 We print off some replacement gun barrels to improve on the kit parts and install and paint with Dark Iron. 34:32 Unmasking all the clear parts. 38:47 Installing the landing and navigation lights 43:02 The final reveal and thoughts about the build