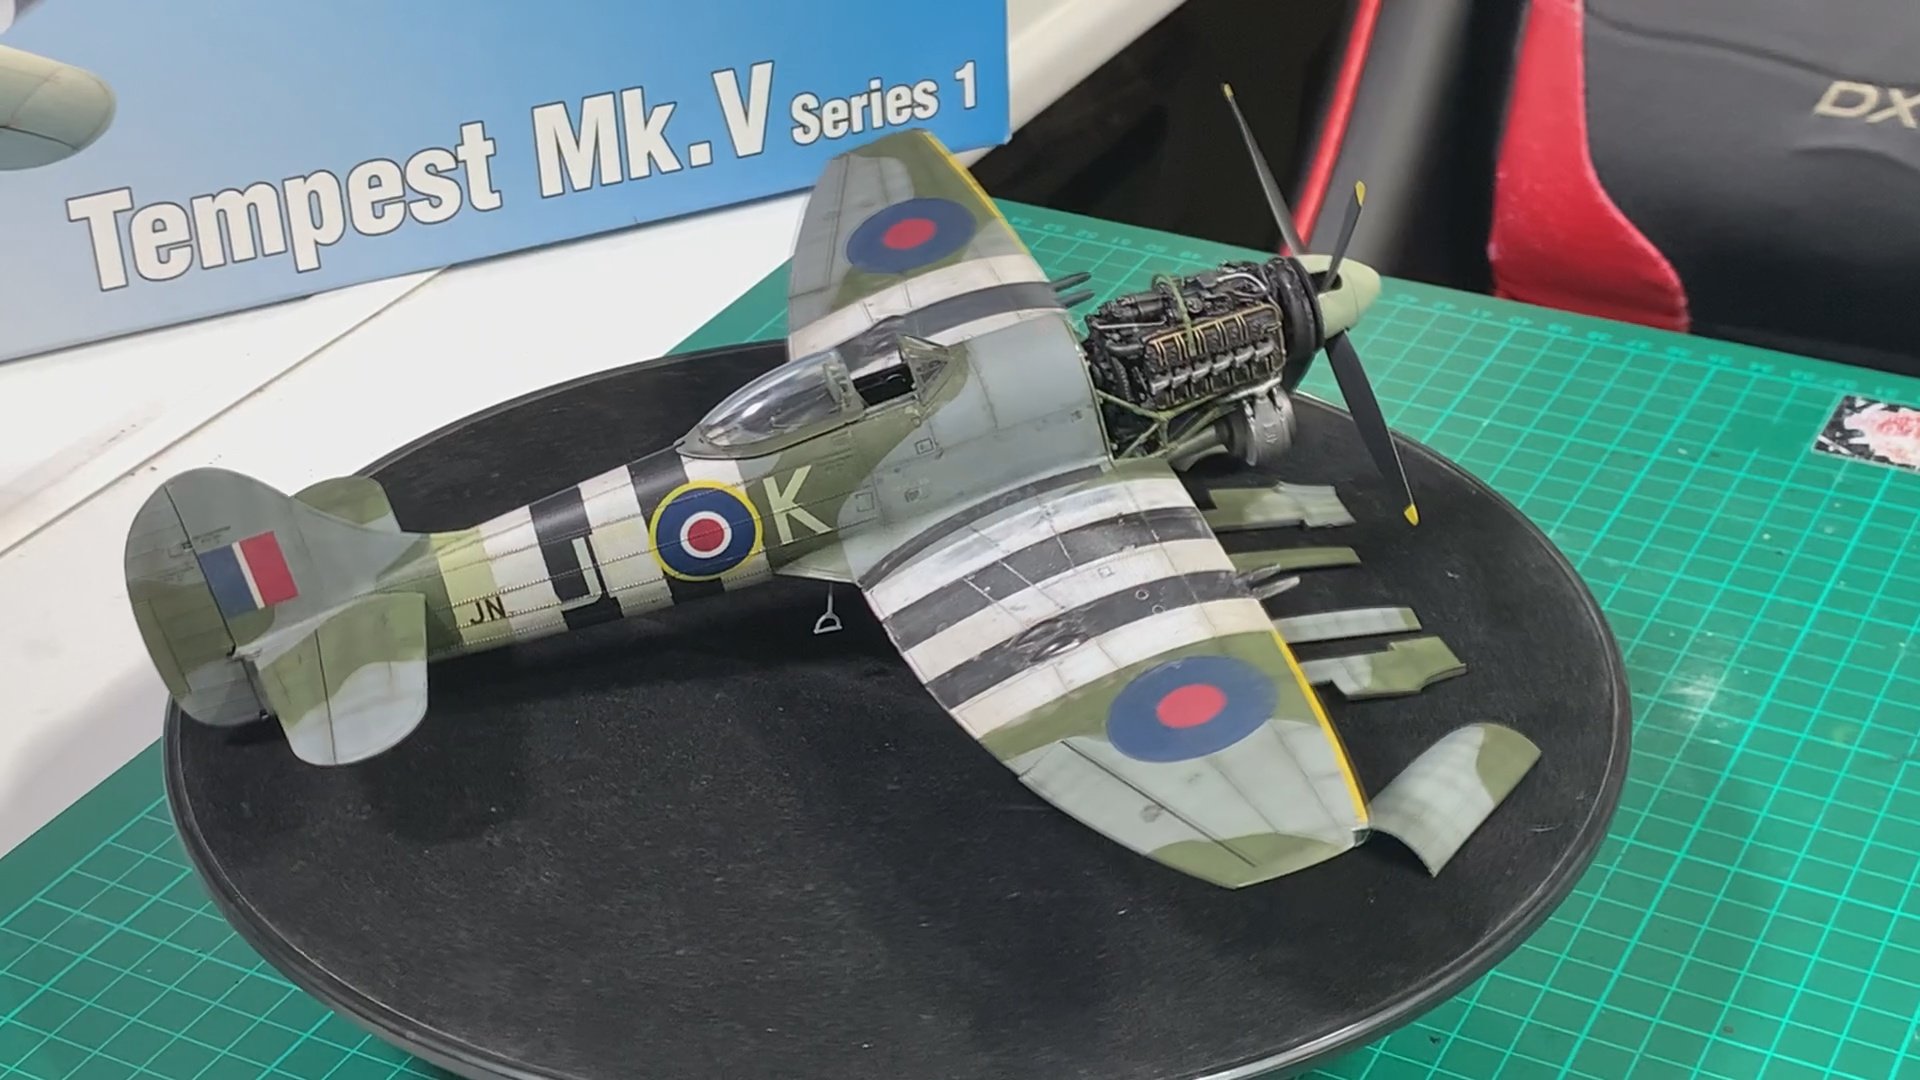
Tempest V
Scale: 48
Manufacturer: Eduard
Parts used: Eduard zoom 644006, Brassin Engine 648417, Gear 648446
Main paints used: Tamiya and AK Real Colours
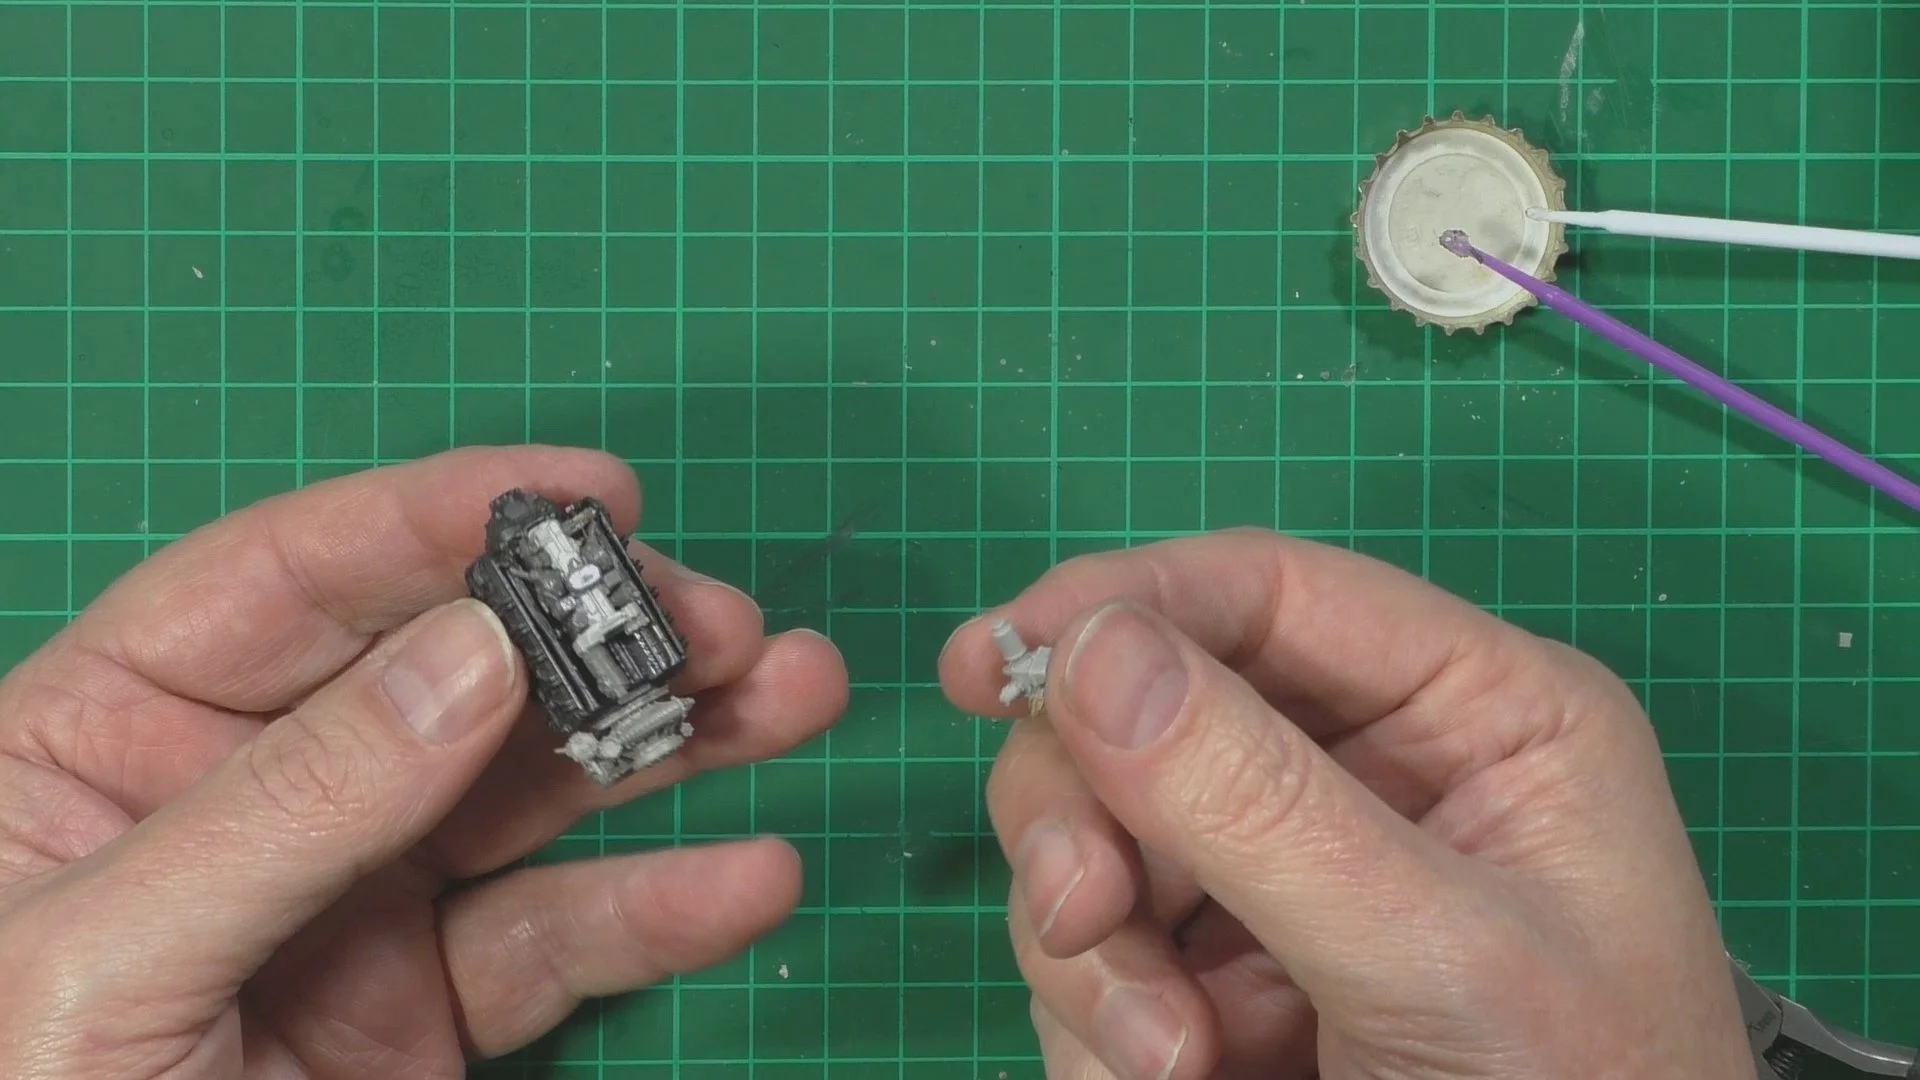
In part one, we look at the build ahead and plan out the work required to install the engine. Next, we start work putting the engine and all the fine details.

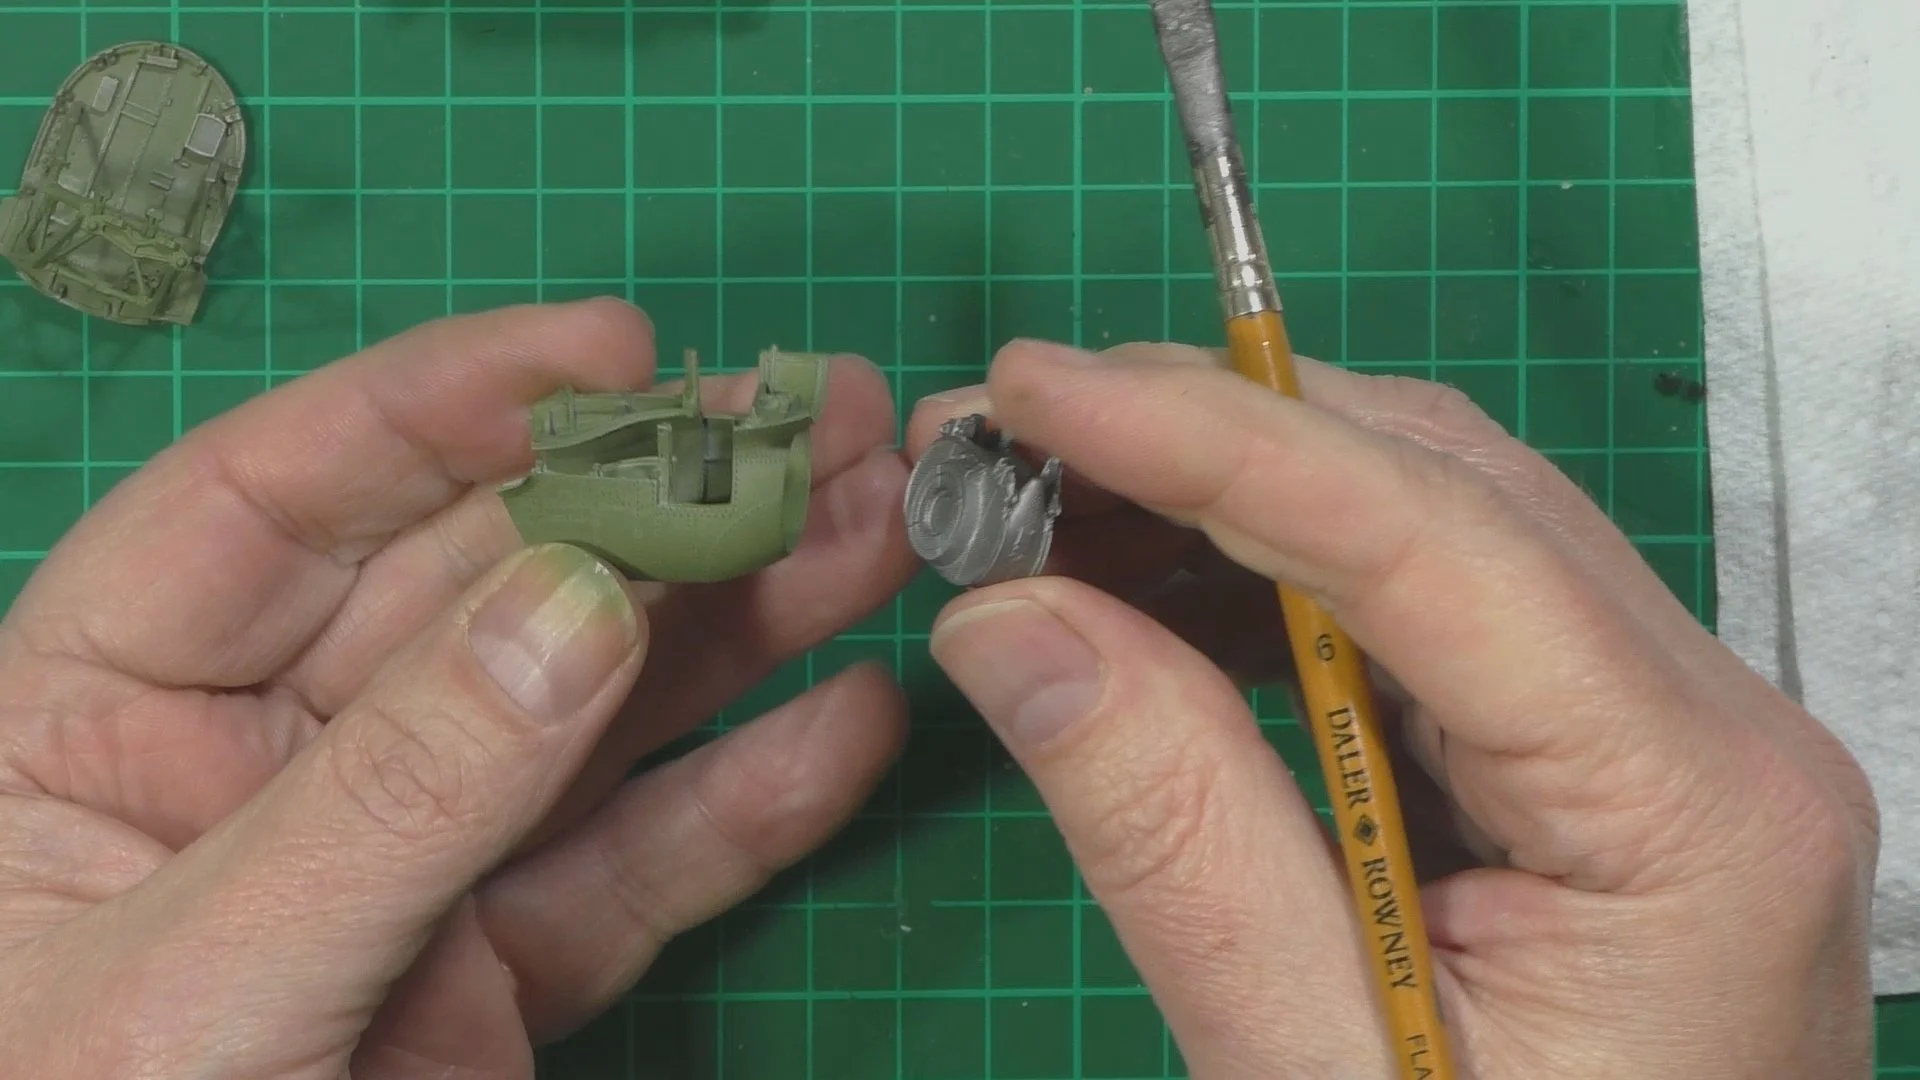
In part two, we Cut off the front of the fuselage for the new engine area and then continue with the engine and add more detail with piping and wiring and paint with Buffable’s and cockpit green for the firewall and cowlings. Then we mount the engine to the mounts and install the radiator. We then weather with dry brushing and oils.

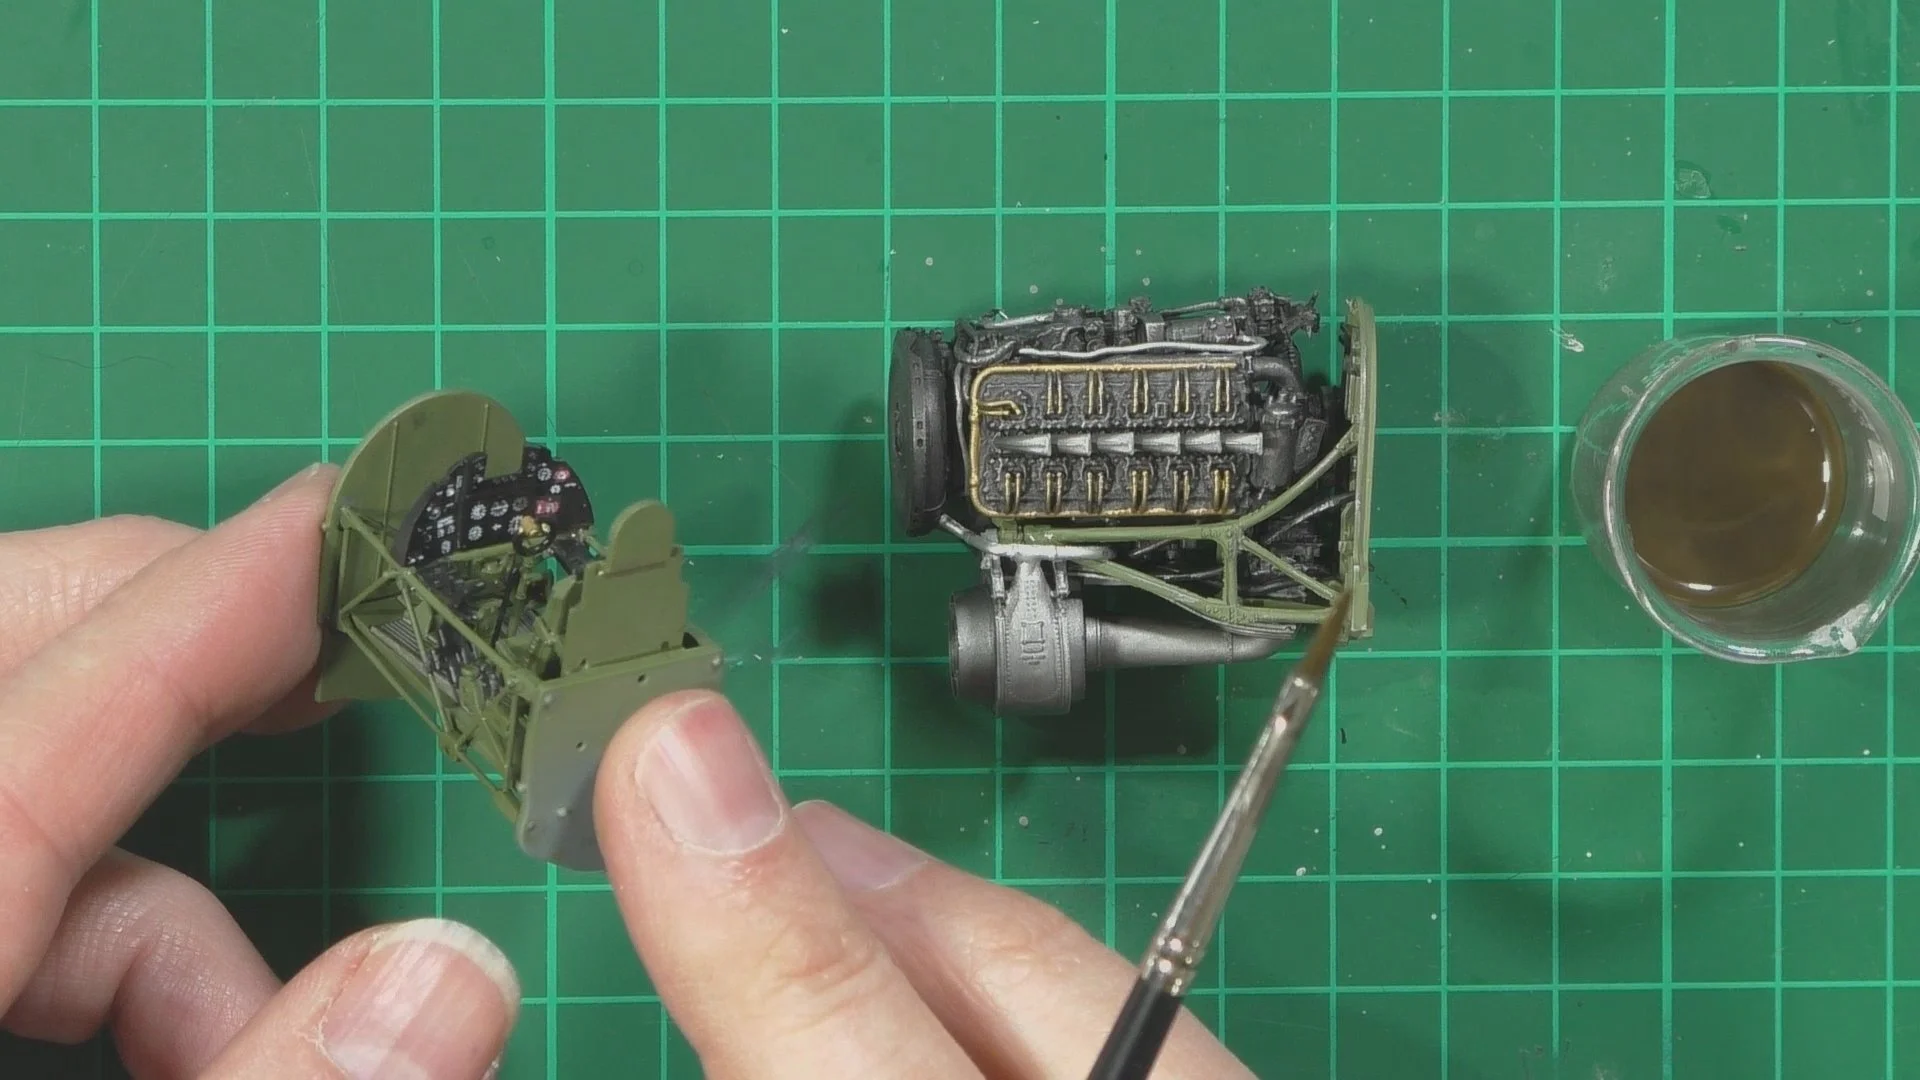
In part three, we finish the engine by adding the radiator and piping followed by the wiring with lead wire. Next we put the cockpit together and add the Eduard Look panel, paint and weather and then once dry add the Eduard harnesses to the seat.

In part four, we install the cockpit and tail wheel and bring the fuselage haves together, next it’s time to put the wheel well together and get the wings, tails and rudder on.

In part five, we move into the spray booth and first put down the primer AK758, next up the lower surfaces with AK RC289 Medium grey. After masking the lower areas we put down AK RC288 Ocean grey. Next we move back to the bench and use the Top Notch masking set TNM48-M013 to mask the Ocean grey camo. With the masking set in place, we paint AK RC286 Dark green.

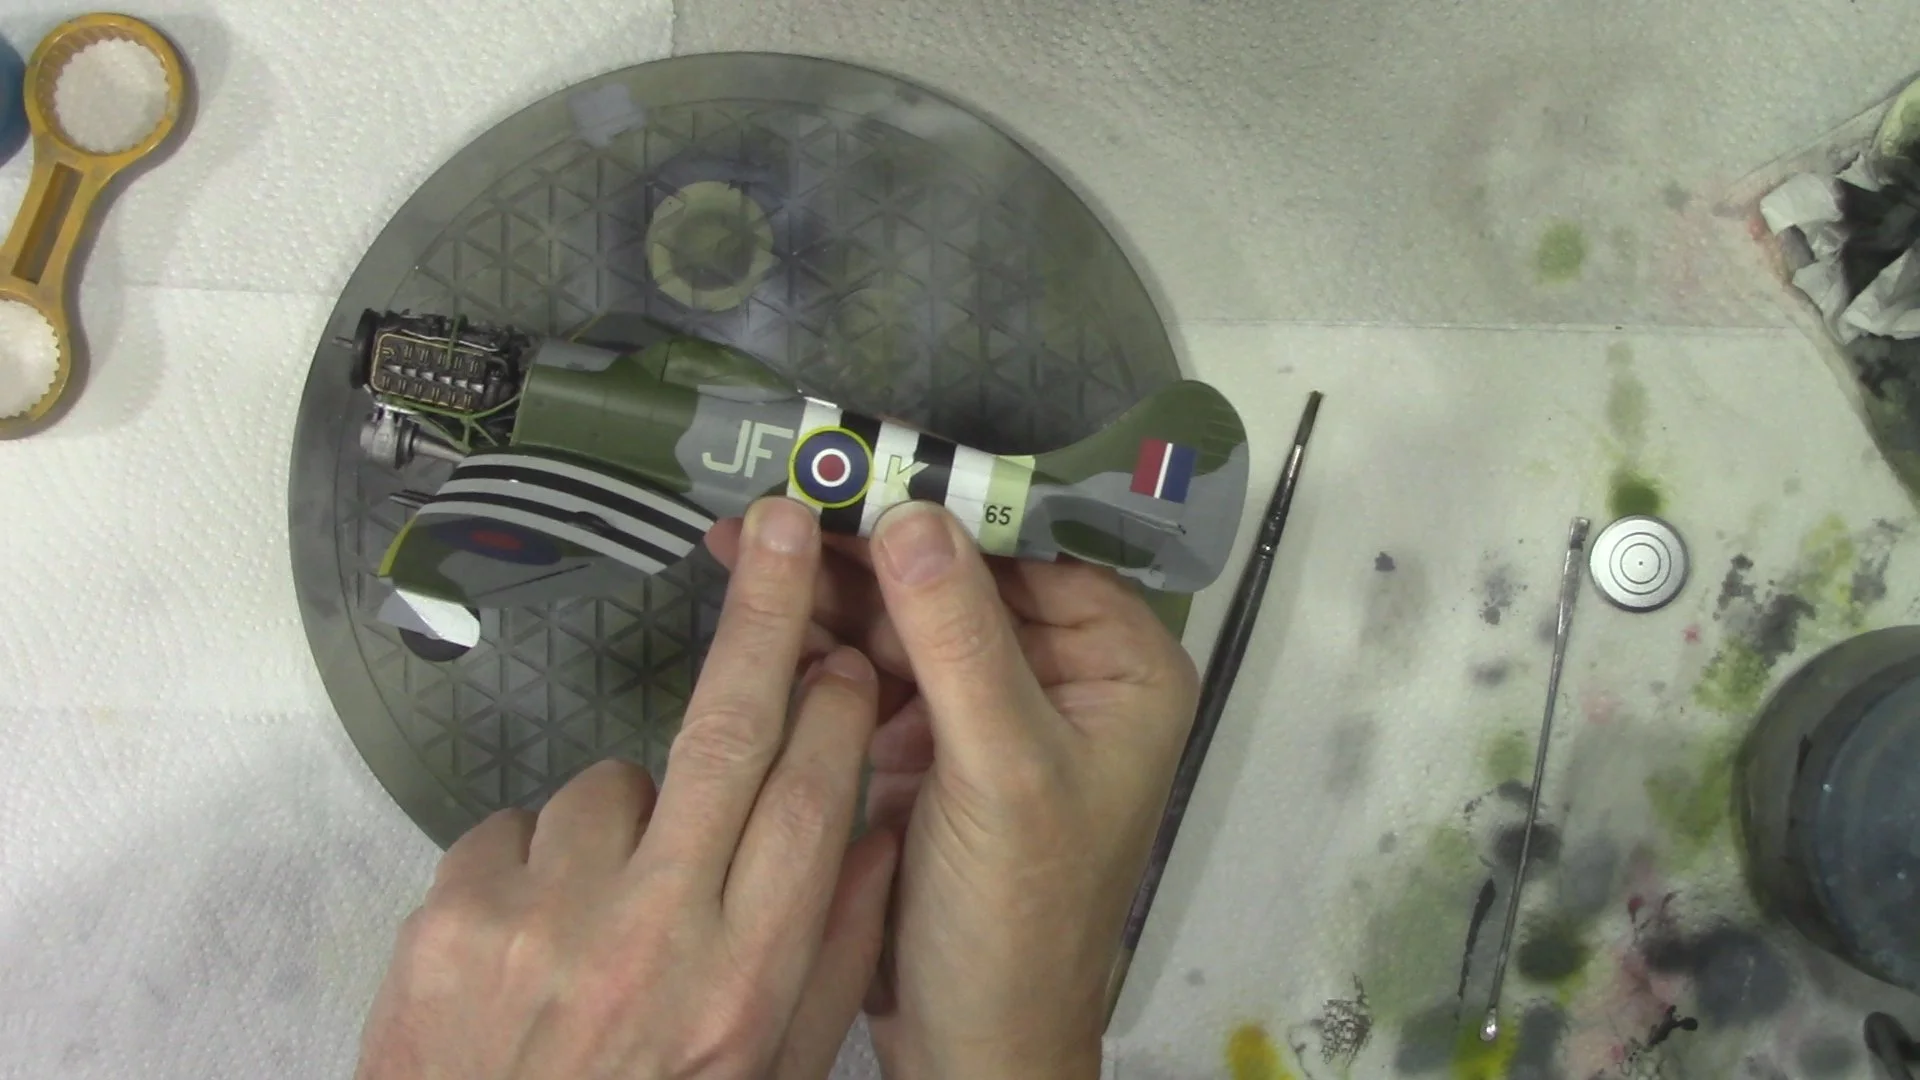
In part six, we paint on the invasion black and white stripes with Tamiya XF-2 Flat white and Tamia XF-85 rubber black. Then we add the yellow strips to the leading edges of the wings all ready for decaling.

In part seven, we have a good rant about Eduards's new decals that are not a patch on the old Cartograf ones!!! But we use them and get them down on the model. Next, we install the main gear and doors, Last up we use 3rd gen Matt varnish to bury the decals ready for weathering.

In part eight, we move onto the weathering stage starting with the dark dirt wash and then with Neat oils to fade and weather the paintwork.

In the final part, we install the engine and unmask. We do fine some over-spray on the clear parts and deal with that. Next we get the clear part’s on lights etc. Last we add so more heavy weathering by sanding back the paintwork and some free hand chipping ready for the final reveal.