Sea Harrier FRS.1
Scale: 1/24
Manufacturer: Airfix
Parts used: Lots of 3D-printed parts
Main paints used: Tamiya and AK Real Colors
In part one, we look at the build ahead and how to tackle this 50-year-old kit. We then try some different ways to reduce the riveting on the kit to a more realistic look. Next, we pop the engine together, we won’t detail this as it won’t be sean but it is structural to the model and of course the engine nozzles.

In part two, we work at removing or fading it back all the detail on the surface of the model and try different ways to get the look we are after. Then it’s time to chop off the GR-1 nose and replace it with the bigger and higher FRS-1 nose. We also fill the seams on the intakes and smooth those out for fitting.

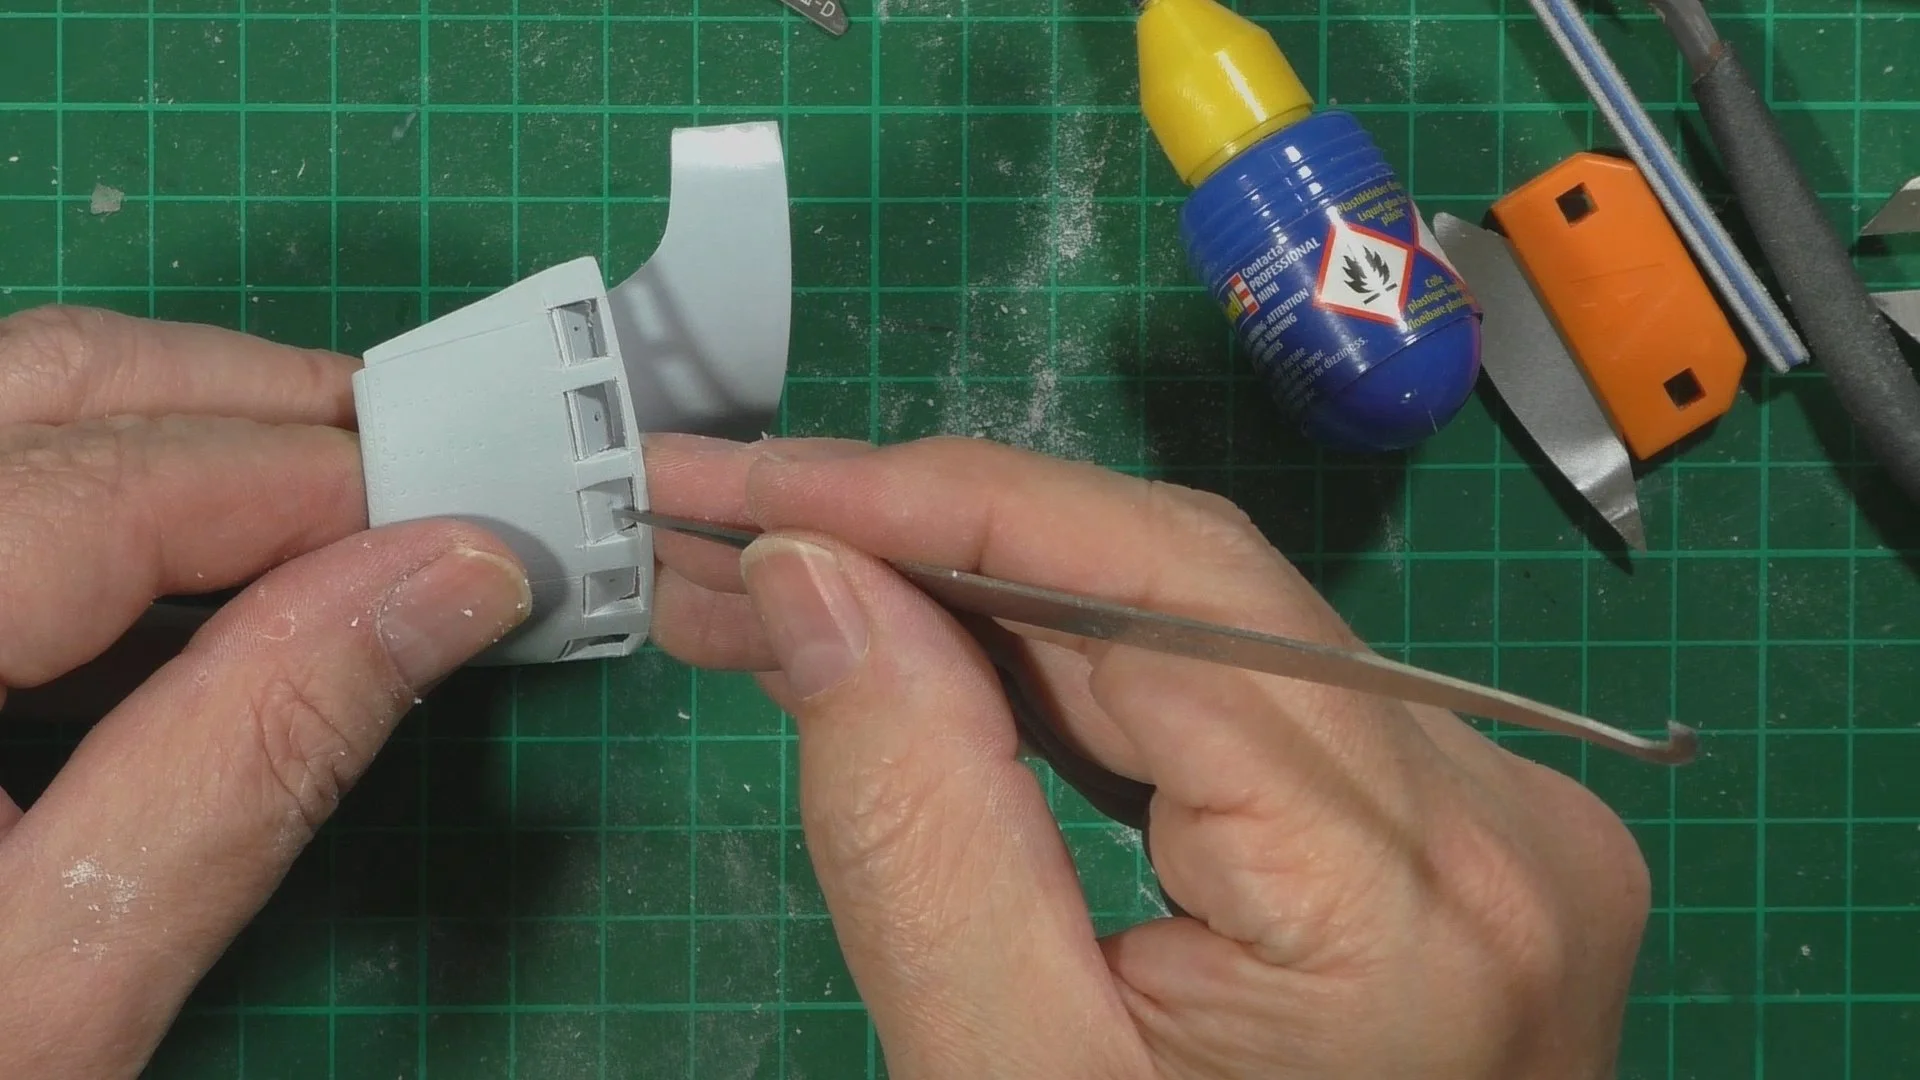
In part three, we do a small upgrade to the kit by opening the blow-in doors on the intakes. Then it's time to upgrade the cockpit with the help of the air scale PE sets. Here we use the PE set to make new details in the cockpit and then their decals for the dials.

In part Four, we add PVA glue to the dials in the instrument panel to give a glass look. We then install the intake to the fuselage and they're a nice fit. Next, we find a problem with the fit of our 3D printed seat not fitting due to me not removing the seat rail on the rear bulkhead. Now it's time to install the cockpit and front wheel well and have to make a few changes to get a good fit. Lastly, we use a CA glue and talc mic to fill some small seams on the intakes.

In part Five, it's time to get the cockpit installed and the wheel well and need to do a bit of surgery to get them to fit nicely. Then it's a little bit of filler in the intakes and we use a water-based putty for easy cleanup. Next, we can paint the intakes to make it easier to install the engine fan blades already painted. Then it's time too get the fuselage halves together so we can really start to push on.

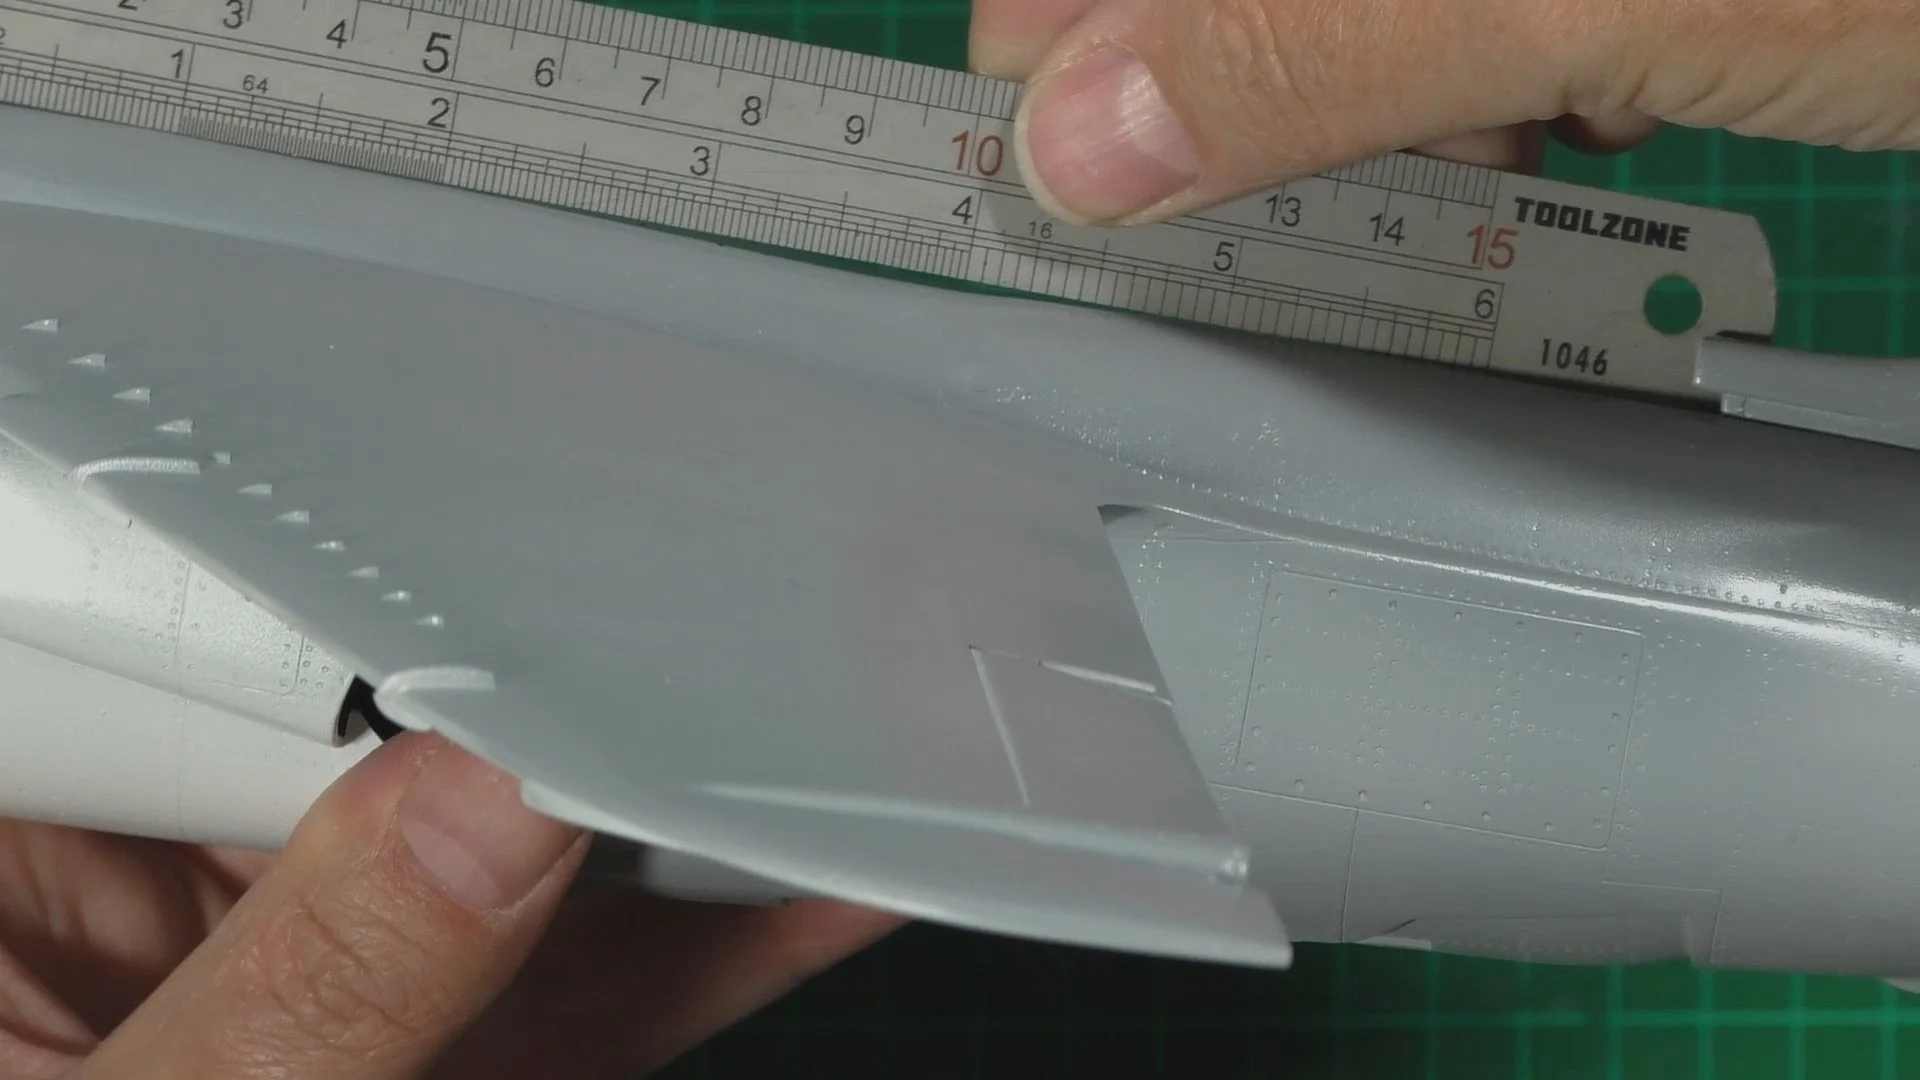
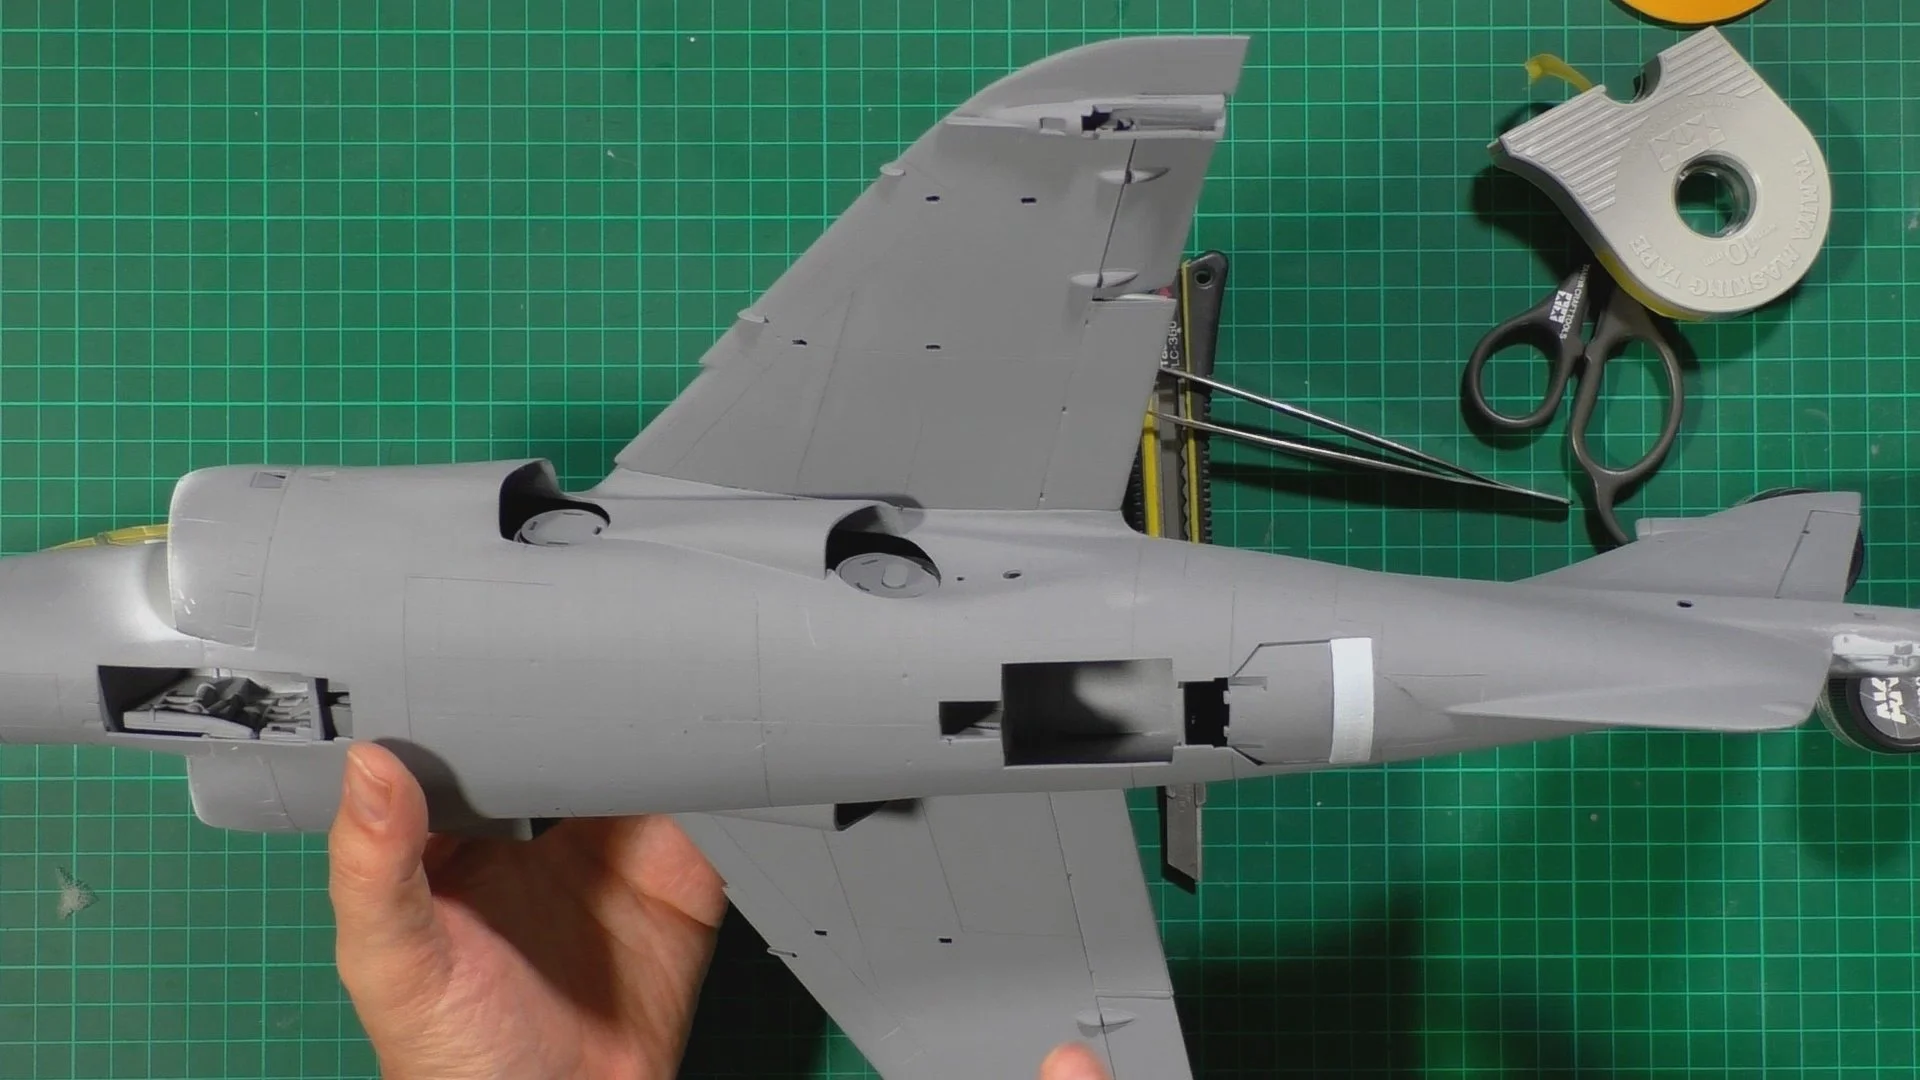
In part six, we look at the seam lines and start sanding and filling where needed and then look at the gear and the best way to add the resin aftermarket wheels we have for the kit. It seemed the best way was to remove the kit's parts and drill small cups for the resin wheels to sit in. With that done it's time to install the wing section, tail, and engine cover and now we have a harrier.

In part seven, it's back to fitting and then filing and sanding but this time it's to re-profile some areas to give them a better look such as the engine cover that just doesn't look right even if you can get it to fit and the other is the top rear fuselage top over the rear wing join, so a lot of filler and re-profiling to get it to look right. Glade I've taken the extra time to get these to look right, or it might of just looked off and spoiled the lovely lines the harrier has.

In part eight, we can now do the final priming and then sand and polish and final primer coat ready for re-scribing and re-riveting. So the long process of re-scribing and riveting begins, with straight edges and tapes and free hand. Then we follow up with the re-riveting.

In part nine, we give a final primer coat to the harrier. Next, we mask the canopies and temporally install them to the models, we also install the air scoops and lumps and bumps as needed. So over to the spray booth and look at the colors we’ll be using. We make a mix of Real colors RC 295 with a few drops of light ghost grey. Then at last it’s time to get the paint on.

In part ten, we start to post-shade the harrier with a thin coat with a few drops of ghost grey added. and then work it over the panels and randomly over the jet. and then come back over with the Extra dart sea grey and then again with the extra dark sea grey with a drop of black. (Apologies for the next part as the sound didn’t come out on the recording so I dubbed over the video.) here we paint the receivers and the anti-icing areas on the tail. next, we unmask and see how the SHAR is looking.

In part eleven, it's time to mask up the wheel well and the gear and wheels (The wheels are painted a sea grey after the white goes down) Next it's to decal and they go down with no problem. Last up we add a Matt coat to seal the decals on and for a slight textured finish to the to help with weathering.

In part twelve, we move on with the weathering and use the Flory models Dark Dirt wash with a few patches of Dust wash added and then left to dry. Once dry it is time to remove the wash with a damp cloth but leave some wash behind on the surface for a grimy look to the paint work. We also use the wash of the Det -cord on the main canopy and will remove ones dry. Next, it’s time to close all the undercarriage doors up and make a start on the Sidewinder missiles.

In part thirteen, we start cleaning up the det-cord now the wash is dry on the canopy and then install the front canopy in place. With that done we paint up the engine nozzles with AK Xtream metals and after a few coats, we get the colors needed for the cold front nozzles and the rear hot nozzles. Last it's time to paint and weather the Mk10 seat.

In part fourteen, we finish off the amazing printed 3D Seat and install and then add the engine nozzles. Next it’s the oils to add the next layer of eathering to the harrier.

In the final part of the Sea Harrier build, we look at a new way of clipping using rubbing-down pads, We cut off the pitot tube and fuel dump pipes and replaced with 0.6mm brass tubes. Next, we add all the lights and clear parts along with all the aerials and antennas. Last up we use neat oils to make leaks and streaks on the harrier ready for the final reveal.